A ceramic dab pen can have a darker cup without giving you enough information to call the chamber damaged. A stain, loose deposit, chipped edge and electrical fault are different observations. Start by identifying which one you can actually see, then follow the care instructions for that specific chamber. Scrubbing harder is not a way to find out whether a mark is dirt or part of the surface.
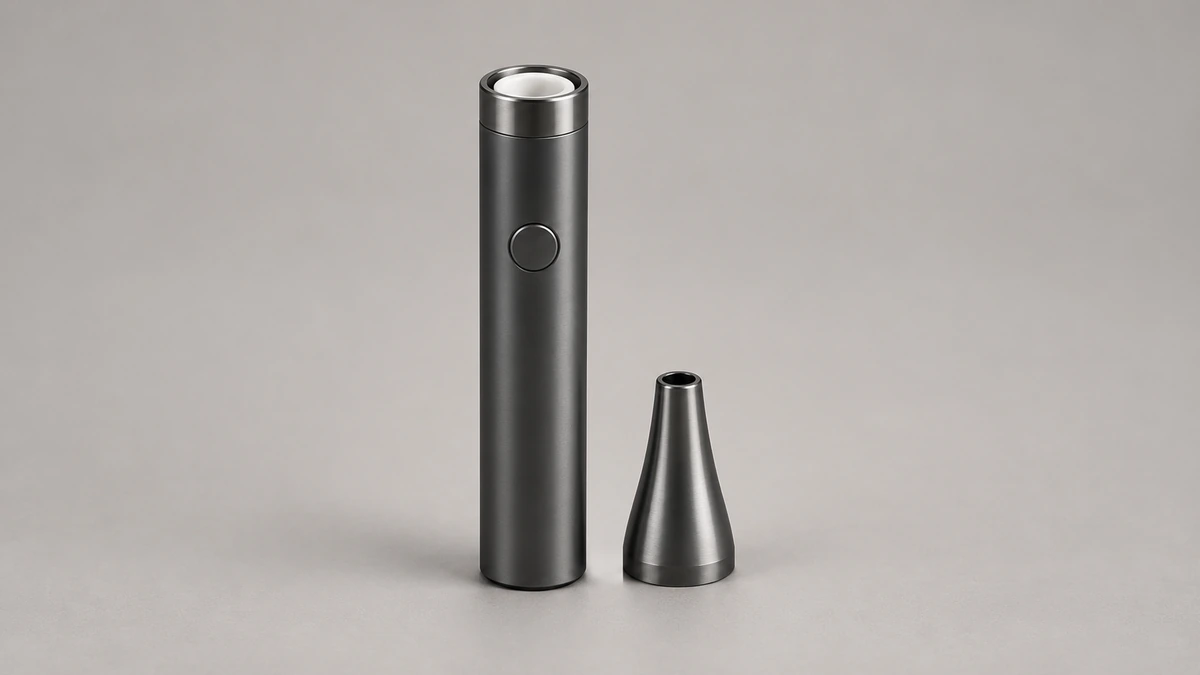
That distinction matters when a pen that once had a white bowl no longer looks new. You may be able to see the bottom clearly, while the heater beneath it remains hidden. The mouthpiece may detach, while the cup stays inside a complete replacement chamber. Knowing where ordinary care ends makes the next decision easier: clean an approved accessible surface, identify a replacement part, or ask support about a visible defect.
🥣 1. Find the Cup in a Ceramic Dab Pen
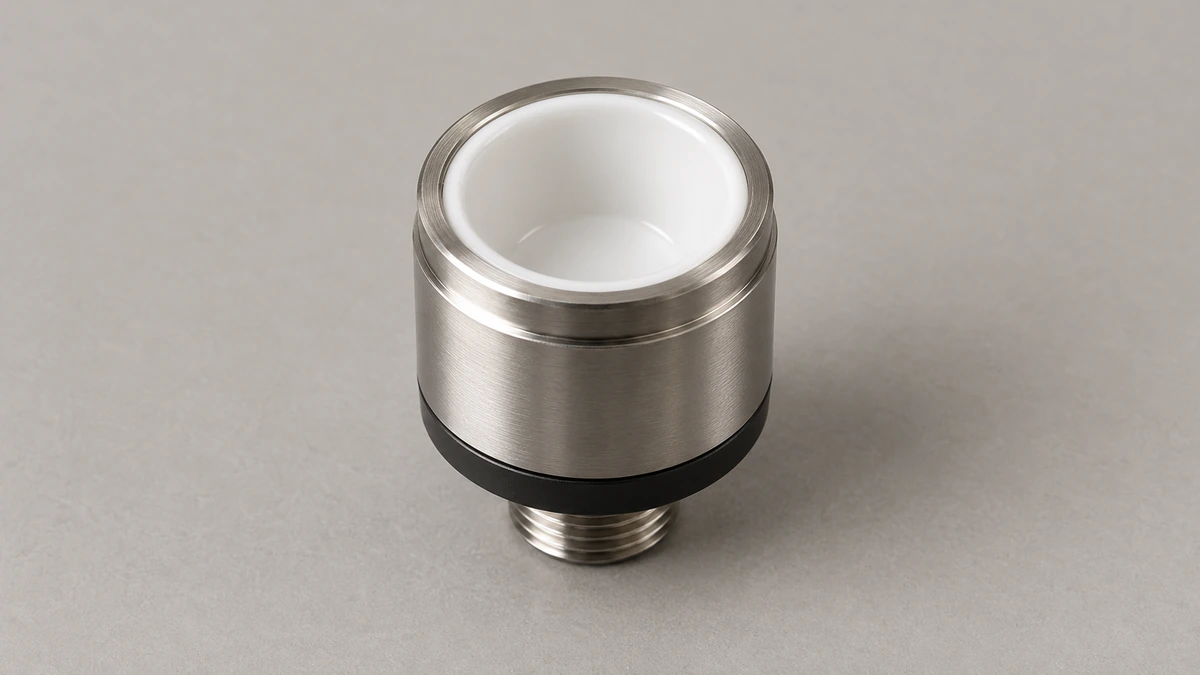
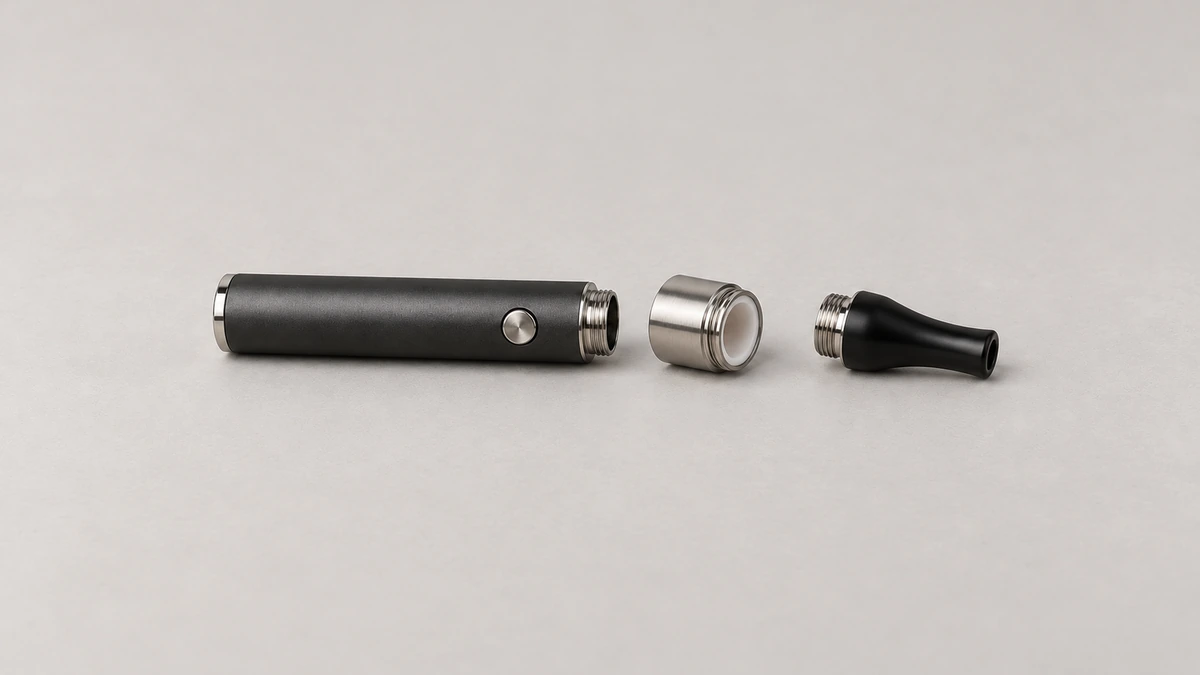
In a cup-style pen, the bowl-shaped interior is the surface people usually mean when they say ceramic. The surrounding metal shell, mouthpiece, connection and battery are separate components. A cleaning instruction for the bowl does not automatically include all of them. Put the model’s parts drawing beside the care section and identify the item named in each instruction. This is more useful than treating every removable piece as something that can go into the same cleaning bath.
A replacement chamber can include the cup, its support and the electrical connection. It need not mean the inner ceramic bowl lifts out on its own. If the drawing shows the complete chamber unscrewing from the battery, keep that distinction: removing an accessory from a device is different from dismantling the accessory. A visible seam around a cup is not enough to establish an owner-serviceable joint. The instructions should identify which part is intended to separate.
The same distinction applies to a mouthpiece with an attached tool or cap. A residue mark on that removable piece is in a different location from a mark inside the cup. Lay out only the parts the manual permits you to remove, while the device is cool and disconnected as directed. An organized view helps prevent a simple mouthpiece-cleaning question from turning into an unnecessary attempt to reach the heater.
🔍 2. A Dark Patch Is an Observation, Not a Diagnosis
One reader discussion about a darkened pen chamber shows the uncertainty clearly: the owner could see a changed surface but could not establish what was happening beneath it. A reply speculated about hidden construction. That speculation does not identify the heater in another pen. A photo can show the location and outline of a mark without proving its cause, composition or condition below the visible surface.
There is a narrow manufacturer example worth keeping in view. Puffco’s Plus support page notes that the bottom of its own chamber can darken with use. That is useful context for that model, not a diagnosis of every dark ceramic cup. It does not establish that a different chamber is intact, that every mark will disappear or that a particular cleaning method is suitable.
Describe the shape and location before naming a cause. Is the mark on the flat bottom, around the upper rim or on a detached mouthpiece? Is there loose material sitting above the surface, or simply a change in color? Does an edge appear missing? Those are answerable visual questions. Calling everything burnt ceramic skips the very information needed to distinguish surface appearance from a physical defect.
🧩 2.1 Keep Deposits and Missing Material Separate
A deposit adds material to a surface. A chip describes material missing from the part. A photograph of a dark region may not distinguish them reliably, especially if reflections obscure the edge. If a crack, missing fragment or displaced component is visible, leave it for model-specific assessment rather than trying to polish it back into its original shape. Cleaning cannot restore a broken edge or establish the condition of a hidden electrical connection.
Even a successful wipe answers a limited question: some accessible material came away. It does not prove that everything remaining is harmless staining, nor that the cup has returned to its original condition. Stop treating the appearance of a new white cup as the only acceptable endpoint. The relevant endpoint is the maintenance result described by the actual manufacturer, together with the absence of unresolved visible damage.
🧼 3. Separate Cup Care From Battery Care
A ceramic bowl and a powered body have different jobs. A manufacturer may permit a particular wipe on an accessible chamber surface without permitting immersion of the battery, shell or connection. Keep the device disconnected from charging during external care, follow its power-off instructions and keep liquid out of the powered housing. If a care section names the mouthpiece, read it as a mouthpiece instruction rather than a general rule for the complete pen.
The tool matters as well as the liquid. A swab used on an accessible surface is different from a swab pressed into a gap beside the cup. The gap may not be a cleaning passage at all. Do not use the rim as leverage, lift the bowl or push a tool beneath it to investigate a stain. Identify the permitted surface, use the specified method and keep any tool within the access the manufacturer describes.
Residue on the outer threaded connection is another separate task. Our 510 battery cleaning guide distinguishes exposed connector care from opening a powered body. Clearing that outer connection does not clean the chamber interior, and a clean cup does not establish that the battery connection is clean. If both need attention, describe and handle them as separate surfaces rather than one general dirty-pen problem.
🧵 3.1 Check What the Swab Leaves Behind
After a permitted surface wipe, look for visible loose fibers on the accessible area. A cotton strand caught at an edge is different from a permanent line in the cup. Do not chase a strand into an inaccessible opening with a sharp object. If an ordinary approved method cannot remove what you can see, ask which part can be serviced or replaced. Escalating force changes the task from cleaning a surface to disturbing the assembly.
Keep used swabs and removed accessories separated while working. A dirty tool laid across a clean mouthpiece can move the deposit to a different component. A shallow parts tray helps you see what has actually been cleaned and what has not. This is a matter of organization, not a promise that a particular cloth, tray or swab removes every kind of residue.
💨 4. An Open Cup Does Not Show the Whole Airpath
Removing a mouthpiece can expose the cup while leaving parts of the air route out of sight. The opening above a bowl is not a complete diagram of how air enters and leaves the assembled chamber. Follow the named inlet, mouthpiece and removable screen in the model’s instructions. Do not assume that an opening near the rim leads around the ceramic rather than through another documented part of the assembly.
This distinction is useful when someone reports that the pen feels obstructed. A visible deposit at a removable mouthpiece and a fault inside a heater are different possibilities. Begin with the accessible component the manual permits you to inspect. Avoid probing farther into the housing to prove that a route is clear. Being unable to see a passage is a reason to consult its documented care method, not to invent one.
Our mouthpiece care guide covers the separate task of reaching and cleaning that removable component. If the mouthpiece comes off with a seal or screen, keep those identified parts together. A missing small part after cleanup can create a new assembly question even when the cup itself was never touched. Check the original arrangement before calling the chamber faulty.
🔧 5. A Replacement Cup May Mean a Complete Chamber
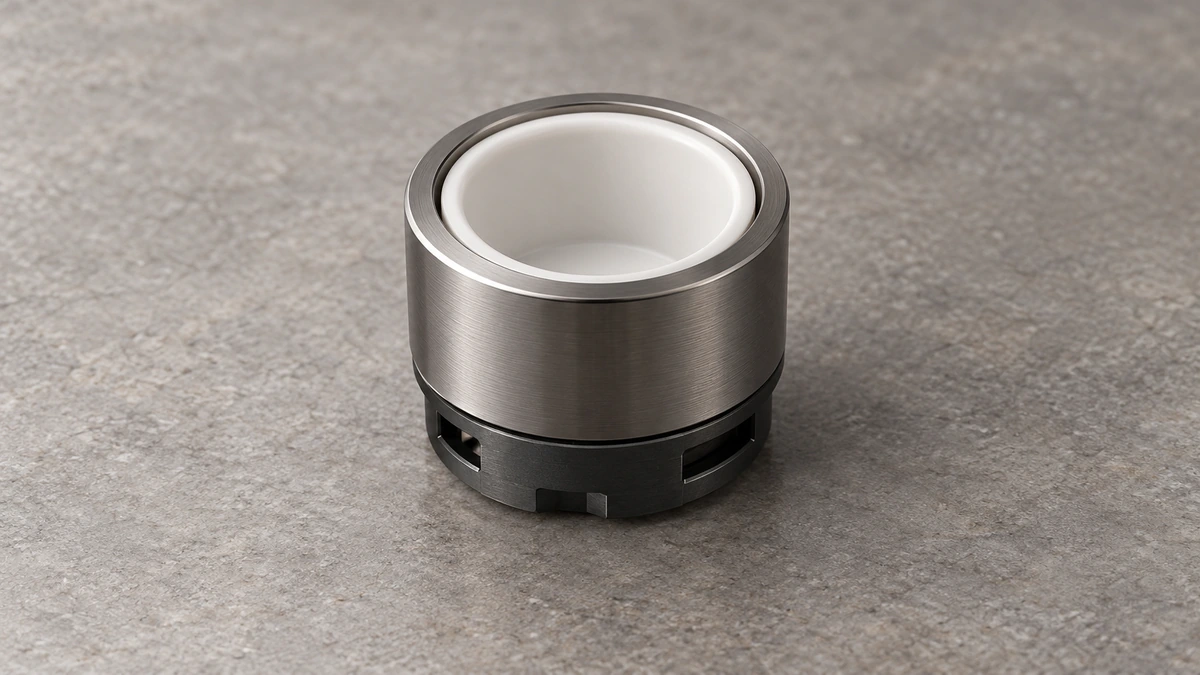
Suppose an accessory photo shows only a white interior inside a metal rim. A second listing shows a complete short cylinder with a threaded base. They may be showing different views of one assembly, or different replacement parts. The name, part number and model revision need to agree before you treat them as the same item. A similar-looking bowl is not enough to settle the question.
The word coil can make this especially confusing. A retailer may use replacement coil for a complete chamber even when no exposed winding is visible at its top. That naming convention does not reveal where the actual heater sits. Our coil-less atomizer explanation covers the terminology. For everyday care, the useful question is simpler: which complete part do the instructions permit the owner to remove and replace?
Retain the packaging or part identification for spare chambers. Two loose accessories stored in the same compartment can become difficult to distinguish once labels are gone. Keep the cap or mouthpiece associated with the chamber it belongs to, rather than assuming every similar cylinder shares the same dimensions. A support photo showing the complete detached accessory is more informative than a tightly cropped image of only its white center.
🔌 6. Matching Threads Do Not Establish a Matched System
A chamber that physically screws onto a battery has passed a shape-and-fit check, not a complete compatibility check. The manufacturer’s intended pairing still matters. As a model-specific example, the Plus support documentation explicitly advises against putting its chamber on other batteries despite its 510 threading. That instruction should stay attached to that actual chamber, rather than becoming a claim that every pen shares its electrical requirements.
If a replacement does not seat normally, leave it apart. Tightening harder cannot establish that it is the right part or restore a deformed thread. Likewise, a loose cap and a loose complete chamber are different observations. Identify which joint moves, without opening the powered housing or adjusting a contact. The location of movement is useful information; an assumed internal cause is not a repair.
📷 7. Make a Useful Record Before Asking About a Mark
A helpful account includes the model, the identified component, the visible condition and the care method already attempted under its instructions. Photograph the cool accessible cup with enough surrounding rim to show where the mark sits. If a detached part is involved, include the whole part in a second view. A close crop can reveal texture while hiding the very component boundary that explains the problem.
Keep the sequence factual. A mark noticed after cleaning is not automatically damage caused by cleaning; a deposit that returns does not identify which component produced it. State what changed and what did not. For example, the mouthpiece was cleaned but the mark at the cup bottom remained. That gives support a clearer starting point than saying the whole pen is ruined or that a stronger cleaner must be needed.
📦 8. Put the Identified Parts Back Together
Finish with the model’s drying, inspection and reassembly instructions. A surface that looks dry does not establish that liquid introduced somewhere else has evaporated. Do not run a heater to prove an unknown residue or cleaning liquid has disappeared. Keep a component with unresolved visible damage out of the assembly while its condition is being assessed. A replacement decision should concern the identified part, not the color of a photograph alone.
Once the permitted components are dry and accounted for, keep spare chambers covered and separated from loose tools. Store the complete pen in the arrangement specified by its maker, without pressure on a detached connector or exposed cup rim. The practical result is an identifiable, correctly assembled set of parts. It is more useful than chasing a showroom-white bowl at the expense of knowing what you have actually cleaned.