A glass screen is one of the smallest parts on a bong, but its dimensions decide whether a bowl piece draws cleanly or chokes on itself. The keyword itself is simple hardware vocabulary, and the question behind it is almost always practical: does this disc sit flush, does it block airflow, and why does it eventually crack or stop working the way it used to. This guide walks through the physical path of a glass screen — shape, fit, airflow, heat, cleaning, and the specific situations where a screen becomes an obstacle rather than a filter.
🧭 1. What a Glass Screen Actually Is
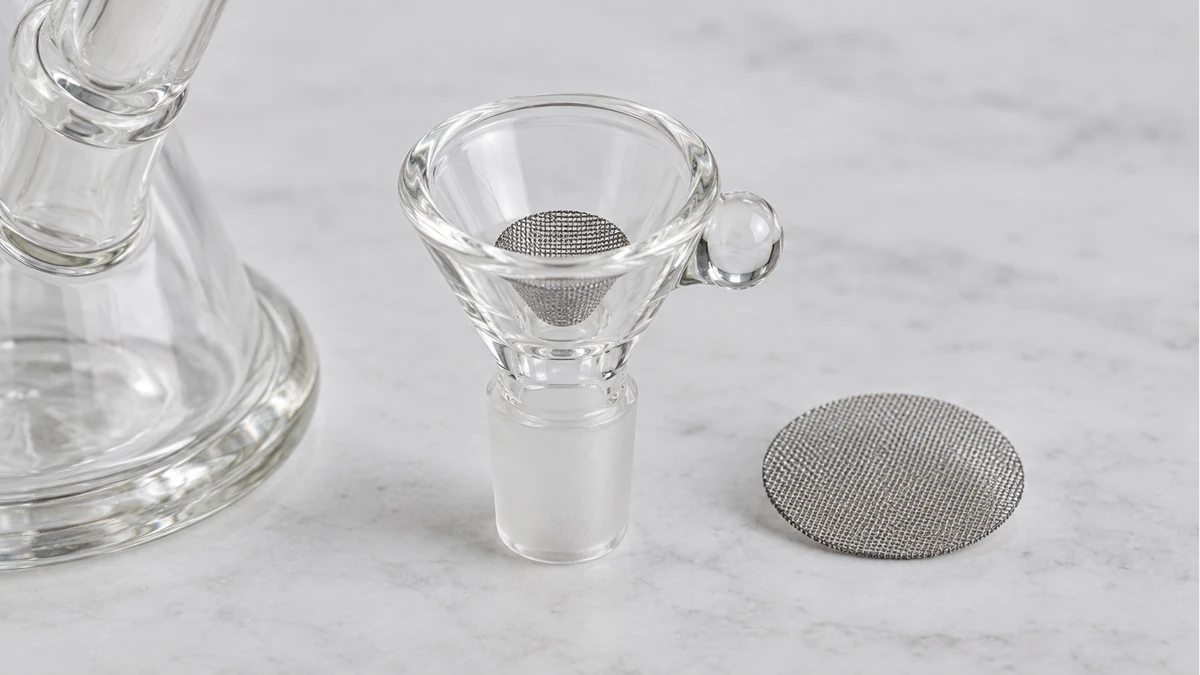
A glass screen is a small, perforated disc of borosilicate glass that sits inside the bowl piece, between the packed material and the downstem. Its job is mechanical, not chemical: it catches loose plant particles so they don’t get pulled through the downstem and into the water chamber. Unlike a metal mesh screen, which is stamped from wire and can be reshaped or pinched into place, a glass screen is rigid. It either matches the internal geometry of the bowl or it doesn’t.
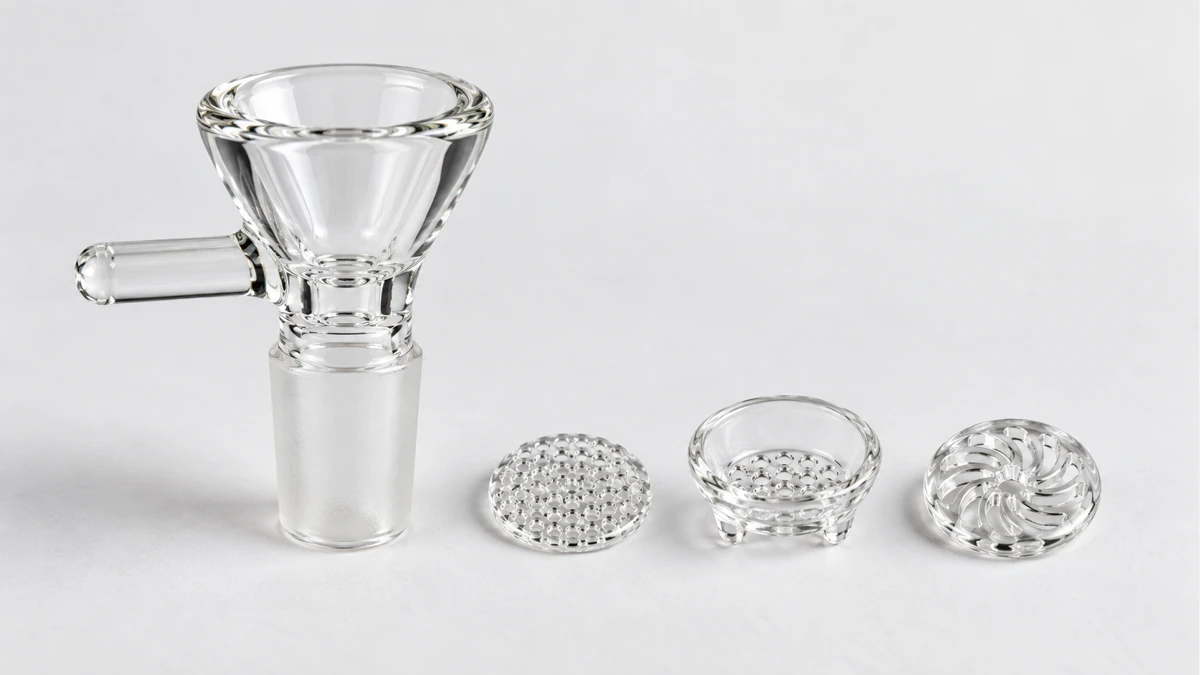
Most glass screens fall into a few recognizable shapes: flat discs with a ring of drilled holes, slightly domed discs that raise the material away from the airpath, and donut-style screens with a solid rim and an open or perforated center. Each shape interacts differently with the bowl’s internal ledge, and that ledge — not the screen itself — is what determines fit.
📐 2. Fit: Bowl Geometry and Screen Diameter
Every bowl piece has an internal step or lip partway down the chamber. This ledge is what a glass screen rests on; it is not glued or fused in place under normal use, which is why screens can be swapped, lost, or upgraded independently of the bowl. The screen’s outer diameter needs to be slightly larger than the ledge’s inner opening so it can rest on the lip without falling through, but small enough that it still clears the walls of the chamber above it.
🔎 2.1 Common Bowl Opening Sizes
Bowl pieces are generally built around a small set of standard joint sizes, most commonly in the 10mm to 18mm range at the joint, with the internal bowl chamber itself often narrower than the joint diameter. Glass screens are cut to match that internal chamber, not the joint, which is why a screen pulled from one bowl won’t automatically fit another bowl with the same joint size. Two 14mm bowls from different makers can have meaningfully different internal ledges depending on how deep the bowl is drilled and how thick the glass walls are.
📏 2.2 Why a Screen That Looks Right Still Won’t Sit Flush
A screen can look correct and still sit at an angle, rock slightly, or refuse to seat at all. This usually comes down to one of three things: the ledge inside the bowl isn’t perfectly level because of how the glass was blown or ground, the screen’s edge has a slight bevel that catches on the lip instead of resting flat, or the screen is simply a fraction of a millimeter too wide for that specific piece. None of these are defects in a general sense — they’re just the result of glass being a handmade or semi-handmade material where tolerances vary piece to piece. A screen that has worked reliably in one bowl for a long stretch of regular use, as some long-term owners report, is really just evidence of a good match between that particular screen and that particular ledge, not proof that the same screen will fit a different bowl.
🌬️ 3. Airflow: How Screen Shape Changes the Draw
Airflow through a bowl piece follows the path of least resistance, and a screen sits directly in that path. The two variables that matter most are the screen’s shape relative to the packed material, and the total open area created by its holes.
🔎 3.1 Flat Discs vs. Dome and Donut Screens
A flat screen sits directly beneath the material, which means air has to pass straight down through both the packed bowl and the screen’s holes in a single line. A domed screen curves upward into the bowl slightly, which lifts the material off the screen’s surface and gives air more room to move around the edges before it converges toward the holes. A donut screen, with its open or lightly perforated center, behaves differently again: it relies on the solid outer rim to hold material back while leaving a comparatively open channel in the middle, which generally restricts airflow less than a fully perforated flat disc of the same diameter.
📏 3.2 Hole Count, Hole Size, and Draw Resistance
Two screens can be the same diameter and still draw very differently depending on how many holes are drilled and how large each one is. More holes, or larger individual holes, increase total open area and reduce draw resistance. Fewer or smaller holes filter more aggressively but restrict airflow more. This is a direct cause-and-effect relationship: as fine plant material and resin residue accumulate in the holes over repeated use, the effective open area shrinks even though the screen’s outer dimensions never change, and the draw gets progressively harder until the screen is cleaned or replaced.
🧩 4. Thermal Cycling: Why Glass Screens Crack or Warp Over Time
Glass screens sit directly above a heat source, whether that’s a flame or a heating element, which means they go through repeated cycles of rapid heating and cooling. Borosilicate glass is chosen for this application specifically because it tolerates thermal cycling better than standard soda-lime glass, but “better tolerance” is not the same as immunity. Repeated fast temperature swings create small amounts of internal stress each cycle. Over enough repetitions, that stress can produce hairline cracks that aren’t visible until the screen is held up to light, or in more extreme cases, a screen can fracture outright during a session.
Combustion events — where material ignites more intensely than intended, whether from a lighter flame held too long or a heating setting pushed higher than the bowl was designed for — expose the screen to a sharper temperature spike than normal use. This kind of sudden thermal shock is a more common cause of screen failure than gradual wear, since the glass doesn’t get time to expand evenly before it’s hit with peak heat.
🧼 5. Cleaning Without Losing the Screen
Because glass screens are small and unattached, cleaning them separately from the bowl is usually more effective than trying to clean them in place. A few practical points keep the process straightforward:
- Remove the screen before soaking the bowl piece, since isopropyl alcohol and coarse salt used for deep cleaning can be harder to fully rinse out of a screen’s small holes than out of the open bowl chamber.
- Soak the screen on its own in isopropyl alcohol, then agitate gently with a soft brush or pick to dislodge residue from the holes rather than scraping across the glass surface.
- Rinse thoroughly with warm water and let the screen dry completely before reseating it, since trapped moisture can affect how cleanly it fits back against the bowl’s ledge.
- Inspect for hairline cracks under light after cleaning, since a cracked screen that still looks intact at a glance can fail without warning during the next heating cycle described above.
Screens with heavier buildup sometimes get replaced outright rather than cleaned repeatedly, simply because narrow drilled holes are harder to fully clear than a flat bowl surface. This is a maintenance decision based on how much residue has accumulated, not an indication that the screen material itself has a fixed lifespan.
🔍 6. Test a Glass Screen as a Removable Flow Restrictor
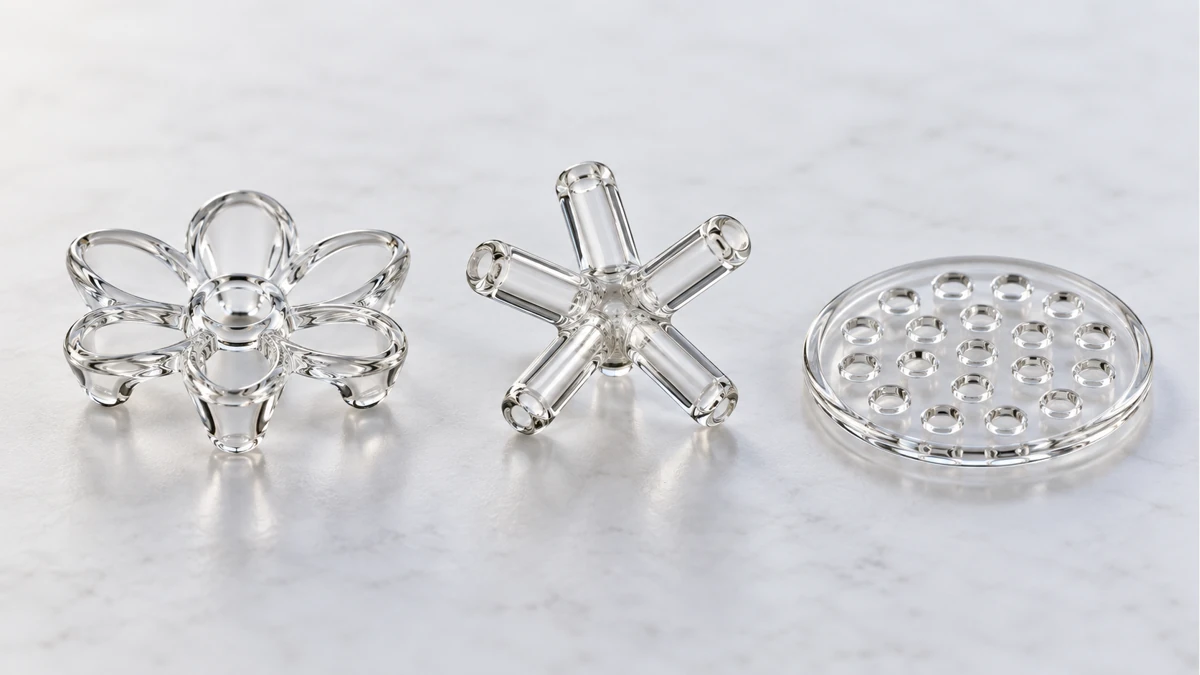
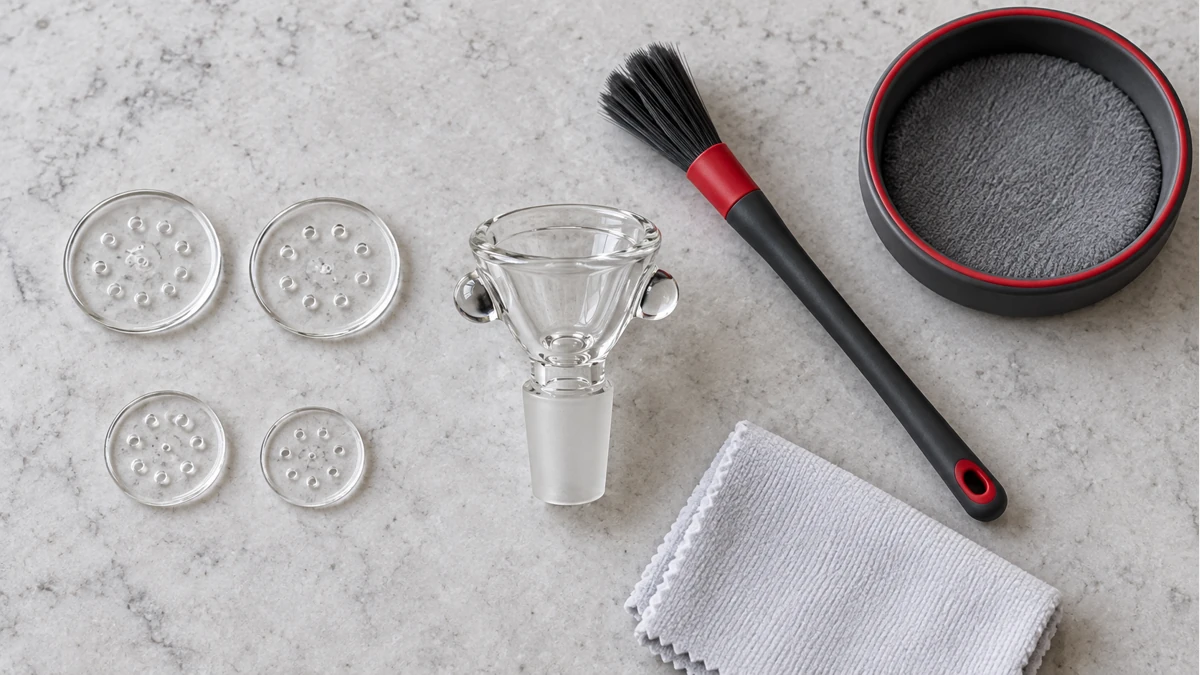
A glass screen is a small insert, not a universal part of the bowl. Its job is to reduce the size of the bowl opening while leaving several paths for air. That balance depends on the screen shape and the bowl geometry. A flower-shaped insert, a jack-style insert, and a flat disc can behave differently in the same nominal bowl because their contact points and open area are different.
🔎 6.1 Check Seating Without Wedging
Place a clean, cool screen into an empty bowl and look for stable contact at several points. It should not fall through the outlet, but it also should not need pressure to stay in place. A wedged screen concentrates force on a small area of glass and becomes difficult to remove for cleaning. If it rocks, blocks the outlet, or protrudes above the usable bowl, the shape is wrong for that bowl.
📏 6.2 Compare Airflow Before Loading
With the piece clean and empty, draw through the bowl once without the insert and once with it. The comparison is about restriction, not producing a result. A small increase is expected because the screen occupies area. A dramatic change means the insert covers too much of the outlet or has settled into it. This dry comparison isolates screen fit from water level and residue.
🧪 6.3 Remove Residue Before It Changes the Open Area
Residue bridges the gaps between the insert and bowl, gradually turning several small air paths into one narrow path. Let the glass cool, remove the screen over a padded surface, and use the cleaning process appropriate to the glass. Do not pry a stuck insert against the bowl wall. Repeated thermal cycling and tool pressure can damage either part even when no crack is immediately visible.
🧷 6.4 Keep a Screen Paired With the Bowl It Fits
Small glass inserts look interchangeable in storage. Keep each screen with the bowl whose geometry it matches, or label a protected container with the joint and bowl identity. Replacement should be based on actual seating and airflow, not color or outside diameter alone. If the bowl already uses an integrated restriction, adding another screen may only create blockage.
🛠️ 7. When a Screen Doesn’t Fit the Attachment
Fit problems aren’t limited to swapping screens between bowls. They also show up when a bowl or adapter is paired with an accessory that wasn’t designed around it. A common example involves water pipe adapters used to connect a separate heating or vaporizing unit to a bong: some adapters include a built-in glass screen fused into the joint itself, rather than a removable disc resting on a ledge. That built-in screen takes up internal space, and if a cooling attachment or additional accessory needs to slide into that same joint, the fixed screen can physically block it from seating properly, regardless of whether the joint diameter itself matches.
This is a distinct issue from the fit problems described in the geometry section above. A loose screen not sitting flush is about tolerance between a removable part and a ledge; a fused screen blocking an accessory is about two pieces of hardware competing for the same physical space inside a joint. The practical fix in that second case isn’t a different screen — it’s an adapter built without an integrated screen at all, since no amount of cleaning or reseating changes fixed internal geometry. how bowls, screens, and inserts fit together
Joint size alone also doesn’t guarantee compatibility. An 18mm joint on one adapter and an 18mm joint on another piece can still differ in wall thickness, internal taper, or how far a fitting is meant to insert, which is why matching stated joint size is a starting point for compatibility, not a guarantee of it. identifying the surrounding glass part
For anyone trying to identify or replace a screen, the fastest confirmation isn’t the size printed on packaging but a direct physical check: remove the existing screen, note where it rests against the bowl’s internal ledge, and measure the diameter at that resting point rather than the bowl’s outer opening. A screen that seats flat against that ledge with no rocking, and whose holes are clear enough to see light through, is a correct match. If a screen only fits by force, sits at an angle, or blocks another attachment from seating, the issue is almost always internal geometry rather than the screen material itself — and no amount of cleaning will resolve a mismatch that comes down to shape. setting the waterline by function