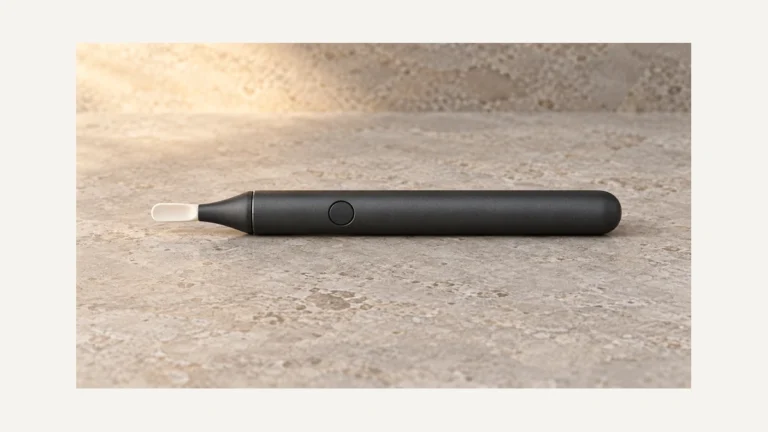
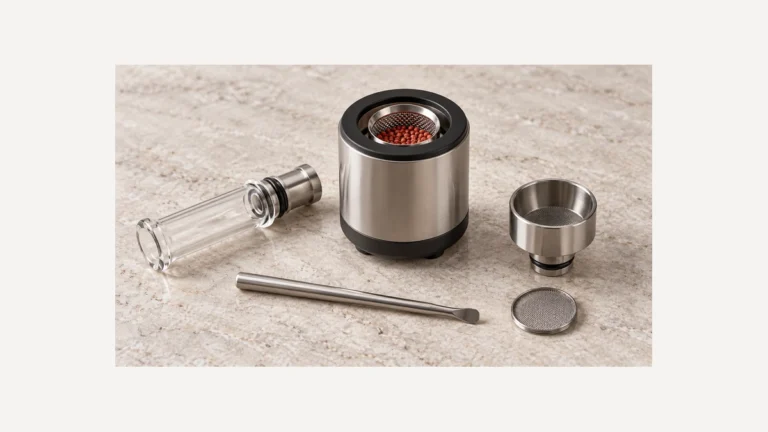
Search “portable dab rig kit” and the confusion starts immediately: some listings show a single glass piece in a padded box, others show a device that looks like a stubby flashlight with a chamber on top, and a few show a torch, a dabber, and a jar of swabs all lumped under the same phrase. The word “kit” is doing a lot of work here, and it means something different depending on whether the heat source is electronic or torch-fired. Before anything else, it helps to separate what’s actually in a functional portable setup from what’s just packaging filler, and which pieces are heat-facing, glass-facing, or cleanup-facing.
This isn’t a buying guide and it won’t tell you which rig to pick. It’s a walkthrough of the physical parts, what each one does mechanically, and where people commonly get confused about compatibility, controls, and travel handling — the same friction points that show up over and over in hardware discussions.
🧭 1. What “Portable” Actually Changes About the Hardware
A portable rig isn’t just a smaller desktop rig. Shrinking the footprint changes three things: base stability, heat retention, and how much of the airpath is rigid glass versus a sealed chamber. Desktop rigs rely on a wide, heavy base and a tall water chamber to stay upright and to cool vapor over a longer path. Portable kits compress that path, which means the water volume is smaller, the glass is thinner-walled to save weight, and the base often has a narrower footprint that’s more prone to tipping if it’s set on an uneven surface.
That compression is also why portable kits ship with more accessory pieces than desktop setups. A shorter airpath needs a well-fitted joint, a properly seated bowl or banger, and sometimes a carb cap to manage airflow, because there’s less internal volume to compensate for a loose seal. Every one of those connection points is a place where physical compatibility can fail if the kit’s parts weren’t matched carefully.
🔥 2. The Heat Source: Electronic vs Torch, and Why the Kit Looks Different
The heating method is the single biggest factor in what’s actually packed into the case. Electronic kits (often called e-rigs) replace an open flame with an internal heating element and a control button or dial. Torch-based kits rely on an external butane torch to heat a separate nail or banger, which means the torch itself has to be stored, transported, and refueled independently of the rig.
⚡ 2.1 Electronic Kit Components
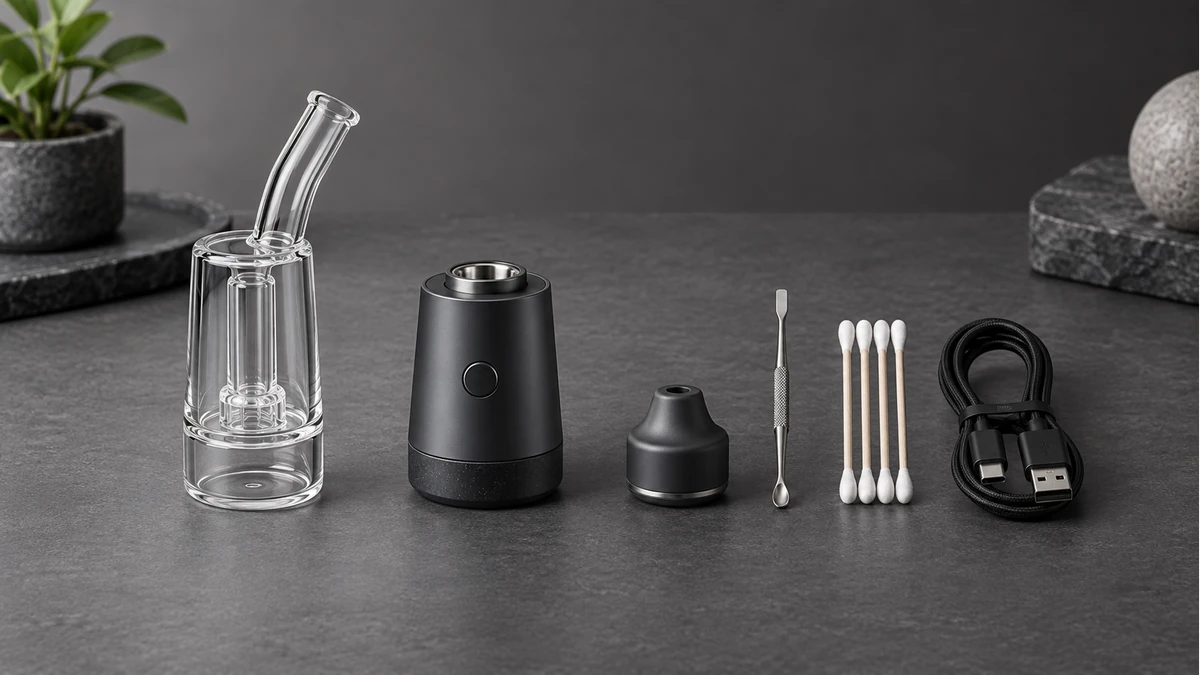
An electronic kit typically includes the base unit with its battery and heating coil, a removable or fixed atomizer chamber, a charging cable, and sometimes a spare coil or gasket set. The control is usually a single button that cycles through preset temperature levels, indicated by a light color or a number of blinks rather than an actual displayed temperature — this is one of the more common sources of confusion, since the label on the button rarely explains what the blink pattern means until you check the included instructions.
🪔 2.2 Torch-Heated Kit Components
A torch-based portable kit centers on a glass or ceramic nail/banger, a carb cap, and a dabber, with the torch sold or packed separately. Because the torch isn’t electronic, there’s no control to misread, but there’s a different compatibility issue: the nail has to match the joint size and gender of the glass piece exactly, and heating time is judged by eye and touch rather than a preset level.
| Feature | Electronic Kit | Torch-Heated Kit |
|---|---|---|
| Heat control | Button or dial with preset levels | Manual, judged by heating duration |
| External tools needed | Charging cable | Butane torch and fuel |
| Main wear part | Heating coil or atomizer | Nail or banger surface |
| Travel constraint | Battery charge level | Torch fuel level and airline restrictions |
🧊 3. Glass and Water Path Pieces You’ll Actually Handle
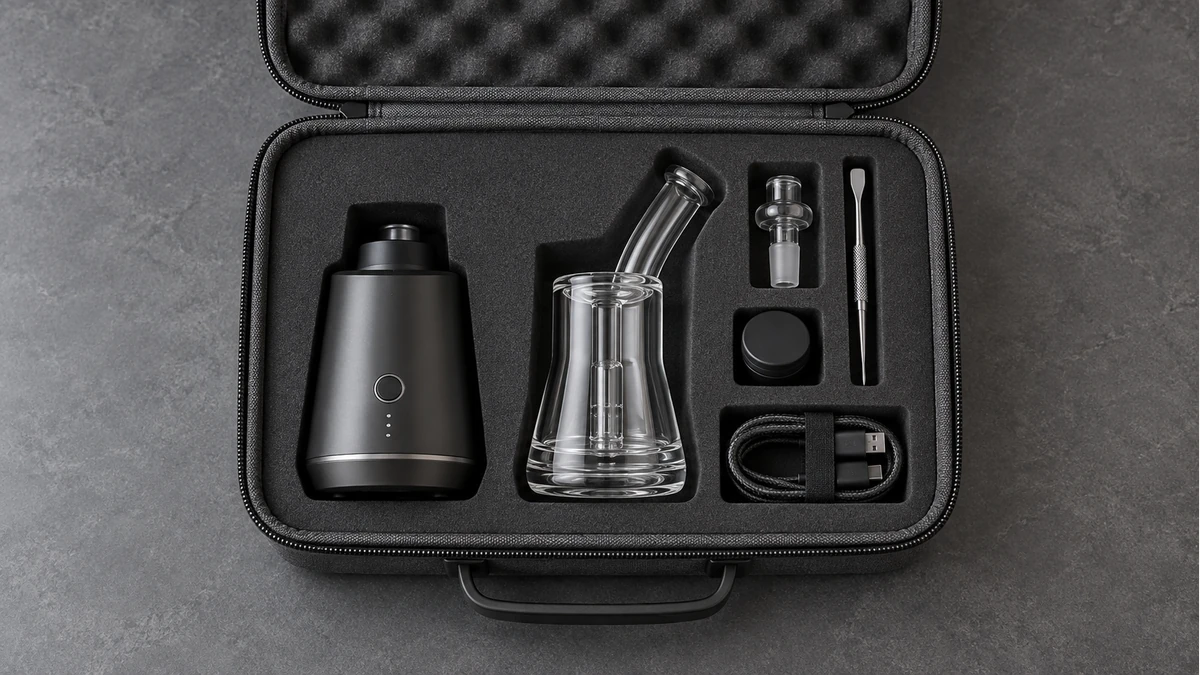
Whichever heat source a kit uses, the glass or the sealed water chamber is the part people handle most and worry about breaking most. Portable rigs generally use one of two water path designs: a straight tube with a single percolator, or a small recycler loop that pulls water through a secondary chamber before it reaches the mouthpiece. Recyclers cool vapor more but add another joint and another point where a crack can start.
🔍 3.1 Identifying What’s in Your Water Path
Look at where the water sits relative to the joint. If there’s a single visible chamber directly below the joint, it’s a straight design. If you can trace a second glass tube looping vapor back into the main chamber, it’s a recycler. This matters for cleaning, since recyclers trap residue in the loop where a straight brush can’t reach.
📏 3.2 Joint Sizes and the Compatibility Confusion
Joint size and gender mismatches are the most common physical complaint with portable kits, mainly because packaging rarely states the size in plain terms. Standard sizes are 10mm, 14mm, and 18mm, and each joint is either male (the tapered piece that inserts) or female (the piece that receives it). A nail or banger built for one size will not seal properly on another, even if it looks close enough to force into place — forcing it is how joints chip.
- Check the joint diameter printed on the packaging or stamped near the joint itself before assuming compatibility.
- Female joints receive the male end of a nail, banger, or adapter; mixing this up is the most frequent return reason for glass accessories.
- A loose-fitting joint won’t hold vacuum properly, which shows up as weak airflow even when everything else is working.
🥄 4. Loading Tools, Dabbers, and Small Accessories
The small metal or glass tools in a kit each have one job, and mixing them up doesn’t usually damage anything but does make the process clumsier. A dabber is a slim rod, sometimes with a flattened or scooped end, used to transfer material onto a heated surface. A carb cap is a small dome or disc that sits over the banger’s opening to control airflow and retain heat once the surface has cooled to a working range.
🧰 4.1 What Each Tool Physically Does
- Dabber — handles the loading step; the flattened end is for scooping, the pointed end for precision placement.
- Carb cap — reduces airflow across the heated surface, which changes how quickly the surface loses heat.
- Silicone containers — non-stick storage jars included in many kits for holding material or tools between uses.
- Storage stand or tray — keeps the dabber and cap off surfaces between uses, reducing residue transfer.
the dab rig hardware guide covers joint and adapter sizing in more depth if you’re trying to match a replacement part to an existing kit.
🧽 5. Cleaning Supplies and Why They’re Part of the Kit
Cleaning tools are included in most kits because residue buildup is the single biggest cause of degraded airflow and cloudy glass over time. The standard cleaning set includes cotton swabs, isopropyl alcohol pads or a small bottle, and sometimes a pipe cleaner-style brush for narrow joints and recycler loops.
🧴 5.1 Swabs, Alcohol, and What They’re Actually For
Swabs handle the accessible surfaces — the inside of a banger, the underside of a carb cap, the joint itself. Alcohol pads are for quick wipe-downs between uses, while a full alcohol soak (letting glass sit submerged for a period) is reserved for heavier buildup that swabs alone won’t lift. Coarse salt is sometimes added to an alcohol soak as light abrasion, but this should only be used on straight glass sections, not the delicate percolator arms found in recyclers.
- Wipe joints and caps after each session while residue is still soft — it hardens and becomes harder to remove within a day or two.
- Never use metal tools to scrape glass; it scratches the surface and creates spots where residue accumulates faster afterward.
- Let alcohol-soaked pieces air dry completely before reassembly to avoid trapping moisture in the airpath.
🔋 6. Power, Charging, and Battery Realities for Electronic Kits
Electronic kits introduce a dependency that torch kits don’t have: charge level. The battery is usually rechargeable via USB-C or a magnetic charging dock, and most kits include the cable but not a wall adapter, which is another common point of confusion when people assume the kit is missing a part.
🔌 6.1 Reading the Charging Indicator
Most units use a single LED that changes color (commonly red while charging, green or blue when full) or blinks a set number of times to indicate remaining charge. If the light doesn’t change after an extended period on the charger, the issue is usually one of three things: a bad cable, a port connection that isn’t seated, or a battery that has reached the end of its usable cycle count. Isolating which one it is means testing with a different cable first, since cables fail far more often than the internal battery.
🎒 7. Case Layout: Keeping Glass From Breaking in Transit
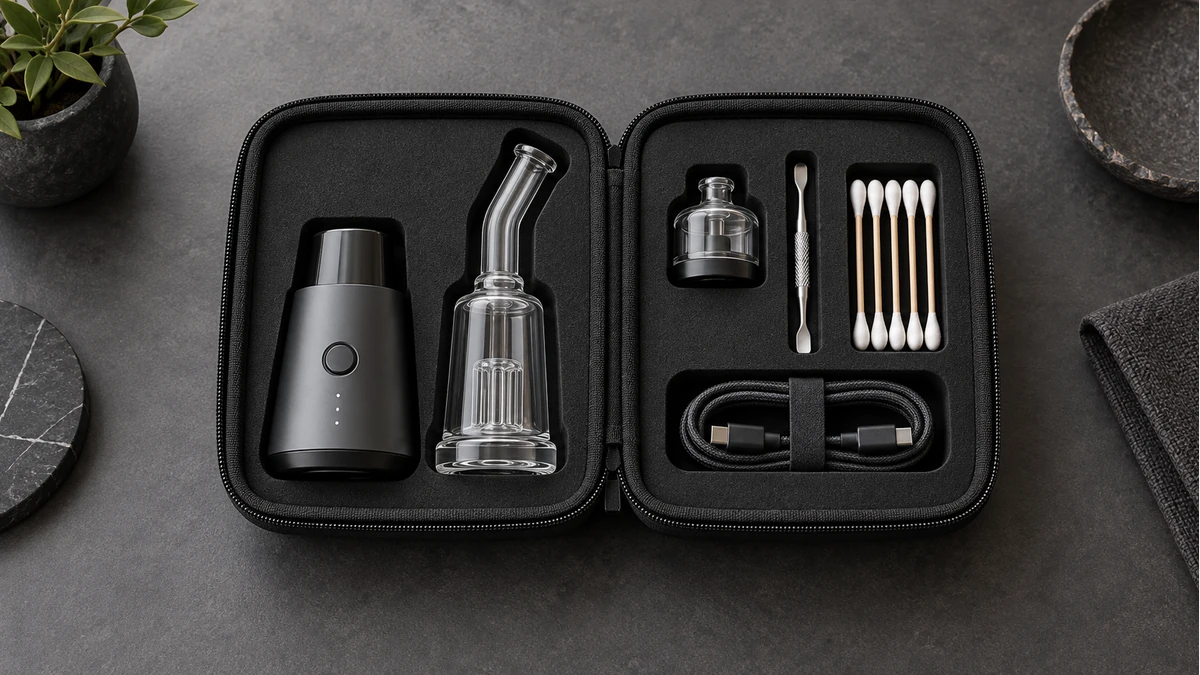
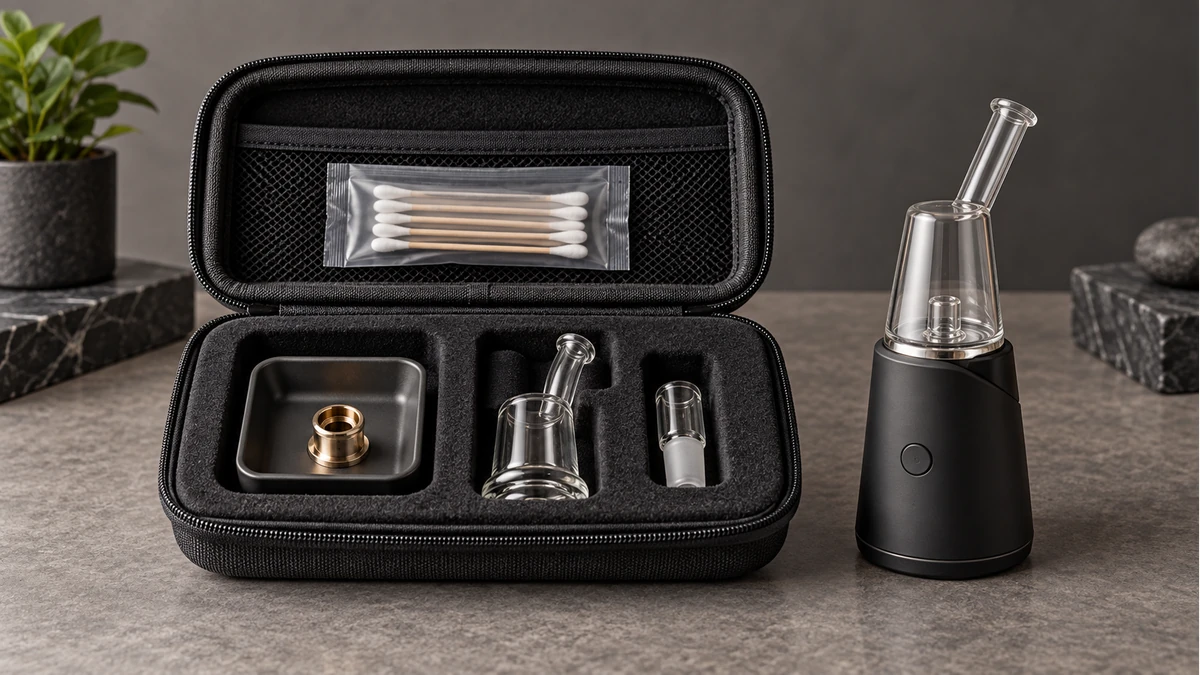
A well-designed portable kit case isn’t just a box — it’s a set of individually shaped cutouts that keep glass from contacting other glass. The main rig sits in the largest cutout, usually with a foam collar around the joint area since that’s the thinnest and most stress-prone point. Smaller tools get their own individual slots rather than a shared compartment, because loose tools rattling against glass during transit is a leading cause of chips.
📦 7.1 What Good Padding Actually Looks Like
- Foam that fully surrounds the joint and mouthpiece, not just the base of the rig.
- Separate compartments for the battery/charging cable, away from anything glass.
- A case exterior rigid enough to resist crushing under light stacked weight, not just soft fabric.
the guide to dab tools has a closer look at case and travel-case layouts if you’re deciding between a soft pouch and a hard-shell case for regular transport.
🧪 8. Pack the Kit in the Order You Will Unpack It
A practical case is arranged around sequence, not symmetry. Put the stable base and protected glass where they can be removed first. Keep the tool that handles a warm part in an immediately accessible slot. Cleaning supplies belong in a separate pocket so a used swab cannot touch a mouthpiece, cable, or clean glass surface.
🧱 8.1 Foam Should Restrain the Heavy Parts
The heaviest component creates the largest impact load when a case is dropped. Give it a fitted recess and keep it from sharing a cavity with glass. Small accessories can use zip pockets or capped tubes, but loose metal tools should never be allowed to strike a glass joint in transit.
📝 8.2 A Short Inventory Prevents Improvised Substitutes
Before leaving, check the device body, protected glass, manufacturer-specified power cable, cap or cover, loading tool, cleaning swabs, and a heat-safe temporary resting place. The point is not to carry every accessory. It is to avoid discovering that a missing small part forces an unsafe or damaging workaround.
🛠️ 8. Troubleshooting by Isolating One Variable at a Time
Most reported problems with portable kits — weak airflow, inconsistent heat, a rig that won’t hold vacuum — trace back to one variable, not a defective kit overall. The fastest way to find it is to change one thing at a time rather than guessing at a full replacement.
🧩 8.1 A Practical Isolation Order
- Check the joint seal first. Remove the nail or banger, wipe both surfaces, and reseat it. A weak seal here mimics a dozen other problems.
- Check water level next. Too much water restricts airflow and feels identical to a clogged percolator.
- Check the heat source last. For electronic units, swap the charging cable before assuming the coil has failed. For torch setups, confirm the torch’s own flame is consistent before blaming the nail.
- Isolate cleaning as a separate step. A recycler loop that hasn’t been cleaned in a while can restrict airflow in a way that looks like a heat problem but isn’t.
the dab-rig cleaning sequence walks through joint-seal troubleshooting in more detail if the airflow issue persists after reseating the connection.
The most useful habit with any portable dab rig kit is treating it as three separate systems — heat, glass, and cleanup — rather than one object. When something feels off, name which of the three it belongs to before touching anything else: a control light that doesn’t make sense is a heat-system question, a joint that won’t seal is a glass-system question, and clouded glass or sluggish airflow is almost always a cleanup-system question. Diagnosing in that order, one system at a time, resolves the majority of complaints without needing to replace a single part.