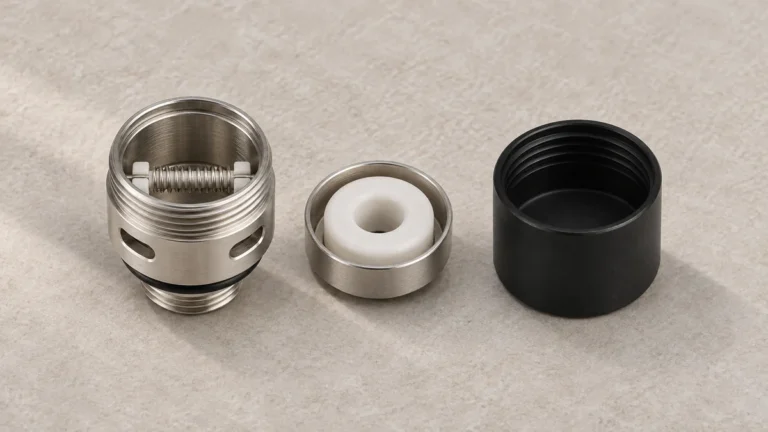
🔎 1. What “Dab Coil” Actually Describes on a Listing
A dab coil listing can describe a bare heating element, a heater already housed in a replaceable module, or a chamber assembly that may include a cap. Start with what comes in the package. The word “coil” can appear on a box even when the visible surface is a pale ceramic disc with no wire in view. That difference in appearance is a reason to check the part number and the documented contents.
Identify the replacement unit before comparing materials. The guide to quartz rods and wires in wax pens explains the visible heater form. Here the question is what actually comes away as an assembly, which piece the listing shows, and which other parts the maker supplies separately.
📦 2. Packaging Model Numbers vs Generic Family Names
The single most reliable identification clue, when it is present, is a model number printed on a blister card, a small insert card, or a sticker on a plastic bag. A printed code ties the part to one documented device line and to the replacement options that the manufacturer lists for that exact line. Without that printed code, a seller or a secondhand owner is left describing the part by shape, color, and rough dimensions, which is a much weaker form of identification and should be treated as such rather than stretched into a device match.
📄 2.1 When a Printed Model Code Is Present
Yocan lists ceramic donut and quartz dual coil options under the Evolve Plus name on its official replacement page. It documents the Evolve Plus XL separately. Read the full model name and follow the exact part listing for it. Two options explicitly listed under one model can look quite different. The similar wording of a second model name provides no basis for applying those same options to it.
🏷️ 2.2 When Packaging Carries Only a Generic Family Name
A small bag marked “replacement coil” leaves the device family open. Use the shape, height, underside and visible openings to describe the piece. If a source photo shows only the top, request the package label or a second photo of the underside. The parts list can also identify whether the piece was sold alone or bundled with a cap.
📐 3. Chamber Height and Profile as an Identification Clue
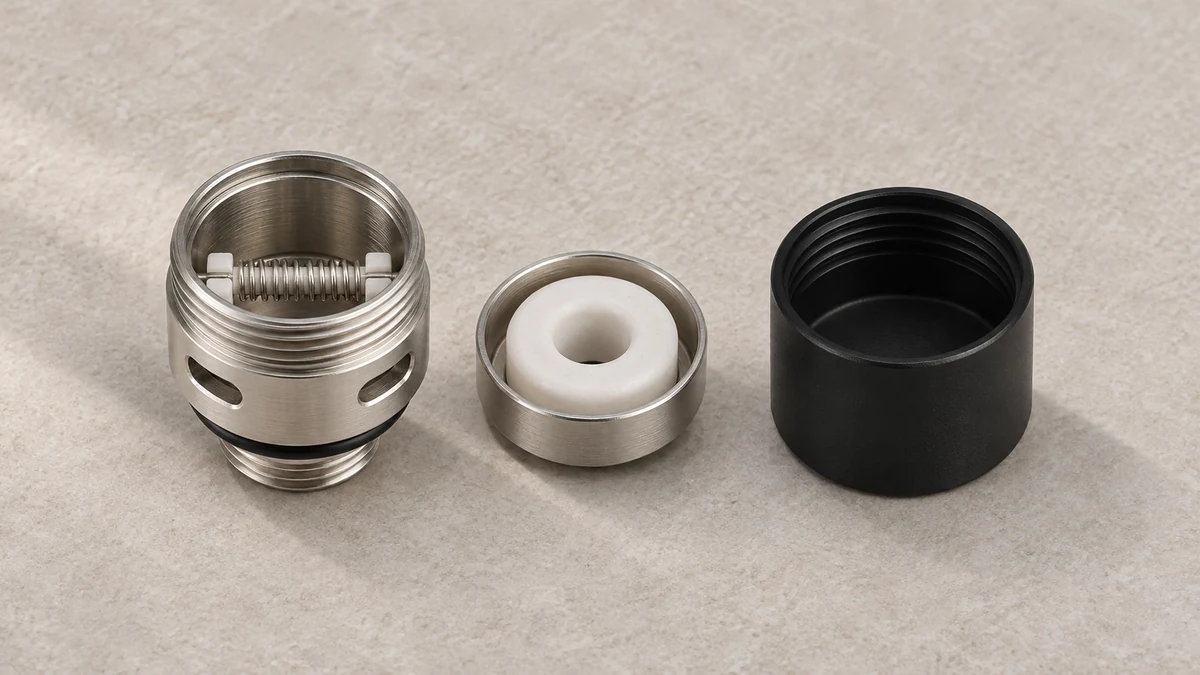
Compare height from the same reference surface. One drawing may include the connection below the housing, while another may begin at the shoulder where the chamber rests. Two measurements taken from different points can be misleading even if both are labeled “height.” A side photograph showing the entire module and a second view showing the cap make it easier to identify the measurement the maker means.
Profile, meaning the outer silhouette of the part when viewed from the side, adds a second data point. Some heaters taper toward the base, some are a uniform cylinder, and some have a stepped shoulder partway up. None of these profile differences by themselves prove a match to a specific device, since visually similar profiles can belong to unrelated chamber families. What a matching height and profile does support is a narrower, more confident physical comparison between two parts in hand, which is a different and more limited claim than confirming an exact documented model match.
🔧 4. Bare Heater vs Housed Replaceable Module
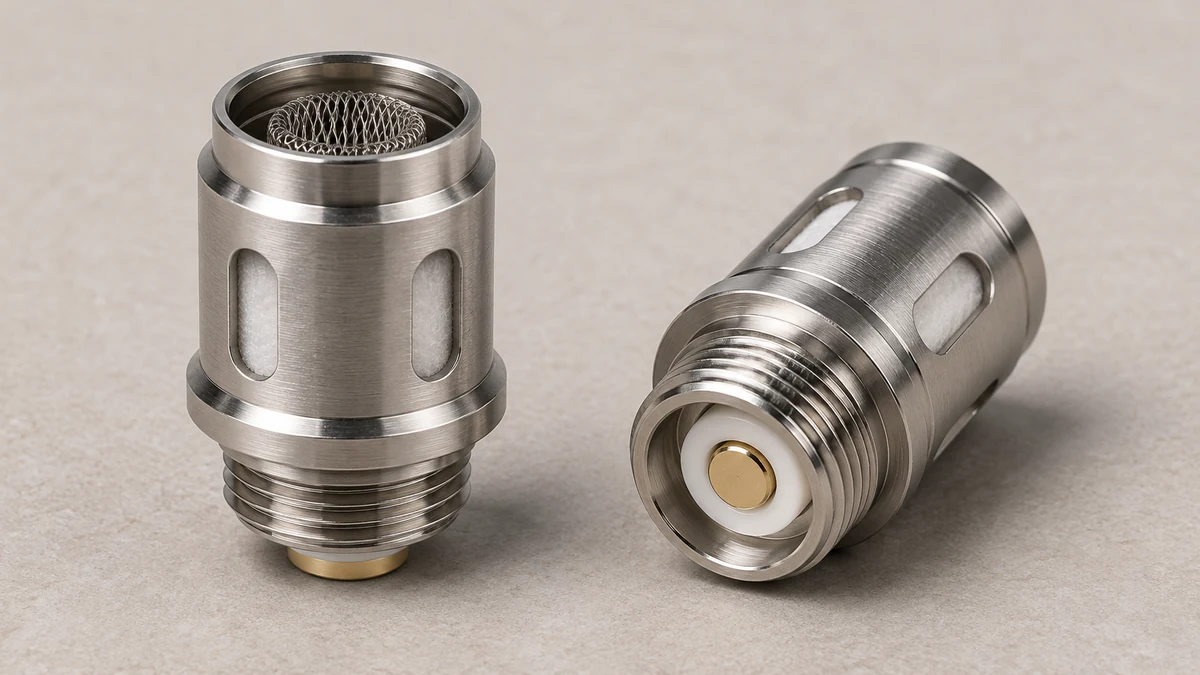
A visible rod or a ceramic surface describes a feature at the top of the part. The housing is a separate feature to look for. In an overhead photograph a bare part and a housed assembly can both show a visible heating element. A profile can show a rim, a shell around the element and a base for the complete assembly.
🔩 4.1 Signs the Part Is a Bare Heater
Look at the sides and the complete underside. A maker may photograph a small heating component by itself to explain a product’s construction, even when the owner-replaceable part is the surrounding module. The contents list and replacement diagram identify what the photograph represents. Keep any enclosed sections intact while documenting a loose part.
⚪ 4.2 Signs the Part Is a Housed Replaceable Module
A flat ceramic surface is visible on some designs. A wire winding is visible on others. Either can be pictured as part of an assembly, so check where the outer wall ends and what comes away together in the maker’s diagram. A smooth top gives limited information about the material and construction below it. The exact model documentation is the place to confirm those details.
🧩 5. Complete Assembly and Its Cap
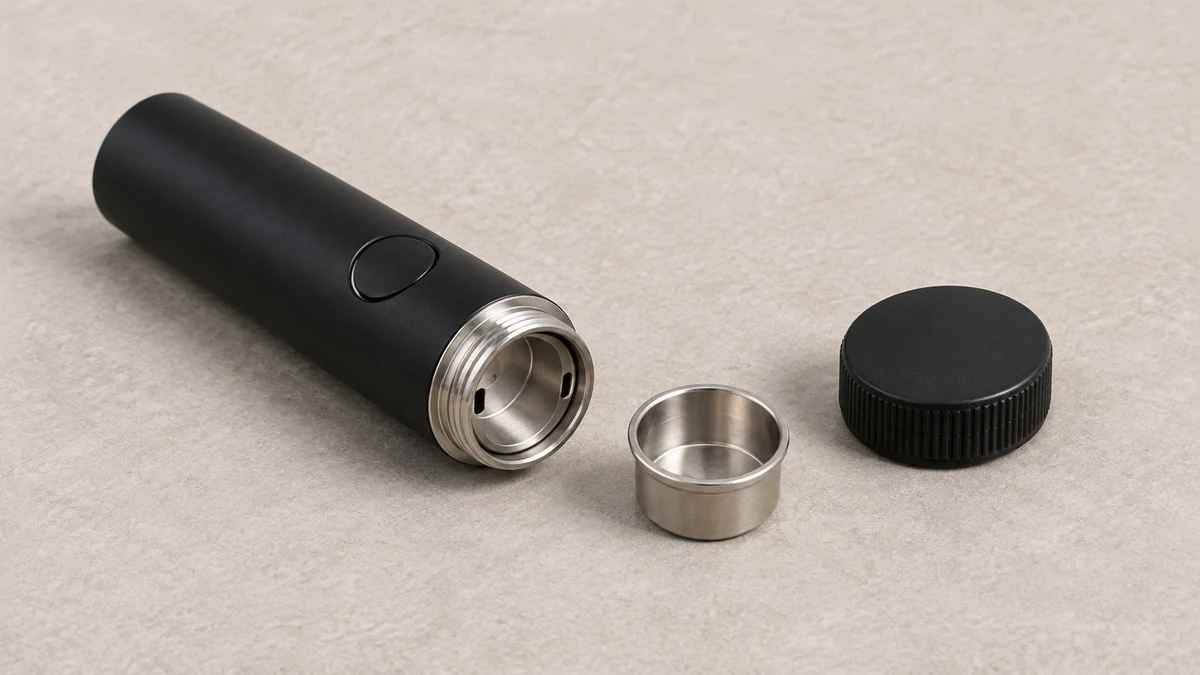
A complete chamber assembly can include a housing and heater under one part number. The cap may be included, listed on its own, or pictured nearby as context. Check the description of the selected item. A seller may show a complete pen in one photograph even when the item is a replacement module. Ask which pieces arrive as separate items if the packing list is ambiguous.
Check the guide to coil-less terminology when a listing gives the heater a shape-based label. The scope of that label can differ from the contents of the box. A cap photographed on a chamber may obscure the heater entirely, and a product photograph with the cap removed may still describe an assembly that includes it. The parts list resolves the packaging question.
📷 6. Reading Underside and Inlet Photos
Many resale and marketplace listings crop their photos to the top of the part, showing only the face a user would see once installed, and leaving the underside and any air inlet holes out of frame entirely. The underside of a coil or module typically shows the contact points where it meets a battery connector or a chamber base, along with the material of the housing itself, which can be brass, stainless steel, or a ceramic ring depending on the part. Inlet holes, when present, are small openings positioned either on the side wall of the housing or near its base, and their exact placement varies between otherwise similar-looking parts.
🧷 6.1 Why Underside Detail Matters for Identification
Read visible features separately. A front photo may show a light-colored ring, while the underside shows a threaded base and a different set of surfaces. Write down what the photo actually shows and leave hidden materials to the part documentation. This matters when two photographed modules have similar tops but a different shape below the rim or a different inlet position.
🗂️ 7. Official Part Families and Where Naming Overlaps
Manufacturers typically publish a dedicated replacement-parts page for each documented device, listing the coil or module options confirmed for that specific chamber. These pages are the strongest available reference point once a device name or packaging code is known, because they state directly which coil forms the manufacturer confirms for that chamber rather than leaving it to visual comparison. A page documenting ceramic donut and quartz dual-rod options under one device name, for instance, settles the question for that one device without extending to any other device, even one with a closely related name.
Readers should treat family naming overlap with some caution, since manufacturers frequently reuse a base name across a small lineup of related devices, distinguishing them only with a suffix or a numeral. A documented part list for one entry in that lineup does not confirm anything about a differently numbered entry in the same lineup, even when the two devices look alike in general photos. Component reference material that explains internal part terminology more broadly, including how terms like heating core and coil get used for related but distinct internal parts, is covered in the general overview at the guide to identifying the parts of a vape device, which readers can use alongside a specific manufacturer’s part page rather than in place of it.
🧭 8. Specific Identification Scenarios Readers Encounter
If a loose piece has exposed wire, photograph the entire part from the side. A cropped top view can hide a surrounding housing. Ask whether the part number refers to the wire and support by themselves or to the assembly that holds them. Keep the complete model name in the question.
If the visible face is flat and pale, compare the outline of the shell and the position of the rim with the official photograph. A shape term such as “disc” is useful for describing the face. Confirmation of the replacement family comes from the maker’s part number or documented match.
If a cap is pictured already fitted to a cylinder, look for a second photograph with the cap set beside the housing. The packing list can show whether both pieces are included. In a support request, include a picture of the box label and both ends of the loose part. These details help locate the exact assembly even when several photographs use the same generic name.
📦 8.1 Compare the Box With the Loose Part
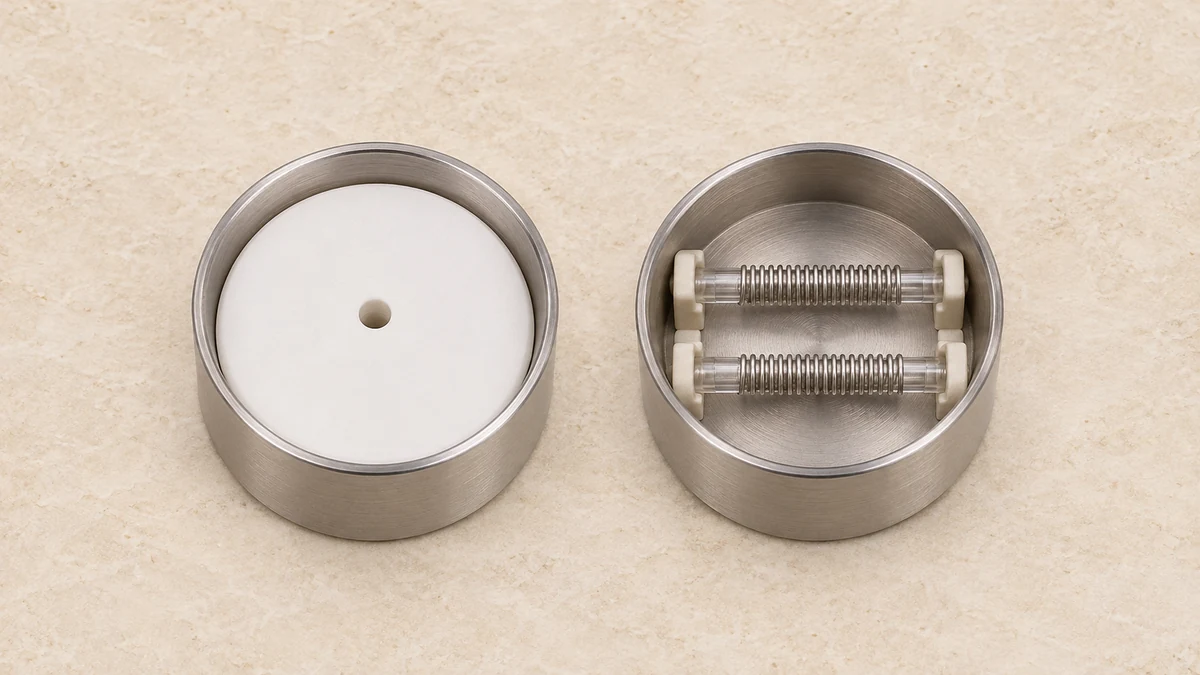
Imagine a spare in a small box marked “coil” beside an assembly removed from an empty, cool pen according to its documentation. The spare has a smooth pale surface at the top. The old assembly shows two horizontal rods. Those photos establish a difference in visible shape. They leave open whether both are listed for the same model and whether the cap shown in a listing is included. The full product name and revision on the box can resolve the first question. The part number and the contents list can resolve the second.
When a label has rubbed off, take a top photo and a side photo with the entire base in view. Keep the loose cap in a separate part of the frame. A top image identifies the heater form. A side image can show the housing shoulder and the location of its openings. Give a support team those two views together with the model marking on the pen. That gives them enough context to distinguish a bare part photograph from a replacement assembly listing.
📦 8.2 Read the diagram beside the parts list
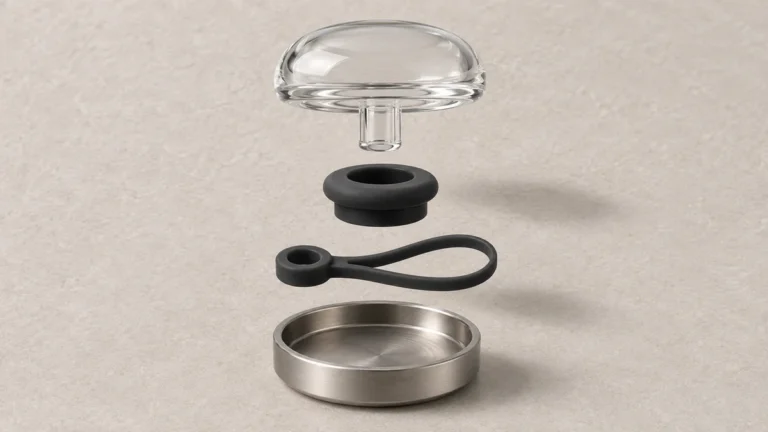
An exploded drawing may show an individual heater, its surrounding cup and a separate cap. The drawing explains where the pieces sit. The replacement list explains which pieces share a part number. For instance, a diagram can name a heater that is supplied only inside a module. A picture of the named heater alone leaves the packaging question unanswered.
Compare the selected item on the replacement page with the drawing for the exact pen. If the page shows a coil pack with a cap beside it, check whether the cap has its own line in the included-parts list. Images that show a complete assembly on one screen and a component on another can describe the same spare from different perspectives.
📏 8.3 Compare the same housing dimensions
When two modules are drawn from the side, start at the point where the housing would rest on its mating surface. A lower threaded section can make the assembly look taller even when the upper chamber has a similar profile. Ask for an image that keeps the shoulder and the underside visible. If the drawing shows a reference arrow, copy the endpoints when describing the dimension.
A separate cap can also change the visible height. Before comparing a capped item with an open chamber, identify which parts the published dimension includes. Check the shoulder below the cap and any change in diameter at the lower edge. These details make a side-by-side photograph easier to interpret.
📷 8.4 Identify the limits of an overhead photo
A pale disc with a center opening can fill the entire frame in a cropped image. A wider photograph may show the disc sitting below a metal rim or inside a separate cup. Look for the edges of the surrounding part and ask to see the underside. Describe the visible top separately from the way it is housed.
Use the same approach when a top view shows two parallel rods. Record their presence and their position relative to the rim. The visible features can help a support team recognize a product photograph. A compatibility statement requires the documented part family. Material and electrical details below the visible surface can come from the manufacturer’s specification.
🗃️ 8.5 Keep a record when parts arrive loose
If an owner finds two spares in a tray, keep the packaging and part labels with each spare as soon as they are identified. A photo of the label and a second photo of the open top create a record that remains useful after the parts are separated again. Add a side photo if the cap or housing is different between the two examples.
For an unidentified assembly, write down which model it was found beside and whether there was a cap loose in the package. Treat that information as context for a question to the maker. A secondhand kit may contain accessories added after the original sale. Use the manufacturer’s part number when you can identify it from the packaging or documentation.