🔎 1. The Part That Actually Holds a Dab Cap in Place
On a powered dab rig with a flexible cap holder, the cap insert can move inside the holder, or the holder can move at the chamber rim. A tether can also stretch or tear at a point away from either contact. A listing that calls one of these parts a dab cap adapter may show only the flexible piece. Identify which connection it occupies before using the listing to name the part in your device.
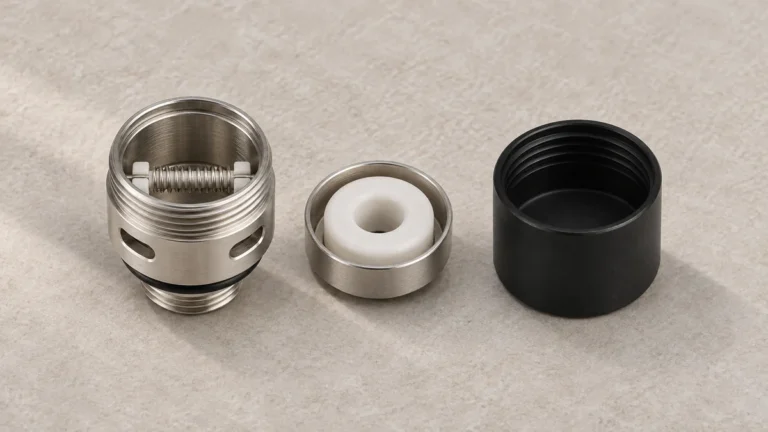
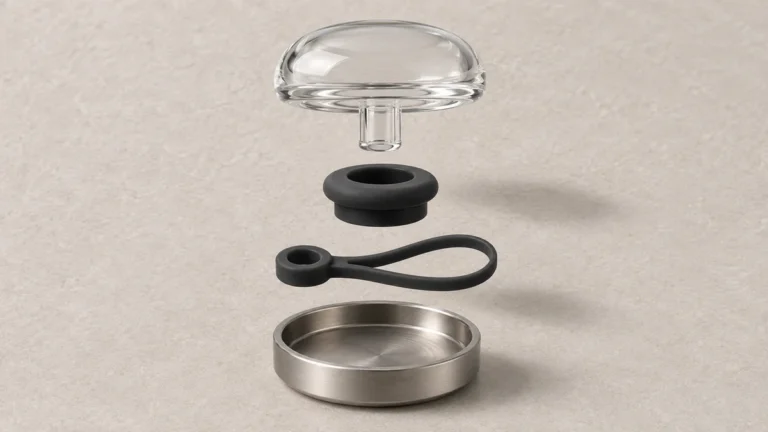
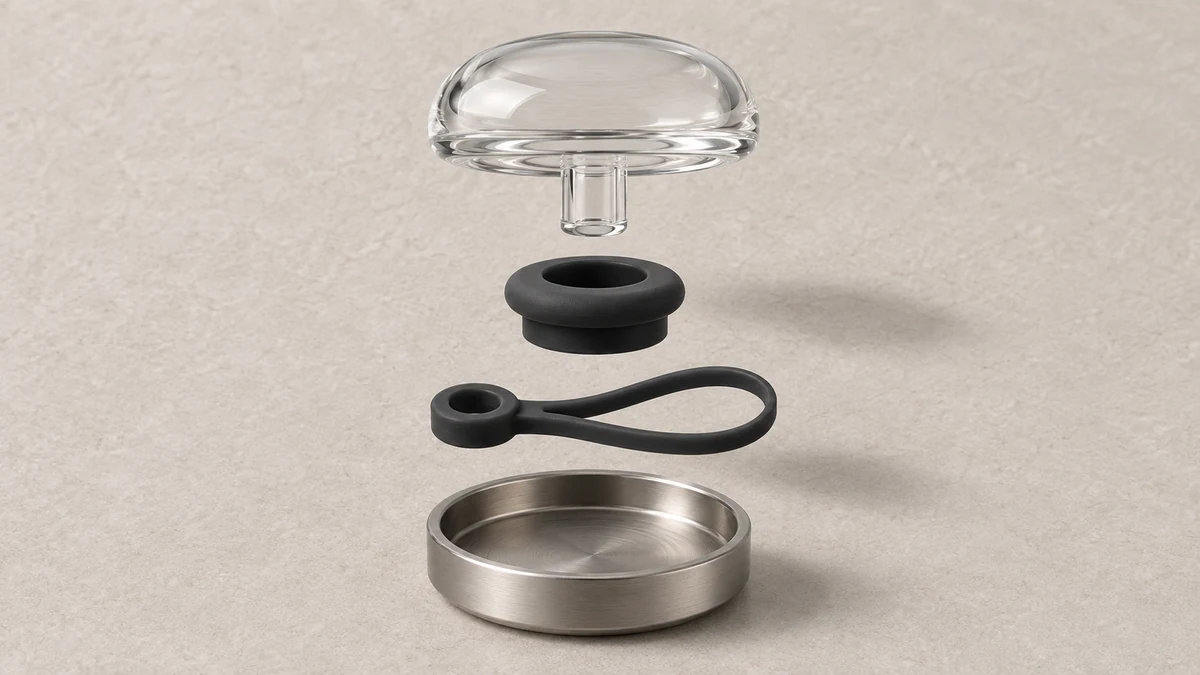
Start with the separate components in the manufacturer’s drawing. A glass cap may have a shoulder that meets a flexible holder. A sleeve may wrap the outside of the chamber and include a hinge. An external loop may attach at an anchor away from the rim. The dab rig parts map gives broader context for where the chamber, cap and main glass assembly sit.
🧩 2. Two Separate Interfaces on a Capped Chamber
In the flexible holder layout considered here, two contacts are worth identifying. The inner opening surrounds the cap insert. The outside of the holder meets the chamber or a piece around it. The same visible gap can appear when either contact is out of position. Record where it appears before you assign a cause or identify a replacement part.
📥 2.1 Insert-to-Ring Contact
Look at the end of the cap that meets the ring. Depending on the model, it may have a short neck below a wider shoulder. The holder may have a molded inner lip or a recess that corresponds to one of those features. A ruler across the outside of the cap does not show the dimensions of the smaller neck. A profile of the cool, empty part provides a better record of where the shapes meet.
🔘 2.2 Ring-to-Chamber Contact
The outside of a flexible holder can have a lip that sits against a rim or a groove in another component. Compare that outer profile with the matching location shown in the maker’s drawing. A cap that appears straight in its holder can still sit unevenly relative to the chamber. If you report this to support, state which two parts remain aligned and which edge sits higher.
🔗 3. Four Parts That Get Confused with One Another
The cap insert may be glass or metal. Flexible components around it can include a holder, a chamber sleeve, and a tether. The maker may combine some of those features in a single molded piece. Locate each by its position in the assembly and by the surfaces it contacts.
🧪 3.1 Flexible Ring vs Chamber Sleeve
A chamber sleeve wraps around part of the chamber’s outer wall. A flexible holder surrounds the cap at its opening. Some designs combine these features in one molded assembly. Others identify them as separate pieces. A picture that crops out the side of the chamber may hide the sleeve entirely. Look for a view that shows how far the flexible material extends below the rim and where a hinge or strap joins it.
🔗 3.2 External Loop vs Captive Tether
A captive tether stays attached at its designed anchor while the cap moves. Some makers mold a tether into a holder or sleeve. A separate loop can attach at another point. The names used in a catalog depend on what comes in the package, so check for the anchor and the holder in the parts photo. The carb cap guide describes the related fit question on glass banger hardware.
📐 4. Measuring Dimensions on Empty, Cool Hardware
Record the width at the cap neck and the width where it meets the holder. For the holder, distinguish its inner opening from the outer lip that meets the chamber. If a drawing shows a tether, record the two attachment points. A strap’s total length gives little context without knowing where it is anchored. Use the original maker dimensions where available. Measuring a flexible part under pressure can change its apparent dimensions.
📏 4.1 Mark the Reference Surface
On a side photograph, mark where the cap begins to widen and where the holder sits against the rim. If the support team needs a scale, place a ruler near the part without stretching or flattening it. A photograph taken at an angle can make two heights look equal. A level profile helps separate the depth of the ring from the height of the cap above it.
🧵 5. A Loose Tether Does Not Always Mean a Failed Seal
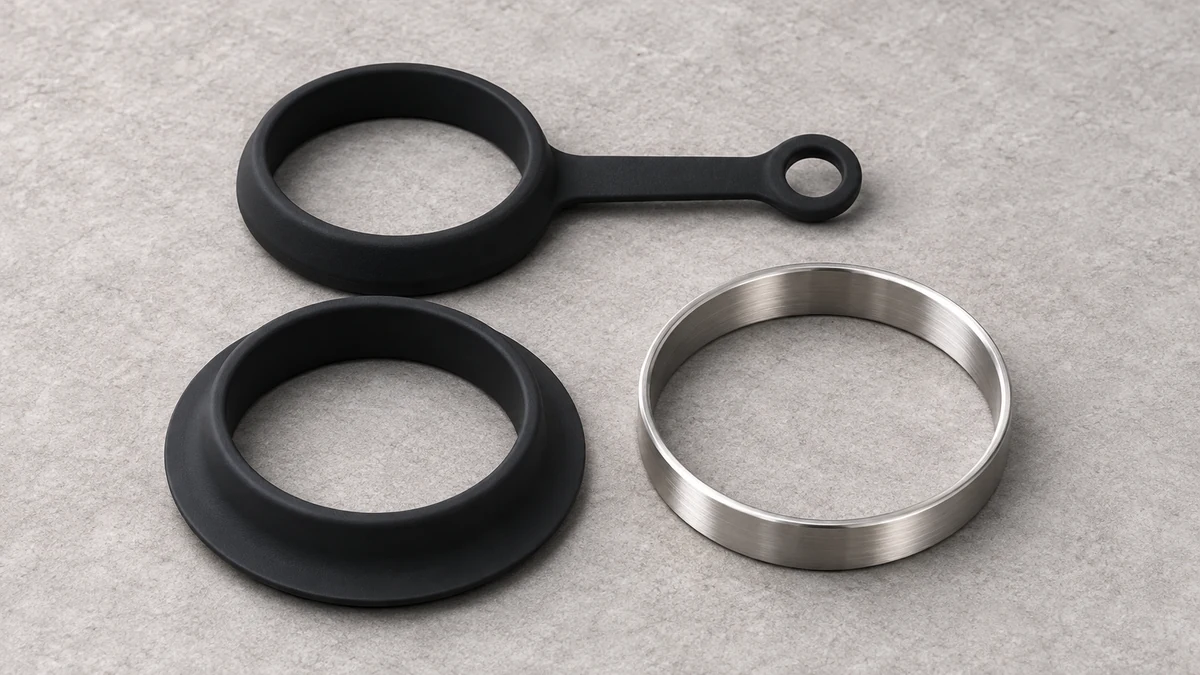
A loose tether can be visible while the cap and holder still appear seated. Another owner may see the cap sit low while the tether looks intact. Describe these observations separately. A flexible hinge that has visibly split is a useful detail, and the absence of an obvious split leaves the cause open. The same question can look different depending on which angle is visible.
Use the maker’s drawing to identify the parts that are meant to come away. Lay already detached parts on a flat surface and photograph them from above and in profile. Avoid stretching a ring to test its fit or pushing an unfamiliar insert into it. Send the model name and a photo of the full chamber beside the loose part. This helps a support team locate the contact you mean.
🩹 6. Reading Wear and Damage on a Removed Ring or Tether
Look for a visible split, a gap at a molded joint, or an edge that has pulled away from its anchor. Record its location in relation to the cap opening. A shiny line on a molded surface can also be a seam from manufacture. A reference picture of the same part can help identify what the shape originally looked like. If you cannot tell, describe what is visible and send the photograph to the manufacturer.
A ring from a newer chamber can look similar to an earlier ring in a small image. Compare the model, chamber revision, shape of the rim, and whether the listing includes a sleeve or just the insert holder. For a worn part, the maker’s drawing is a better reference than a dimension taken from the damaged edge.
📦 7. Platform-Specific Naming in Replacement Listings
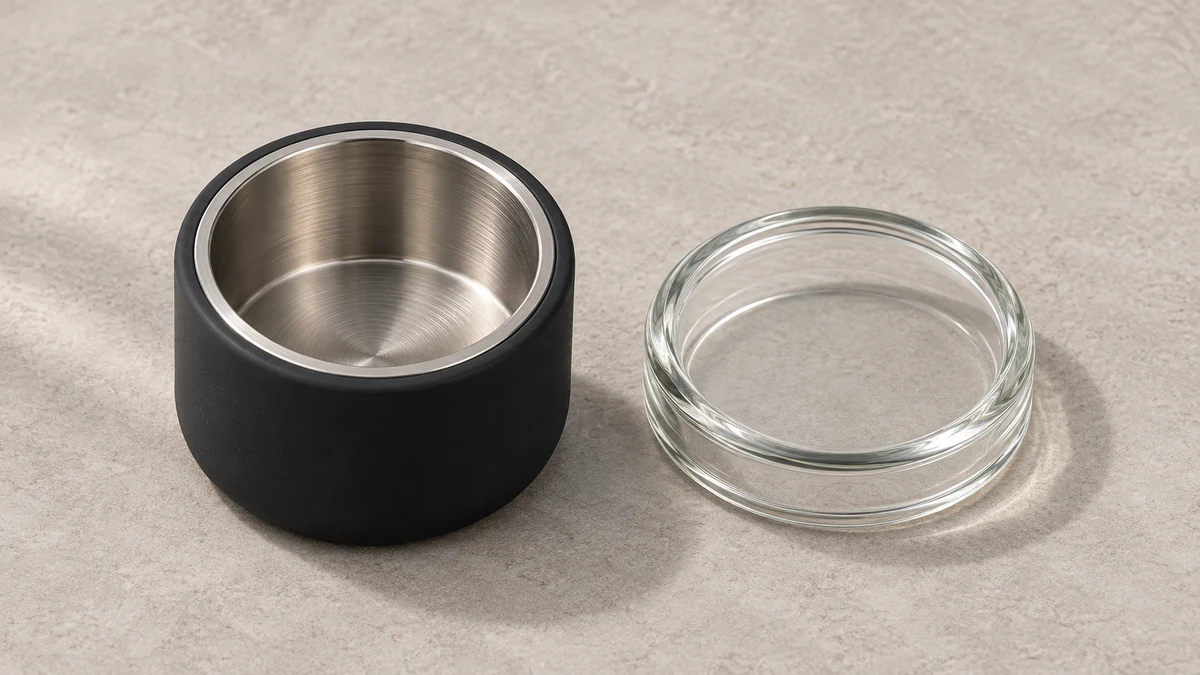
Puffco lists a specific Peak joystick cap and tether together. Dr. Dabber names a Boost Evo replacement cap for its own platform. The Dr. Dabber XS instruction manual lists a glass cap and a seal or tether separately. Each description applies to the named product. The examples show why the item name and included-parts list can both matter when someone is looking for a small piece around the cap.
A buyer who orders a replacement glass cap alone, based on one of these listings, can receive only the glass piece without the ring or tether that held the original cap in place, if the maker sells those parts separately. Whether an existing ring or tether will fit a newly ordered cap depends on whether the new cap’s base dimensions match the ring already installed on the chamber, which is a question the dimensions in section four above are meant to answer rather than a question a product photo can settle on its own.
🧭 8. Matching a Loose Glass Cap to the Correct Holder
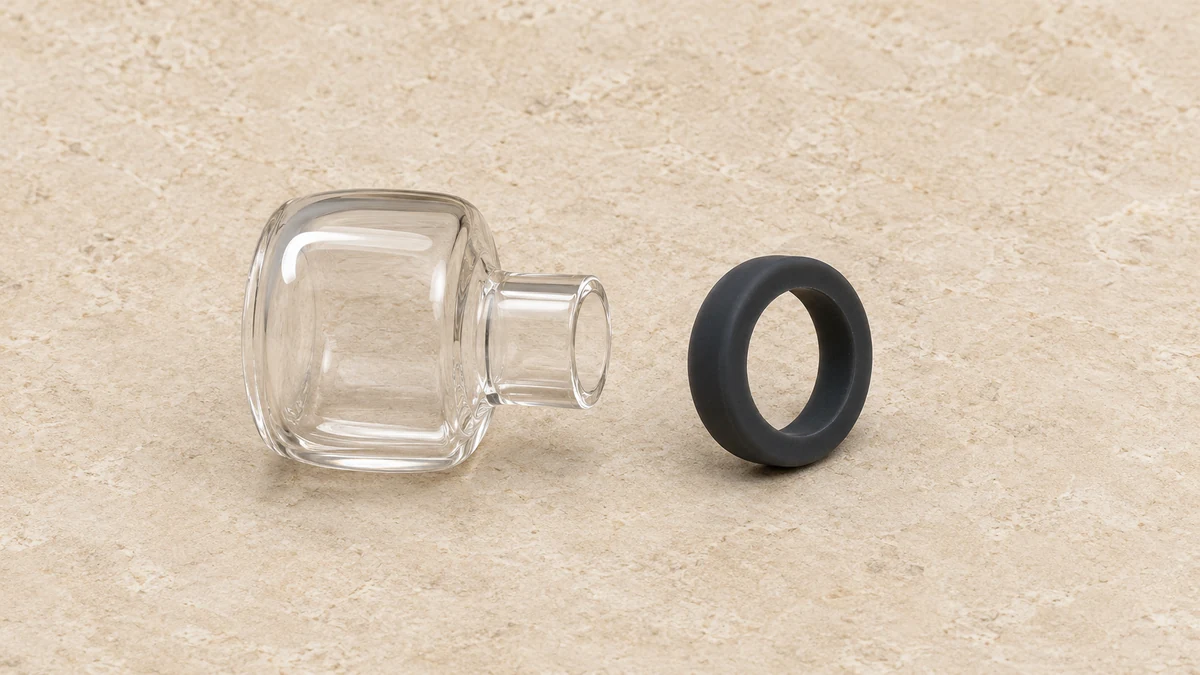
A loose glass or ceramic cap and a loose flexible ring are two separate problems that happen to produce the same visible symptom, a cap that does not sit flush on the chamber. Confirming which part is responsible means checking the cap’s base diameter against the ring’s inner opening first, since a cap that is slightly undersized for its ring will rock even when the ring itself is undamaged. If the cap seats snugly in the ring by hand, away from the chamber, the remaining question is whether the ring’s outer edge still seats correctly against the chamber rim, which points attention toward the ring-to-chamber contact rather than the cap.
For a loose glass cap photographed beside a quartz banger, the guide to banger rims and cap seating explains the related glass contact surfaces. If the piece is for a powered chamber, keep the manufacturer’s chamber diagram and the listing photo together. Those references can show whether the loose piece is the cap, holder, sleeve or tether.
📷 8.1 Use Two Close-Ups to Locate a Fit Problem
Imagine two soft rings that look the same from above. One has a shallow lip inside and a deep groove around its outside. The other has a deeper inside step and a broad flat flange. A photograph from the top can show both center openings without showing which side contacts the chamber. A side view of each ring and a separate view of the cap neck will tell a support team more. The photos separate the cap-to-ring interface from the ring-to-rim interface.
If the loose part is a tether, include its anchor in the photograph. An external loop may catch an opened cap without occupying the same position as the flexible ring that surrounds the insert. For a torn hinge, show where the strip joins the ring or sleeve. For a cap that sits low, include a side photo of the cap and holder together. Describe the shift you observed and leave the identification of the exact replacement to the model documentation.
🧭 8.2 Which way the holder faces
A loose flexible ring can look almost symmetrical from above. The two faces may still have different shapes. One face may present a broad flange while the other has a recess around its inner opening. Record which face appears next to the cap in the maker’s drawing. A listing that shows the opposite face may use a photograph of the correct part while leaving its installed orientation hard to recognize.
An underside view also helps when a lip disappears into a larger sleeve. Take a photograph of the detached part as supplied, beside a separate image of the documented assembly. The goal is to see which edge belongs to the insert and which edge belongs to the chamber. Avoid using the shape of one photograph to infer the orientation of a different model.
🧾 8.3 What a replacement set includes
One listing may call its product a cap and show the holder mounted on it. Another may call the holder an adapter and use the glass insert in the image to show scale. Read the item name and contents together. If the maker labels the cap and tether separately, find out whether they share a part number. This matters when the failed piece is the strap and the cap itself is still present.
A chamber version can also matter when the rig name stays the same. Read any suffix on the packaging and look for a model list that includes it. If the seller names only a broad family, send the exact designation to the manufacturer. Include a photo of the chamber exterior so the manufacturer can tell which sleeve or rim the cap is supposed to meet.
🖼️ 8.4 Describe what moves in the assembly
If a cap appears lower than expected, record whether the outer holder is still at the same level around the chamber. A line seen along the inner opening is a different observation from a visible gap between the holder and the chamber. The distinction can be clear in a side photo, even when both conditions look like a tilted cap from above.
For a torn hinge, photograph its anchor and the break. A short strip can be integral to a sleeve in one design and supplied with a separate ring in another. A photograph of the complete chamber lets support place the hinge in the right assembly. Keep the loose cap visible beside it. That way, the replacement question can identify the glass piece as well as the flexible piece.
📦 8.5 Keep small parts with their original model
Use a labeled compartment for already detached spares from each chamber. Similar black rings can be difficult to distinguish once their packaging is gone. A label with the full chamber name, the part number, and the date the part was supplied can help if you later receive a revised version. When a kit includes several sizes, keep the supplier’s drawing with the box.
If you find a ring in an unlabeled tray, compare the drawing with the loose part before putting it with the current chamber. Include a photo of the opening and another that shows the molded edges. Ask whether it is a holder, a seal for another part, or a tether component. Each answer points to a different surface in the assembly.
Keep both the cap designation and the chamber designation in the record. A diagram for the chamber can show the position of the sleeve, while a separate drawing for the cap can show the insert neck and holder. Saving the two references together makes it easier to locate the correct attachment point later.