🔎 1. Reading a Dab Rig Bowl Listing Without Guessing
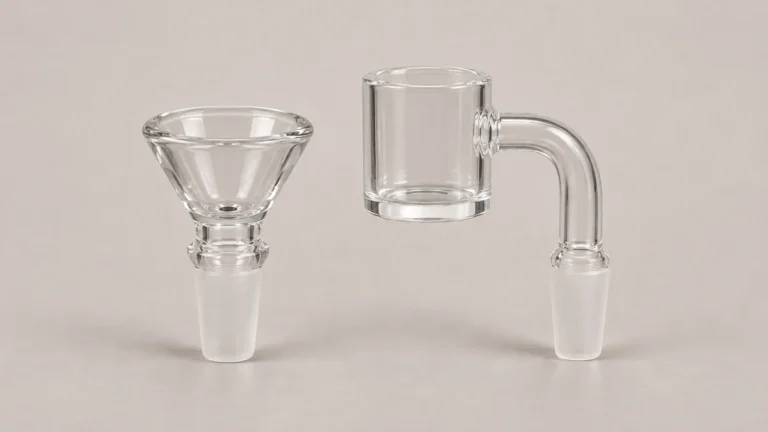
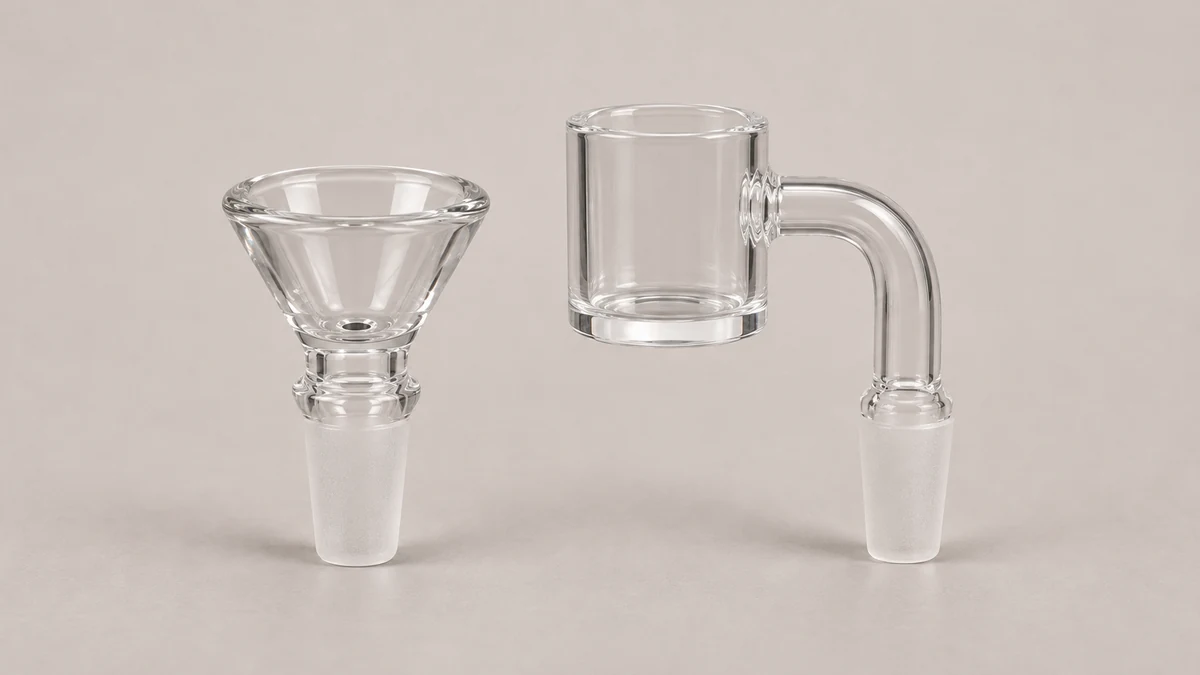
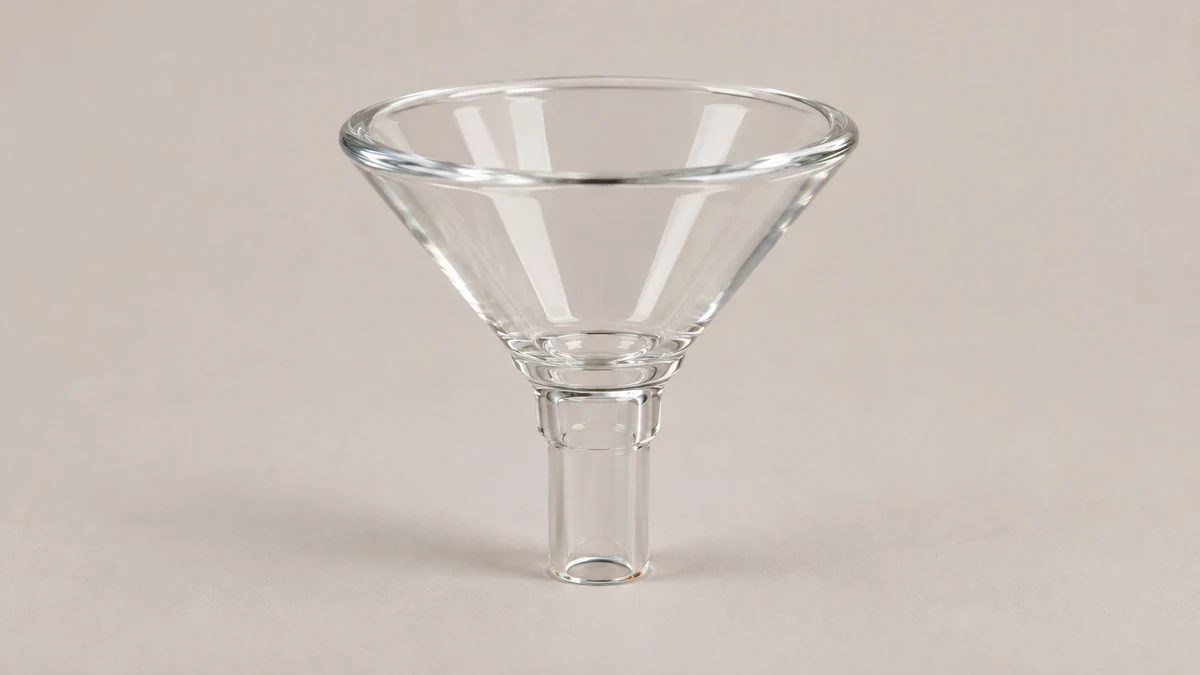
In a listing for a “dab rig bowl,” start at the part that connects to the rig. A glass slide often narrows to a centered stem beneath the cup. A bucket-style quartz banger usually has a closed bottom and an outlet at the side that leads to a separate joint. A liner sits inside another piece, and a cap rests on a rim. The word “bowl” can appear beside any of those objects in a listing, so a complete side view is more useful than a tight photograph of the cup opening alone.
The labeled map of dab rig components shows where these distinctions fit in a complete assembly. Use the map to identify the likely name of the piece in a photo, then compare the actual joint or matching part with the maker’s description. The term “rig” in a caption can refer to the entire setup even when the photograph shows only a detachable attachment.
🧩 2. Downward Centered Stem vs Offset Connecting Arm
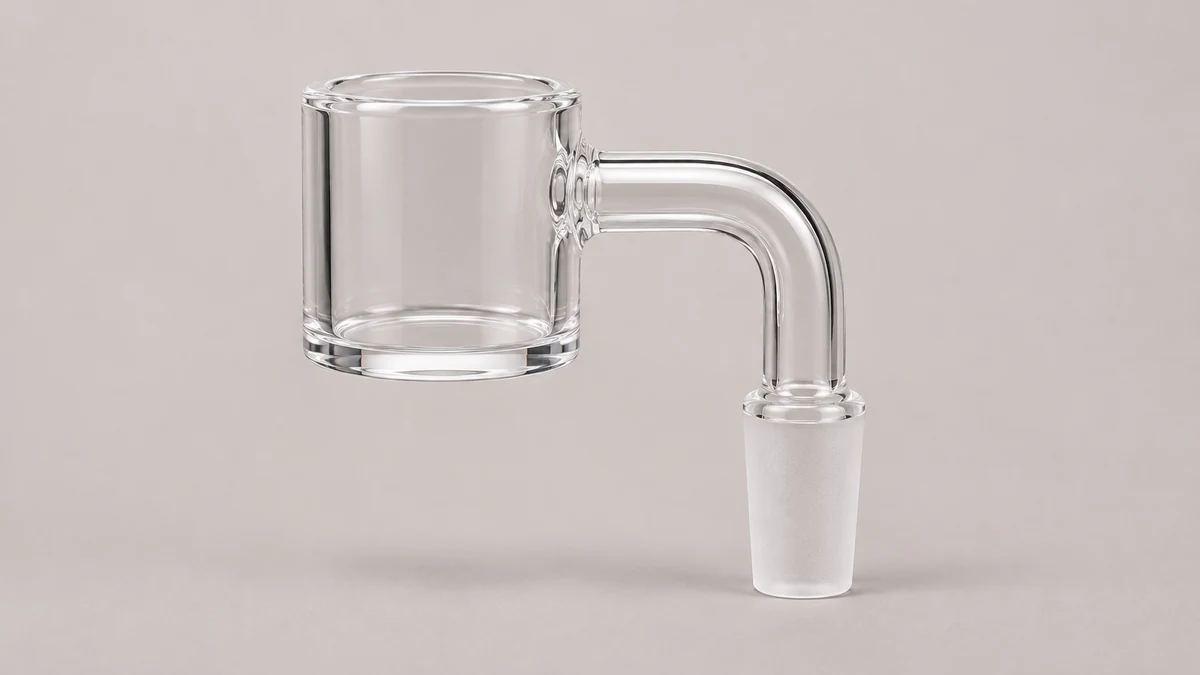
Imagine two clear glass parts sitting beside a rig after everything has cooled. From above, the pieces both look like small round cups. In a side photo, the first cup narrows straight into a stem underneath it, while the second stays cylindrical and meets a narrow arm at one side. In the first photograph, the opening under the cup lines up with the cup itself. In the second, the joint sits away from the cup center. The side photo supplies the feature that the top photo hides.
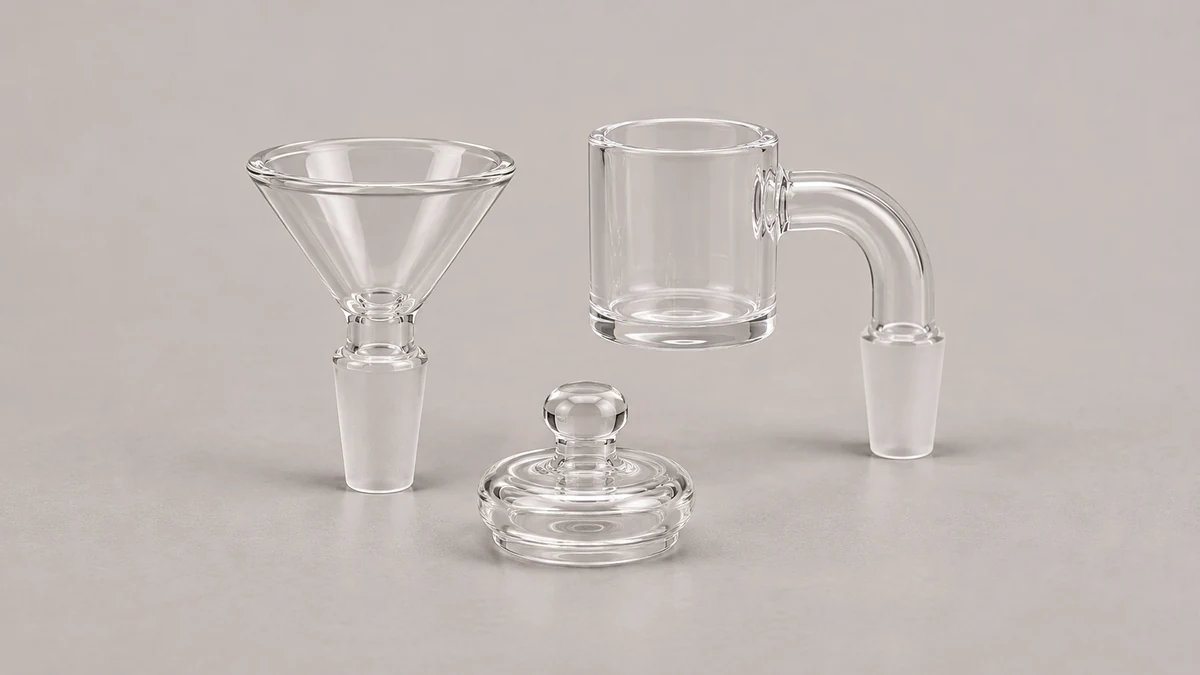
One listing might also put a loose cap beside the second part. An overhead photo makes the cap look like another short cup, especially if it is resting upside down. The useful clue is where each piece contacts another part. A cap rests at the rim of its matching attachment. The attachment joins the rig at the tapered connector. An inset cup may rest inside a separate holder. A single image with the pieces nested can obscure all three boundaries, which is why a clear side photo of the detached piece matters.
📐 2.1 Where the Stem Meets the Joint
A ground glass joint often has a frosted surface where the two parts mate. On a male joint the contact surface is outside the taper, while a female joint receives the mating taper inside the opening. Look for the complete contact surface in a side view before relying on a nominal joint size. An image that shows only the upper stem may leave both the size and the joint orientation unclear. The listing or maker’s drawing is the appropriate reference for the stated size.
🧵 2.2 Offset Arms on Angled Joints
An offset arm moves the cup away from the joint axis. It can bend between the cup and the taper, and the angle can differ between versions. To compare empty parts, note where the taper points and where the bucket would sit relative to the rig body. Two bangers with the same nominal joint size can position the cup at different heights or different distances from the glass beside it. A side view of both parts laid out separately can show whether the designs leave similar clearance.
📏 2.3 Read the Joint Size and Angle Separately
A size marking describes the mating interface. The angle shown in a product drawing describes the orientation of the cup relative to that interface. Imagine two empty attachments with the same stated joint size. A side view can show that one bucket sits directly above the taper and the other extends much farther outward. That difference may determine whether the bucket sits near the side of a compact rig or clear of it. Where a listing gives an angle, check the drawing to see which two lines the seller uses to define it.
For a photo comparison, keep the opening of the rig in view along with the loose attachment. A close-up of the cup alone will hide the distance between the attachment and the body. If the seller is describing a part shown beside a larger rig, also check whether the photographed joint is the one named in the listing. A display setup can contain more parts than the package being described.
🥣 3. A Liner Sitting Inside Another Cup
A photograph of two concentric rims may show a small insert seated in a larger cup. Ask for a view that shows the loose parts individually or a parts drawing that labels the insert. If the listing only shows the top, the smaller rim might belong to a separate insert, a cap turned upside down, or part of the same piece. These possibilities affect what a replacement listing would need to include. The presence of two rims by itself says little about whether the inner piece has an independent connector.
🔬 3.1 Loose Inserts vs Fused Liners
If a maker describes a liner as removable, look for an exact part number or an image of the separated pieces. Fused features can create a similar nested outline from above, especially when transparent walls overlap in the photograph. A line where two surfaces meet is useful evidence but is not conclusive. Ask whether the inner piece is supplied separately and what it mates with. A photograph that leaves the rim or lower cup out of frame may still be useful for color and shape while leaving the replacement question unresolved.
🧢 4. A Cap With No Rig-Facing Tapered Connector
A cap is identified by how it sits on a matching rim. It may have a knob, a short projection, or a shaped underside. A projection by itself can look like the start of a joint in a tightly cropped image. Look for a view that shows the full underside and the rim of the part it fits. The guide to quartz banger and carb cap fit explains why the cap’s seating surface and the rim profile belong in the same comparison. A cap can be included in a set even though the attachment is the piece that mates with the rig.
🟠 4.1 Check Which Rim the Cap Is Shaped to Meet
Seen from above, a cap and a shallow insert can both show a round outer edge. Turn to the profile and look at the contact surface instead. A cap can have a broad shoulder above the rim it is intended to meet, while an insert may have a narrower body that sits inside a holder. For a missing cap, record the matching cup model as well as the cap’s visible form. For a missing insert, record the holder model. These are different questions even when the photographs make the pieces look alike.
🔧 5. Fixed vs Removable Construction
Check for two different separations. One is between the cup and its stem or arm. The other is between the complete attachment and the rig. A cup and stem can be permanently joined to each other while the attachment as a whole is removable at the rig joint. If the catalog calls a piece “fixed,” ask which connection the word describes. It may refer to a part of the main glass body or to two sections within a single removable assembly.
🏗️ 5.1 Fused Construction Signals
In a photograph of transparent hardware, highlights can look like seams and a ground finish can blend into a light background. A well-lit side view helps locate the contact surface, but the manufacturer’s assembly drawing or part description is a better reference for whether two sections are joined permanently. If the piece is empty and cool, photograph it as the manufacturer documents it. Avoid forcing a joint apart to settle a question about how it was made.
📝 6. Reading Maker Drawings and Exact Item Names
Thick Ass Glass publishes separate categories for slides, downstems, and quartz items. Its own comparison of bowls and bangers also treats the two as separate attachment types. Those pages are useful for seeing the terminology a maker applies to its own parts. When an unlabeled photo shows a direct stem or an offset outlet, the catalog images give you likely terms to compare. Match the geometry first, then confirm the individual part number and joint details.
🗂️ 6.1 Matching Catalog Categories to Listing Photos
A material category alone can still leave the part ambiguous. A page grouped under quartz may show a complete jointed attachment alongside a liner or cap. Start with the picture or drawing that shows which piece meets the rig. Then read the item name and included-parts list together. Some listings describe the complete set in the title and photograph the individual parts in separate frames, so the photograph and the title may be accurate while answering different questions.
🖼️ 7. Platform-Specific Cups vs Standalone Jointed Attachments
The Ispire Daab manual illustrates a different arrangement. It identifies a platform-specific cup and shows it as separate from the glass attachment of the powered device. A standalone photograph of the cup leaves out the holder that locates it. If the listing names a powered platform, check the exact model and part number, and confirm whether the listing is for the cup, the holder, or the separate glass assembly. A round rim and closed bottom can look familiar while the underlying connection is specific to that device.
📦 7.1 Confirm What Comes With Replacement Glass
Some parts lists use “glass” for the assembly visible on the outside of a powered device. A smaller insert can be called glass as well, especially in a reseller’s short title. Check the quantity and item name in the parts list, and look for a drawing that puts the assembly and cup in separate positions. If the listing is used, ask which loose pieces will actually be included. A photo of the assembled device may show the external glass while the insert remains out of sight.
A photograph of a cup with a ruler can show size, but it gives little evidence about whether the cup belongs to a particular holder. Where several revisions of a powered device exist, match the model and revision first. For an unlabeled standalone attachment, the joint and the direction of its outlet remain the more useful starting points.
💬 8. Unlabeled Listing Photos and Reader Disagreement
A photo request works best when each frame answers one question. Take a side view to show how the stem or arm aligns with the cup. Add a clear view of the joint from the end to show where the mating surface is. If the listing mentions an insert or cap, ask for a view that shows it next to the part it sits in or on. A second overhead shot can show whether the cup narrows to a central opening or meets a passage at the side. These details are the pieces of evidence that are usually missing when owners send in a tightly cropped identification photo.
🧭 9. A Practical Checklist for Incomplete Listings
Ask which part joins the rig, which part sits inside another piece, and whether the model name in the caption refers to the whole system or the attachment. If the photo and catalog use different names, compare the geometry before treating the terms as interchangeable. The comparison of dab rigs and bongs gives broader context for the similar-looking glass shapes and overlapping vocabulary. Use the actual attachment drawing or the matching part number for fit.
📋 9.1 Read the Included Parts List Against the Images
Consider a secondhand listing that shows a bucket with a side arm in one image and an empty glass cup beside a cap in another. If the caption calls all of them a “bowl set,” ask whether the listed item includes each piece and which image shows the rig-facing connector. The small cup could be a liner for the bucket, or it could belong to an entirely different system. The answer changes what needs to be photographed next. Ask for a view of the small cup beside its holder or the exact part number on its original packaging.
Make a short record when the listing provides good information. Use the full part name, the connection type and nominal size if known, and the name of any companion part. Note whether the side arm is centered on the joint axis or offsets the cup. If a cap is shown, describe its seating surface and the rim it meets. That record makes later questions easier because “replacement bowl” by itself can refer to several pieces you have already distinguished.
For a listing that shows only the cup opening, ask for the profile before naming the attachment. For a profile that cuts off the end of the stem, ask for the full taper and the matching rig joint. If a package includes several pieces, ask which ones are loose and which arrive as a single assembly. Those three requests work even when the listing has no drawing and the photographs are all you can compare.