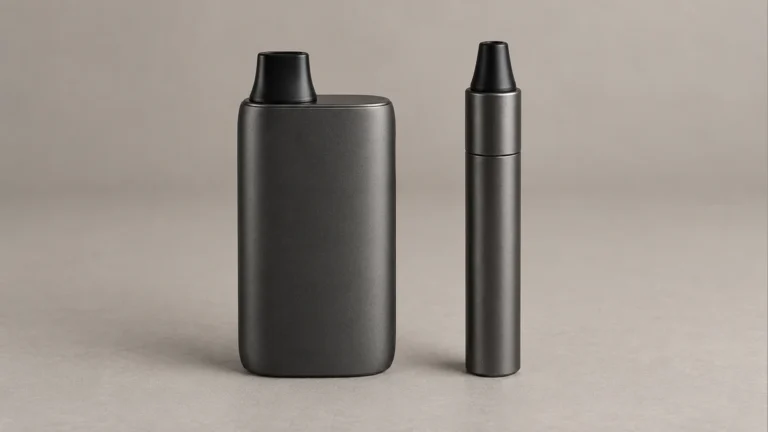
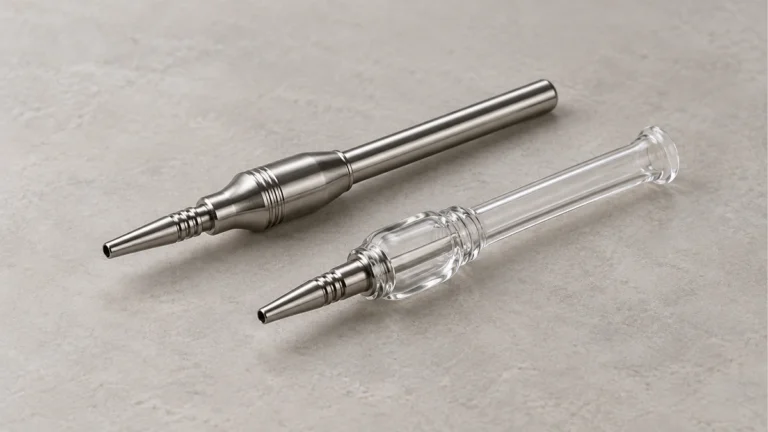
A wax pen kit is rarely one single device. It’s a small collection of separate parts — a battery, a heating chamber, a mouthpiece, a loading tool, a charging cable, and a handful of cleaning supplies — that all have to agree with each other before the kit actually works the way it’s supposed to. Confusion usually starts here: two kits can look nearly identical in a photo and still use different thread sizes, different coil types, or different charging ports. Knowing what each part does, and how it’s supposed to fit the others, makes it much easier to identify what’s missing, worn out, or mismatched when something in the kit stops cooperating.
🔌 1. What’s Actually In the Box
Most wax pen kits ship with the same basic groupings of parts, even if the exact materials or shapes vary by brand. A typical box includes:
- A battery or “mod” — the cylindrical body that holds the charge and often has a button or auto-draw sensor.
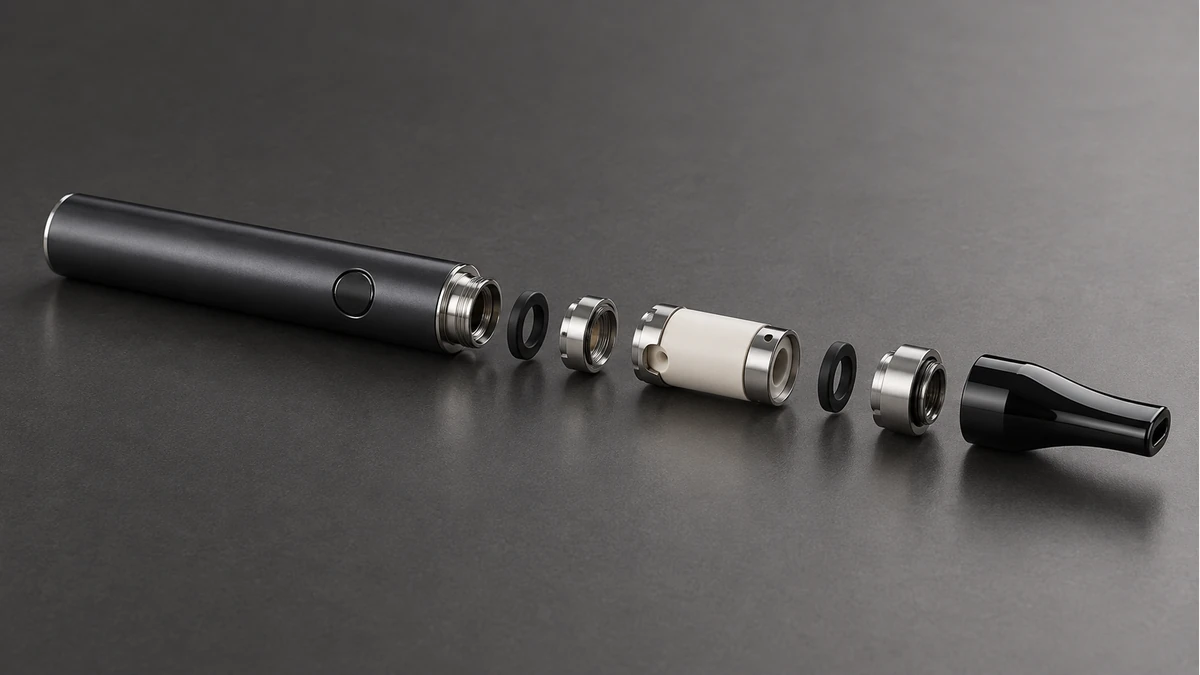
- An atomizer or chamber — the small heating unit that screws or clicks onto the battery.
- A mouthpiece — sometimes fused to the chamber, sometimes a separate piece that slides or screws on top.
- A loading tool — a metal or silicone-tipped pick used to move material into the chamber.
- A charging cable — usually USB, though the port style differs between kits.
- Extra coils, O-rings, or a small silicone storage jar in more complete kits.
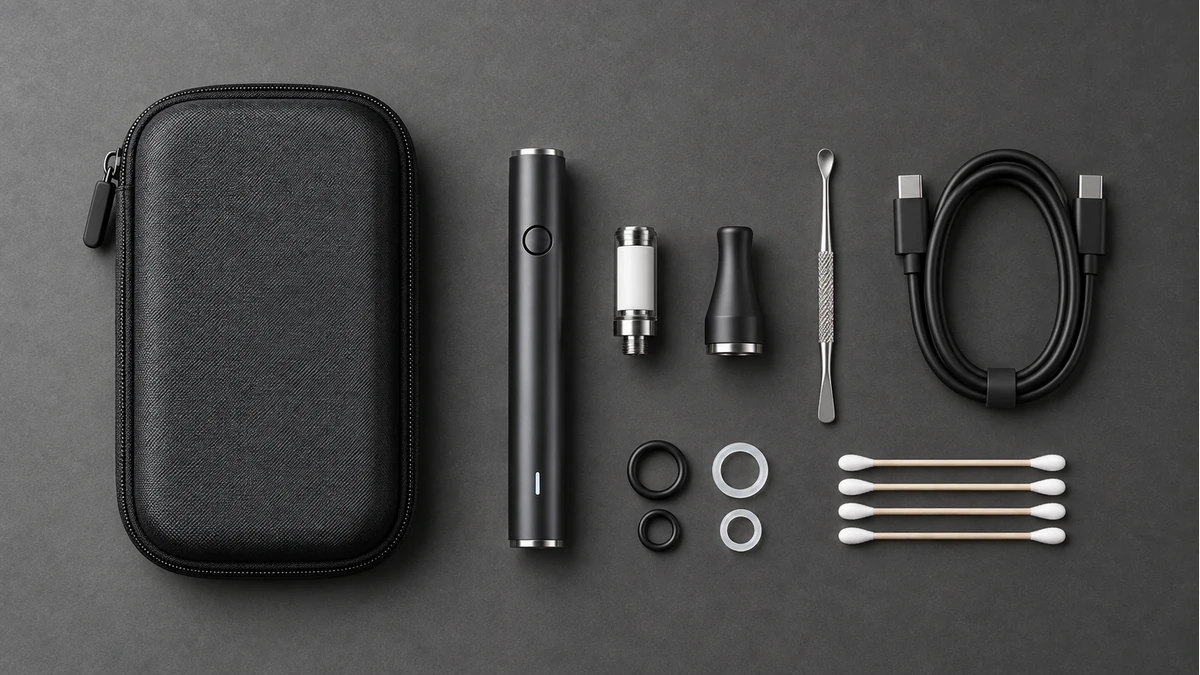
Reading a kit this way — as a set of independent parts rather than one sealed unit — is the fastest way to figure out which piece is causing a problem later, since almost every complaint about a wax pen traces back to one specific component rather than the device as a whole.
🧭 2. Battery and Power Components
The battery is the part most people focus on first, but the details that matter for compatibility are quieter: connection type, voltage adjustability, and activation style. Most batteries use a 510 thread connection, which is a screw-on standard shared across many vape categories. Some brands instead use a magnetic pin connector, which only pairs with chambers designed for that exact magnet placement.
🔎 2.1 Activation and Heat Settings
Batteries are either button-activated or draw-activated (heating starts automatically when you inhale). Button models often include variable voltage or wattage settings, sometimes with a preheat function that warms the chamber gradually before full power kicks in. A preheat function matters mainly for thicker material, since a sudden jump to high heat can scorch the outer layer before the center ever warms up.
🧠 2.2 Charging Ports and Cables
Charging cables are one of the more common points of confusion in kit troubleshooting threads. Older or smaller batteries often use micro-USB, while newer kits are shifting toward USB-C. A cable that “fits” but delivers the wrong current can charge painfully slowly or not at all, so it helps to keep the original cable with its matching battery rather than assuming any USB cable will do the job.
🔋 3. Chamber and Coil Types
The chamber is where material actually vaporizes, and it’s also where kits differ the most from one another. Coil-based chambers use a heating wire wrapped around a wick or ceramic core, while coilless designs rely on a solid ceramic or quartz dish that heats directly. Each style transfers heat differently.
🔎 3.1 Ceramic vs. Quartz vs. Titanium
Ceramic coils tend to heat more evenly and retain warmth longer after the button is released, which can affect how much residue builds up between uses. Quartz chambers heat up faster and cool down faster, which some people prefer for shorter sessions. Titanium coils are less common in newer kits but still show up in older or budget models. None of these materials is universally “better” — they behave differently, and a chamber swap between materials can change how the whole kit performs even if the battery stays the same.
🧠 3.2 Chamber Depth and Tool Fit
Chamber depth varies more than people expect, and it directly affects which loading tool will actually reach the bottom of the well. A tool that’s too short leaves material stranded near the rim, where it can burn unevenly or drip down the outer wall of the chamber instead of settling into the coil.
🧩 4. Mouthpiece Fit and Threading
The mouthpiece looks like a simple part, but it’s a frequent source of loose-fit complaints. Mouthpieces are made from glass, hard plastic, or silicone, and each material handles heat and vapor path differently. Glass tends to stay cooler to the touch but is more fragile; silicone tolerates drops better but can retain odor over time if not cleaned regularly.
Fit problems usually come down to one of two things: the wrong drip-tip diameter for the chamber’s opening, or a worn-out O-ring where the mouthpiece meets the chamber. A slightly loose mouthpiece won’t just wobble — it can also pull in extra air around the seal, which changes vapor density and can make draws feel weaker even though nothing else in the kit has changed. the wax pen hardware guide
🧼 5. Loading Tools and Dab Tools
Loading tools are easy to overlook, but the shape of the tip matters more than it seems. Flat metal tips work well for scooping firmer material, while a rounded or silicone-coated tip is gentler on ceramic coil surfaces and less likely to scratch the coating inside the chamber.
A recurring point of confusion is that many kits label their tools generically — “dab tool” or “wax tool” — without specifying which chamber size they’re built for. If a tool feels too wide to reach the coil, or too narrow to scrape material off the chamber wall, it’s worth checking whether the tool actually shipped with that specific kit or was substituted from another one.
📐 6. Cleaning Parts: Swabs, Brushes, and Alcohol
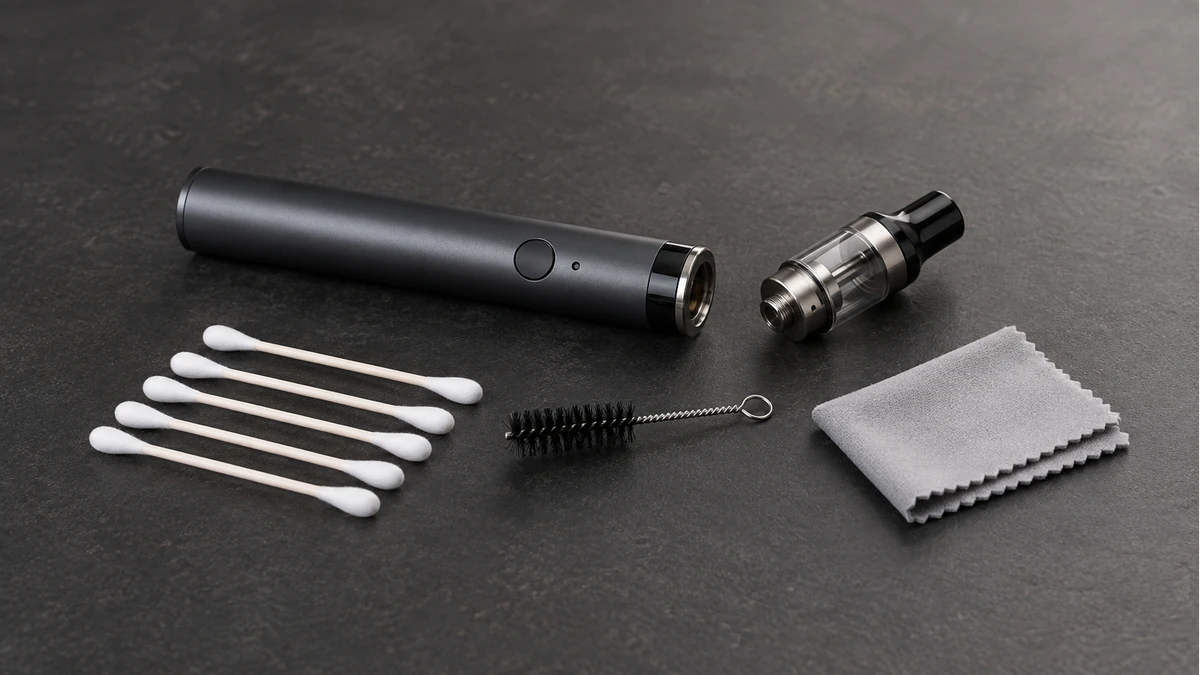
Cleaning supplies are often the smallest items in the kit, but they have an outsized effect on how the whole device performs over time. Isopropyl alcohol swabs, cotton pipe cleaners, and small wire or nylon brushes each target a different kind of buildup.
🔎 6.1 Where Residue Actually Builds Up
Residue collects fastest in three spots: the inside wall of the chamber, the threading where the chamber meets the battery, and the airway inside the mouthpiece. Left alone, this buildup can restrict airflow, cause a burnt taste that wasn’t there before, or make the chamber and mouthpiece harder to separate for cleaning.
🧠 6.2 What Not to Clean Together
Batteries should never be submerged in alcohol or water — only the chamber, mouthpiece, and any detachable tools should get wet cleaning. Wiping the battery’s threading with a dry cloth or a barely damp swab is usually enough, since moisture inside the battery housing is one of the more avoidable ways a kit stops working entirely.
🔍 7. Cases, Cables, and Storage Compatibility
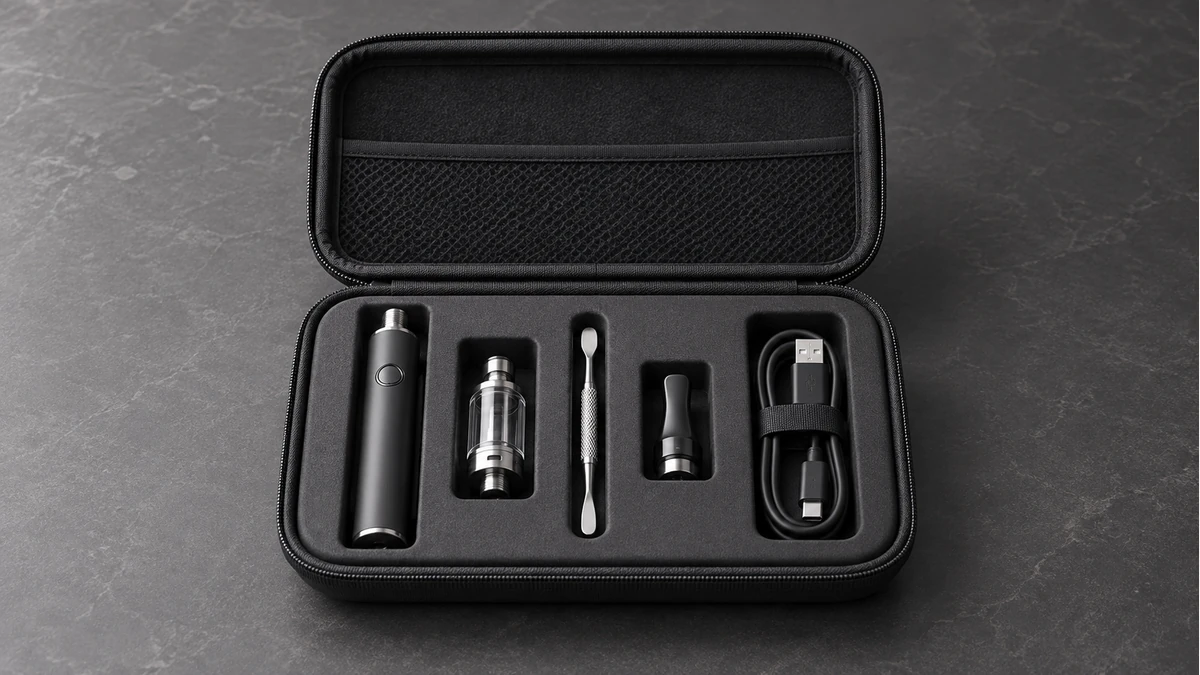
Storage components are the part of a kit that gets ignored until something goes missing or gets damaged. A zippered case keeps loose parts — coils, O-rings, the loading tool — from scattering, while a small silicone jar is meant for unused material rather than for cleaning residue.
Cables deserve the same attention as the case. A charging cable stored loose in a bag can fray at the connector end faster than one coiled and kept in a dedicated pocket, and a frayed cable is a common, quiet cause of a battery that “charges intermittently” for no obvious reason. Keeping the original cable paired with its battery, rather than mixing cables between multiple devices, avoids a lot of guesswork later. the guide to dab pen parts
⚙️ 8. A Complete Kit Is a Chain of Compatible Interfaces
A kit can contain every expected object and still be functionally incomplete. The chamber must fit the battery connection, the mouthpiece and seals must fit the chamber, the cable must match the charging input, and the tool must reach the chamber without scraping a heater or seal. Evaluate those interfaces before counting accessories.
🔎 8.1 Battery and Chamber Documentation Belong Together
Keep the model instructions for both parts. The thread or magnetic mount shows how they attach, but it does not prove that the battery’s output range matches the chamber. A replacement chamber should be identified by the maker’s compatibility list, not by a similar exterior diameter.
🧠 8.2 Cleaning Pieces Need Separate Roles
Dry swabs remove loose residue from accessible surfaces. A small brush can clear crumbs from an unpowered, cool chamber when the manual permits it. A cloth protects the body finish. None of those items means the entire device can be soaked. The powered body, charging port and sealed electronics stay outside any liquid-cleaning process.
📏 8.3 Spares Should Be Identifiable
Extra seals and screens are useful only when their location is known. Store each spare in a labeled compartment or its original bag and note the part it serves. Similar-looking rings can differ in diameter, thickness and temperature exposure. Installing an arbitrary ring can change airflow or place stress on glass.
🧪 8.4 The Case Should Preserve the Clean State
A fitted case prevents the tool, chamber and mouthpiece from striking one another. Give used cleaning supplies a separate disposable pocket, keep the cable away from residue and let every cleaned part dry before the case is closed. Organization is not decorative here; it keeps contamination and impact from moving between components.
🧰 8.5 Inventory the Kit by Function
Lay every component on a clean surface and group it under power, heating, airflow, handling, cleaning or storage. This map reveals duplicate accessories and missing interfaces. A second loading tool does not replace a missing chamber seal, and an extra cable does not prove that its power specification matches the battery. Keep the component names with the manual so future replacements can be compared against the original kit instead of memory.
When a part wears out, replace the smallest documented component that actually failed. Swapping the entire chamber, battery and mouthpiece at once may restore operation, but it hides the cause and creates new compatibility questions. A function-based inventory makes one-variable troubleshooting possible.
Finally, keep consumable cleaning items distinct from replacement hardware. Swabs and wipes are discarded after use; seals, screens and chambers need exact part identification. Mixing those categories in one loose pocket makes it easier to discard a real component or reinstall a contaminated item.
✅ 9. Troubleshooting Common Kit Mismatches
Most wax pen kit problems fall into a short list of patterns once the parts are understood individually.
- Battery light blinks but the chamber never heats: usually a threading mismatch or a chamber that isn’t seated fully into the connector.
- Loading tool doesn’t reach material at the bottom of the chamber: a depth mismatch between the tool and that specific chamber design.
- Mouthpiece feels loose or draws feel airy: a worn or missing O-ring at the mouthpiece-to-chamber seal.
- Charging works slowly or not at all: a mismatched or damaged cable rather than a dead battery.
- Flavor turns harsh after regular use: residue buildup in the chamber or mouthpiece airway that hasn’t been cleaned recently.
Working through this list in order — connection, tool fit, seals, cable, cleanliness — covers the majority of issues people run into, since each symptom tends to point back to one isolated part rather than a fault with the whole kit. the dab-pen cleaning sequence
The most useful habit with any wax pen kit is treating it as a set of replaceable, mix-and-matchable parts rather than a single fixed object. Once you know which piece controls power, which one controls heat, and which ones are just there for fit and upkeep, most “broken kit” situations turn out to be a five-minute fix involving one small component — not a reason to replace the whole setup.