The joint size advertised on a modular water pipe can describe the side accessory port while the removable mouthpiece uses a completely different connection. That is why a replacement section can look right in a photograph and still belong to the wrong system. Identify the connection at the broken section itself, then match its family, connector and seal.
For a modular body used as a dab rig, there are usually two separate questions. What attachment belongs at the small inlet on the side? And what holds the larger glass sections of the body together? Keeping those questions separate makes a replacement search much less confusing.
🗺️ 1. Draw Two Connections on the Same Body
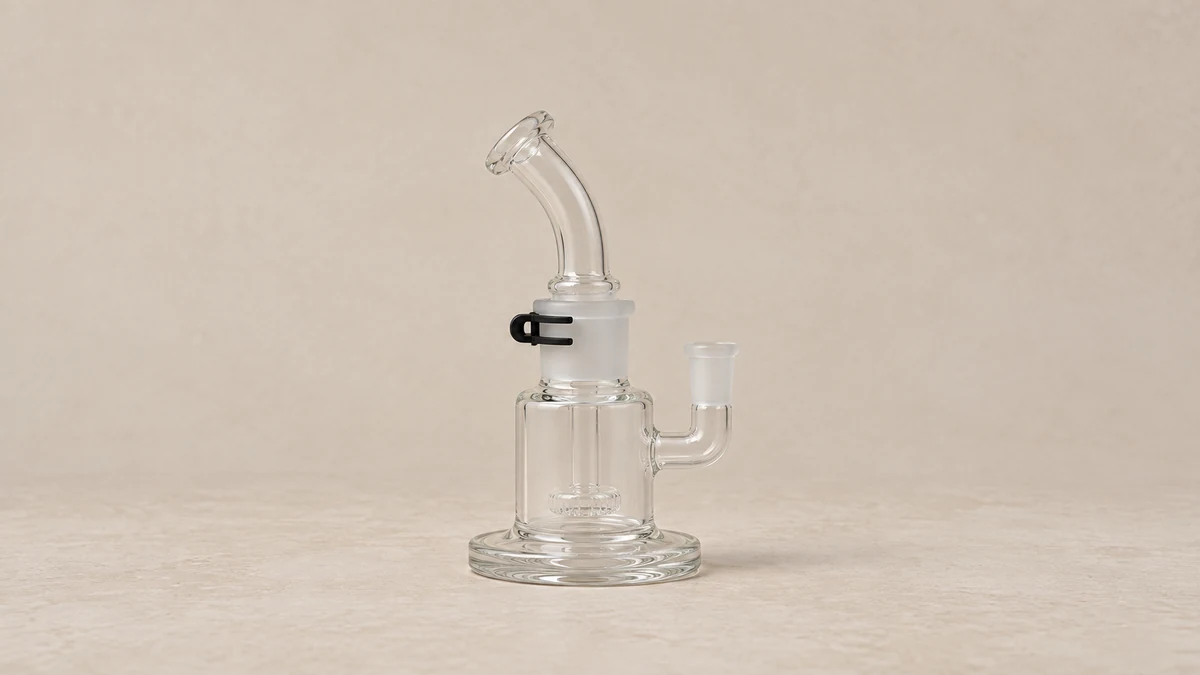
Start with a side photograph of the complete, cool and empty piece. Mark the point where the nail or banger meets the body. Then mark the seam where a mouthpiece or intermediate section separates. On some designs the two marks are close together, but they identify different interfaces and different replacement parts.
A catalog’s small joint-size field may refer to the first mark. The larger structural joint may be described farther down the page, under the module family or connector system. Treat the short specification field as incomplete until you know which connection it labels. Its location beside a photograph of the whole piece does not make it a specification for every seam.
📍 1.1 Keep the Side Inlet in Its Own Entry
A description such as “female accessory inlet on the side of the base” locates the opening without assigning a size you have not verified. Make another entry for “upper body connection below the removable neck.” This simple distinction helps when the same parts page uses joint, connector and opening in several contexts.
The dab rig component map gives names to the main body and loose attachments. For modular replacements, add the separable boundary to that map. A welded tube inside the base and a removable tube above it can be visually continuous while having very different service options.
🪟 1.2 Trace the Neck All the Way to Its Lower End
A removable mouthpiece may include a broad lower section that disappears inside a collar when assembled. A photograph showing only the upper bend leaves that interface hidden. Ask for a detached view of the entire neck, alongside the base opening it is supposed to meet.
The important detail is the end that joins the body. Two necks with the same comfortable-looking upper bend can have different lower interfaces. Once the complete outline is visible, the replacement discussion can focus on the actual mating surfaces instead of treating the shared mouthpiece shape as evidence of a match.
📏 2. See How Two Valid Sizes Can Describe One Rig
GRAV’s STAX product range provides a useful documented example. Its modular dab rig bundle lists a 14mm accessory joint. Separately, its 34mm plastic joint clamp is specified for securing two interlocking 34mm STAX components. These numbers identify different jobs within the product system. Neither number invalidates the other.
The practical mistake would be using the accessory figure to search for an upper mouthpiece connection. A part can be correctly described as fitting a small side inlet while having no relationship to the body’s wider structural coupling. Read the module description alongside the base specification before treating the two listings as inconsistent.
🔍 2.1 Check the Measurement Location Before the Number
When a seller provides a dimension, ask what surface it describes. Outside tube diameter, a tapered joint designation and the opening through a connector are separate measurements. A ruler laid across the outer glass wall does not necessarily establish the named joint size. A drawing that points to the interface is more useful than a bare number.
If the product record leaves that location unclear, retain both possibilities in your notes. You can ask, “Does this dimension describe the body joint or the side accessory socket?” That question usually produces a more useful answer than sending a photograph with a guessed diameter attached to it.
📋 2.2 Keep Each Dimension Beside Its Component Name
A compact note can prevent several mistakes: accessory inlet, upper base joint, lower mouthpiece joint, and any intermediate connector. Put a verified dimension beside the named location. If a field is unknown, leave it blank until the product documentation supplies it. Do not copy the first dimension across the whole list.
That matters when comparing a complete kit with an individual spare. The kit page may emphasize the attachment included at the side, while the spare page emphasizes its structural coupling. Reading the two descriptions as entries for different components can resolve an apparent contradiction without assuming either page is wrong.
🔗 3. Recognize the Actual Connection Mechanism
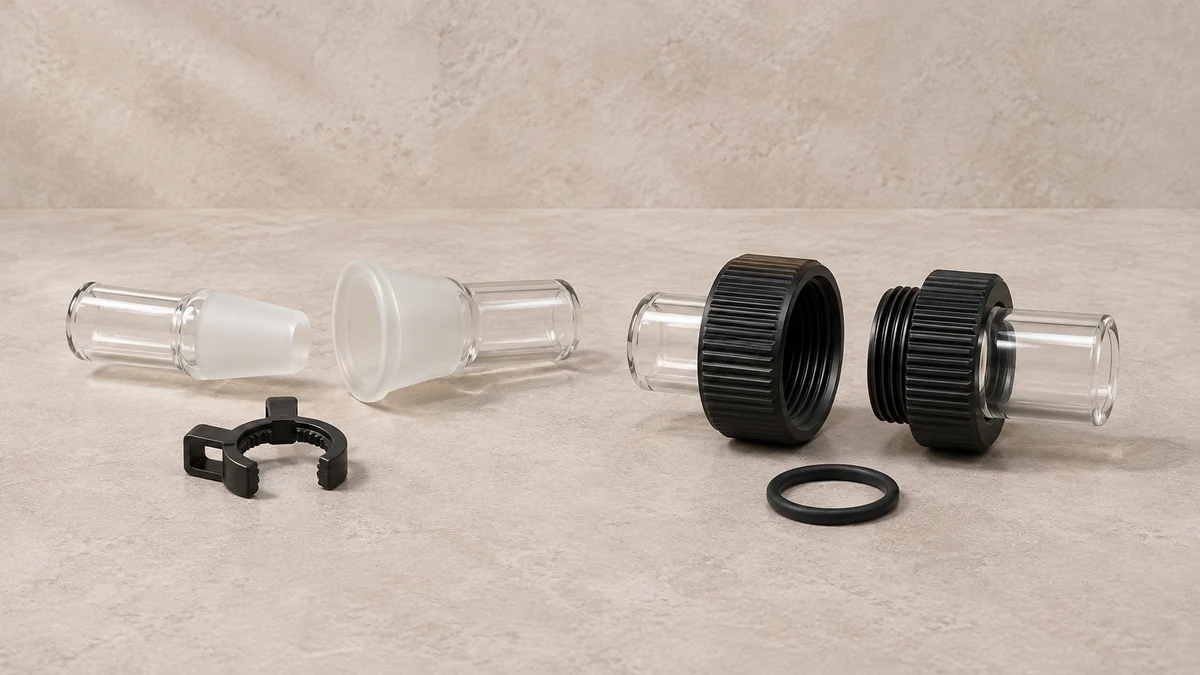
A frosted taper, a threaded collar and a sleeve with a gasket should not be treated as equivalent simply because each joins two pieces of glass. Look for the features that perform alignment, retention and sealing. Different designs divide those jobs between different components, and the loose part on the table may perform only one of them.
Prism’s current FAQ describes its Halo as a threaded connector with a central silicone gasket. It also distinguishes the MINI and Classic families and states that their components are not interchangeable. That is a specific compatibility boundary within one maker’s range, even though the general product description calls both families modular.
🧩 3.1 A Collar and a Seal Can Be Separate Service Parts
If a collar is present, record whether the seal remains inside it or comes away separately during the approved disassembly. Keep the pieces in their original relationship. A loose gasket without its location is harder to identify, particularly when a second seal elsewhere in the assembly has a similar color and outline.
A retaining clip is another distinct part. Its presence shows that an assembly uses an external retention component, but it does not establish the compatibility of the glass underneath. Matching the clip alone leaves the mating surfaces unresolved. Keep the glass module, retaining part and any gasket together in the replacement description.
🏷️ 4. Match the Product Family Before Matching Appearance
Modular means that specified parts of a system can separate and recombine. The useful boundary is the system identified by the maker. A brand can sell multiple families with different connectors, and a compact version can use a smaller interface than the original even when the silhouettes look almost identical in a catalog.
Check the family name on the order record and the replacement page. A word such as mini may identify a separate hardware system rather than a shorter version of the same tube. Preserve the full designation, including any generation or connector name. Removing those details from a search can return visually similar parts that answer a different fit question.
🗃️ 4.1 Old Photos Can Show an Earlier Coupling
A development photograph, an older review and a current retail listing may depict different connectors. Use the image to identify visible features, then establish which version the replacement page supports. The date an owner posted a photograph is useful context, but the original product identification remains the stronger clue.
This matters particularly with secondhand glass. A previous owner may have mixed parts, kept an older collar or replaced only the neck. The complete assembled photograph does not show the history of every component. Ask for the part names or order records that accompany the actual pieces being offered.
🧱 5. Separate a Body Module From an Accessory Adapter
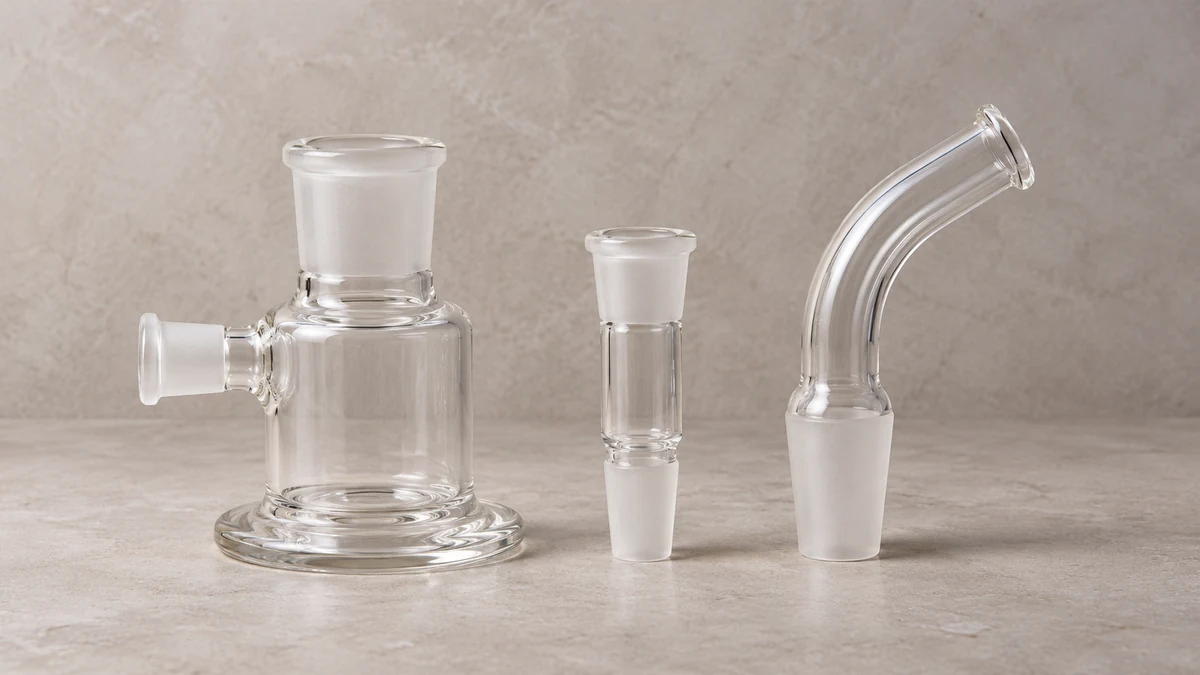
An accessory adapter sits between an attachment and the rig inlet. A body module replaces or extends a section of the main glass assembly. They solve different fit problems. An adapter specified for a side port does not automatically provide a structural connection for an upper chamber, even when it changes between two familiar joint sizes.
The difference becomes clear when you consider where the weight goes. A body connection carries the section above it. Its intended retaining hardware and mating surfaces belong to that arrangement. A small adapter selected for its end sizes may never have been specified to serve as the junction between larger glass modules.
The guide to dab rig adapters and their two interfaces explains the attachment side of the problem. Read a body’s module instructions separately. Where an official cross-system adapter exists, its documentation should name the systems and the position it is intended to connect.
🧷 5.1 An Adapter Needs an Intended Location
An adapter advertised as connecting two named systems still needs a position in the assembly. It might connect a mouthpiece to a base, join a particular module, or adapt an accessory socket. Keep that location in the specification rather than shortening the description to the two brand names.
A maker’s explicit adapter listing can establish an approved exception to a general family boundary. It cannot establish that every component from the two ranges becomes interchangeable. Use the listed ends, location and restrictions together. If the documentation does not identify the proposed arrangement, the cross-system fit remains unresolved.
🧼 6. Inspect the Exposed Connection During Approved Disassembly
With cool, empty hardware separated as the maker permits, you can usually see more of the interface. Look for a chip on a glass rim, debris on an accessible mating surface, a gasket outside its intended seat or a visibly damaged retaining component. Record the observation before trying to correct it.
🔦 6.1 Describe a Gap Without Diagnosing Its Cause
A section sitting at an angle can have several explanations. The parts may be mismatched, the connector may be obstructed, or a piece may be damaged. A photograph can establish that the seam is uneven. It cannot reliably identify which explanation is correct from one angle, especially with reflections across clear glass.
Take another view at the same seam and keep the base supported. Avoid tightening farther simply to eliminate the visible gap. If the approved fit cannot be achieved gently, use the maker’s support process with the individual part details. A connector that looks closed in a photograph is not a substitute for an identified matched assembly.
Cleaning instructions also belong to each component. A direction for plain glass does not necessarily apply to a collar, gasket, decorative finish or another material attached to the glass. Preserve that distinction when preparing pieces for inspection or storage. The purpose is to expose the connection clearly without adding another change to the fault.
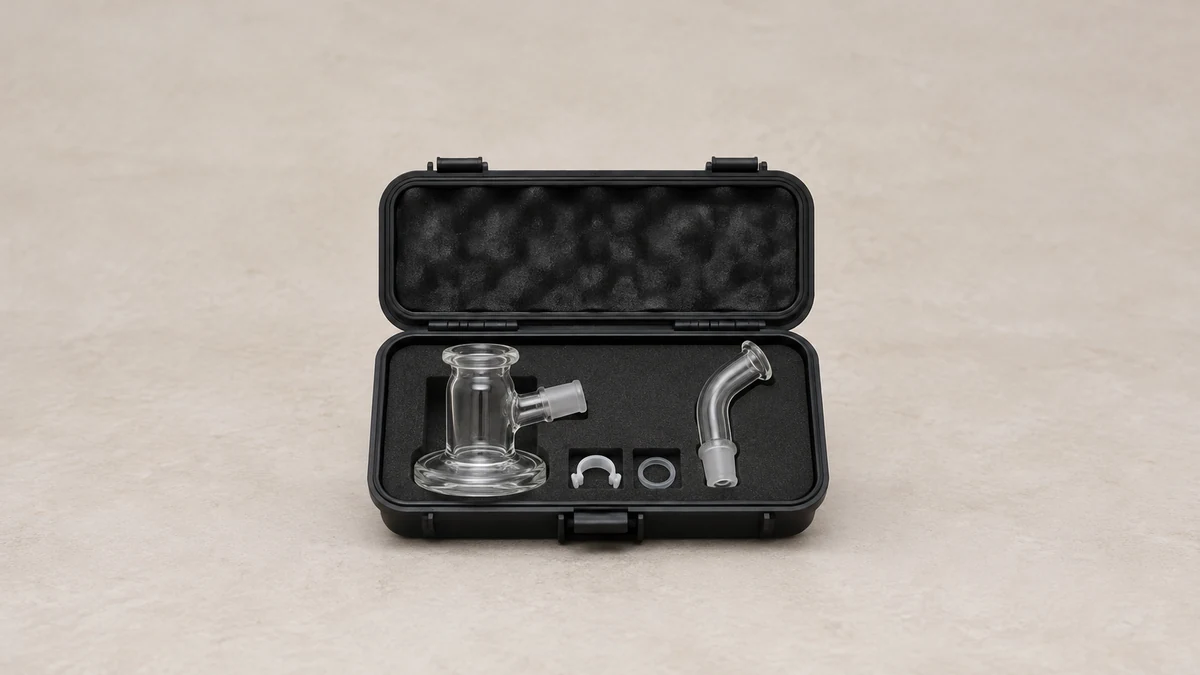
📦 7. Keep Separated Sections Traceable in Storage
Once a body comes apart, its sections can lose their association surprisingly easily. Two clear mouthpieces in the same drawer may look alike until the lower ends are compared. Store each module with a note identifying its family and location, and keep small retaining parts where they cannot become mixed with another set.
A fitted case should support the glass sections individually. A connector left projecting from a section can change the space that section needs, so check the packed outline of the actual pieces. The dab rig case guide explains why nominal overall height does not answer every clearance question.
📝 7.1 Photograph the Separated Set Before Packing It
A simple overview showing the base, neck, intermediate modules and retaining parts becomes a useful reference later. Add closer photographs of the mating ends. This is particularly helpful when several unmarked glass pieces share a case, or when the owner needs to tell a support team which component is missing.
The overview also prevents a small part from being assigned to the wrong interface after cleaning. A clip beside the base in a photograph may actually belong at an upper seam. Keep the close view and the complete arrangement together so that the location can be reconstructed without relying on memory.
🧳 7.2 Measure the Actual Separated Assembly
A removed neck may be shorter than the complete rig while remaining awkward to pack because of its bend. A wide coupling can also be the largest part of a short section. Measure the actual part’s outer outline when arranging support in a case, including any fitted connector the instructions say should stay attached.
Keep separate sections from contacting one another as the case moves. Their mating ends need protection too, even when the larger glass bodies sit comfortably in the available space. A storage arrangement that works for a single fused body may need different compartments for the same body divided into several modules.
✅ 8. Describe the Replacement by Its Position and Its System
Compare two requests. “I need a 14mm top” names a number without locating it. “I need the removable mouthpiece above the base, from this product family, with this connector shown at its lower end” identifies a component and gives the recipient something concrete to match. Add the verified dimension once its location is established.
A complete replacement request should include the maker and family, the module’s position, photographs of both mating components, and the connector or seal that belongs between them. If the side accessory joint is also relevant, list it separately. That keeps a correct specification for the banger from being mistaken for the specification of the upper glass.
When the reply identifies a replacement, save the part designation with the original body record. An answer tied to both the system and the location remains useful after the current listing changes. The next person looking at the separated glass should be able to tell which opening the specification describes.