A replacement e-nail coil can have the right-looking plug and still be wrong for the controller on your desk. Before connecting it, match the controller model and revision, the documented electrical pairing, the coil’s power version, and the way the heater is supported around the nail. A matching bucket diameter answers only one part of that question.
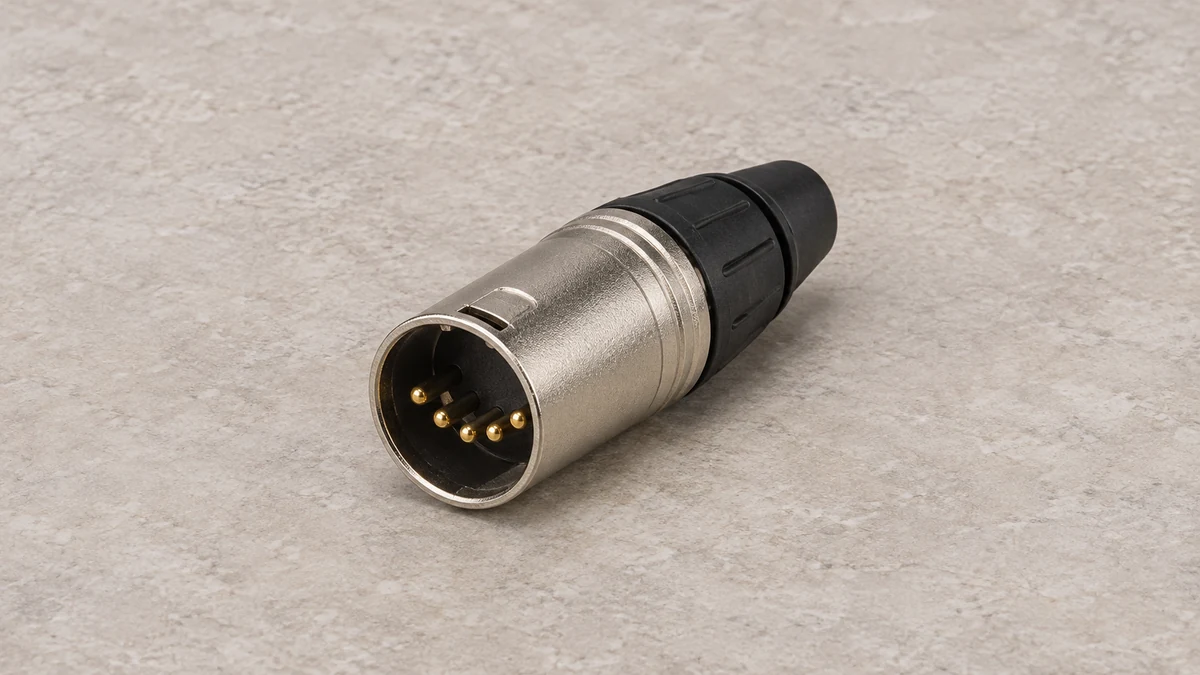
This becomes frustrating when the original coil has failed and the replacement listing looks almost identical. You can count five contacts, recognize the braided cable and see the same general shape of metal winding. Those observations help describe the spare. They leave several important details inside the assembly unresolved.
🔌 1. Separate the Connector Shell From Its Electrical Assignment
The shell is the metal housing you can hold. It provides alignment and a mechanical connection. The pin assignment describes the job of each contact inside it. Two manufacturers can use a similar shell while assigning those contacts differently. A connector that enters a socket smoothly therefore supplies very limited evidence about an unfamiliar heater.
Cannabis Hardware’s published article, Enail Pinouts, Connections and Compatibility, explicitly warns that e-nail wiring has no universal standard. Its documented examples include equipment with similar quick-disconnect connectors and different internal assignments. That warning is a reason to identify the exact pair before connection, even when the photographs look familiar.
🧭 1.1 Describe What You Can See Without Testing the Pair
Photograph the unplugged connector face, its outer shell and the label on the controller. Keep the cable attached to its heater so the photograph establishes which parts belong together. If a sleeve hides a model code, look for the original order record or packaging rather than dismantling the connector to find one.
A useful initial description might read, “External barrel heater with a round five-contact plug, purchased separately from the controller.” That is enough to start a support conversation. Adding that the plug fits would make the description longer without resolving the electrical question.
🏷️ 2. Match the Controller Model and Generation
Start with the controller you actually own. A brand name can cover several products, and a current photograph can show a different connector from an older unit. Record the complete model designation, any revision printed on the unit, and the relevant manual edition. Use those details when comparing a replacement page.
Replacement discussions often drift into lists of brands reported to work together. Such lists can help you locate documentation, but an owner’s successful pairing leaves questions about the particular versions involved. An old controller, a current coil and a used cable accessory deserve a more specific answer than a shared brand family.
🗓️ 2.1 Treat a Legacy Connector as a Separate Case
Cannabis Hardware distinguishes a legacy threaded connection from its quick-disconnect arrangement. That is a concrete example of why generation matters. A threaded retaining sleeve and a latch-style plug should be recorded as different visible features, with the appropriate documentation attached to each one.
Keep the original failed assembly available for identification if it can be stored safely. The old label and the way its cable exits the heater may be useful to the maker. A discarded coil leaves the owner trying to reconstruct the purchase from memory, especially when a kit was sold under a shorter name than its individual components.
⚡ 3. Check the Power Version Before the Coil Shape
Power-related markings belong to the exact assembly. A controller’s input label, a heater’s rated supply version and the original mains lead describe different locations in the system. Read each one where it appears. A photograph of a wall plug on a kit page does not identify every component that has since been replaced.
The published Cannabis Hardware flat-coil listing, for example, offers separate North American and international voltage versions and names specific compatible controllers. Those are product-specific selection fields. They illustrate why a matching shape or diameter cannot substitute for the electrical version identified in the original documentation.
📄 3.1 Keep Unreadable Markings Unresolved
If a label is worn away, write “unreadable” in your notes and ask the maker what other identifier it needs. Do not fill the gap with the country where the item was bought. A secondhand controller may have traveled, and its current cable may have been supplied by someone other than the original manufacturer.
A clear photograph of the label is better than a typed approximation. Small suffixes can be easy to omit, and a support person may recognize a revision from information that initially seems incidental. Keep the complete image alongside the short written description so both forms of evidence remain available.
🧠 3.2 Power and Temperature Feedback Are Different Functions
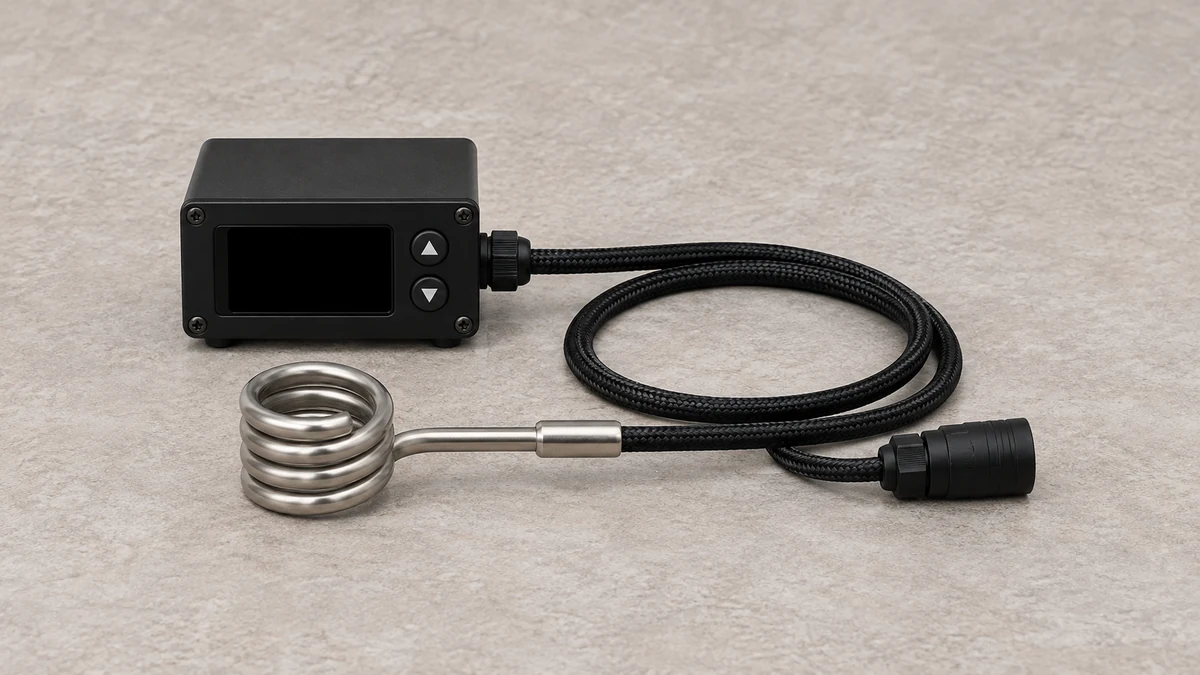
The heater circuit supplies energy to the element, while a temperature-sensing circuit reports a measurement to the controller. The published connection documentation identifies these as different contact functions. A plug’s overall appearance cannot show whether the controller and heater agree about those functions, which is why pin count alone is an incomplete description.
This distinction also helps describe a fault. A display that powers on establishes that the controller display is active. It does not establish that every circuit through the heater cable is intact or that an unknown coil is a permitted replacement. Keep those observations separate when explaining what the equipment does.
🌀 4. Distinguish Barrel, Axial and Flat Heater Geometry
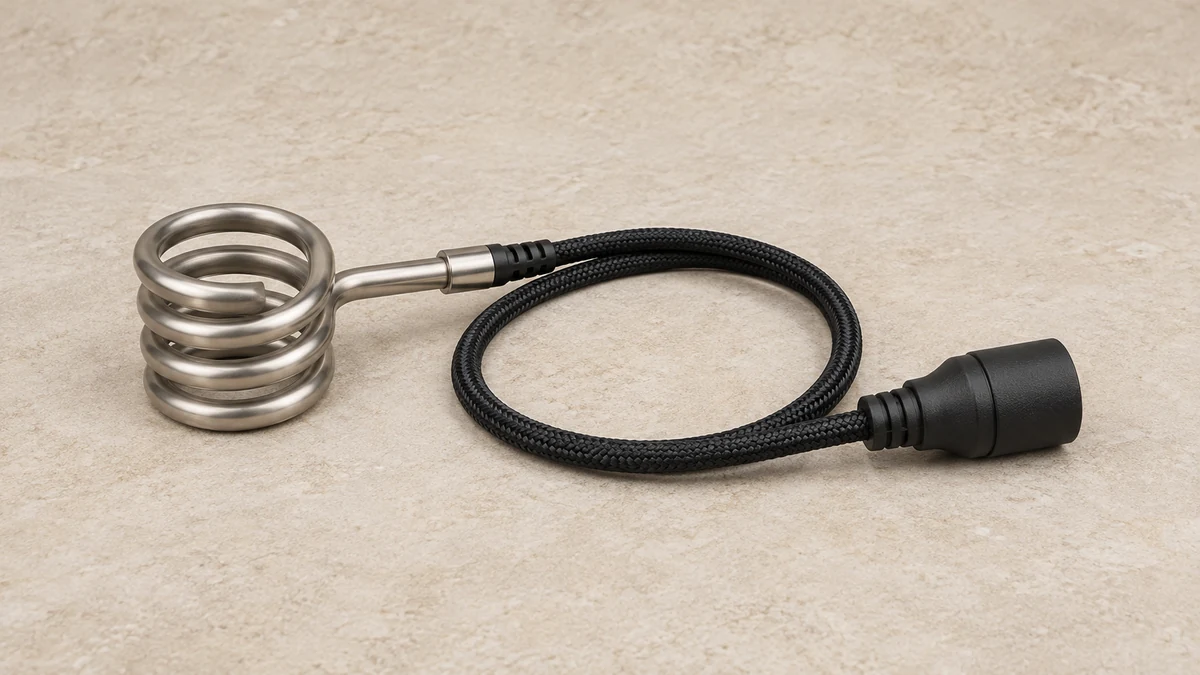
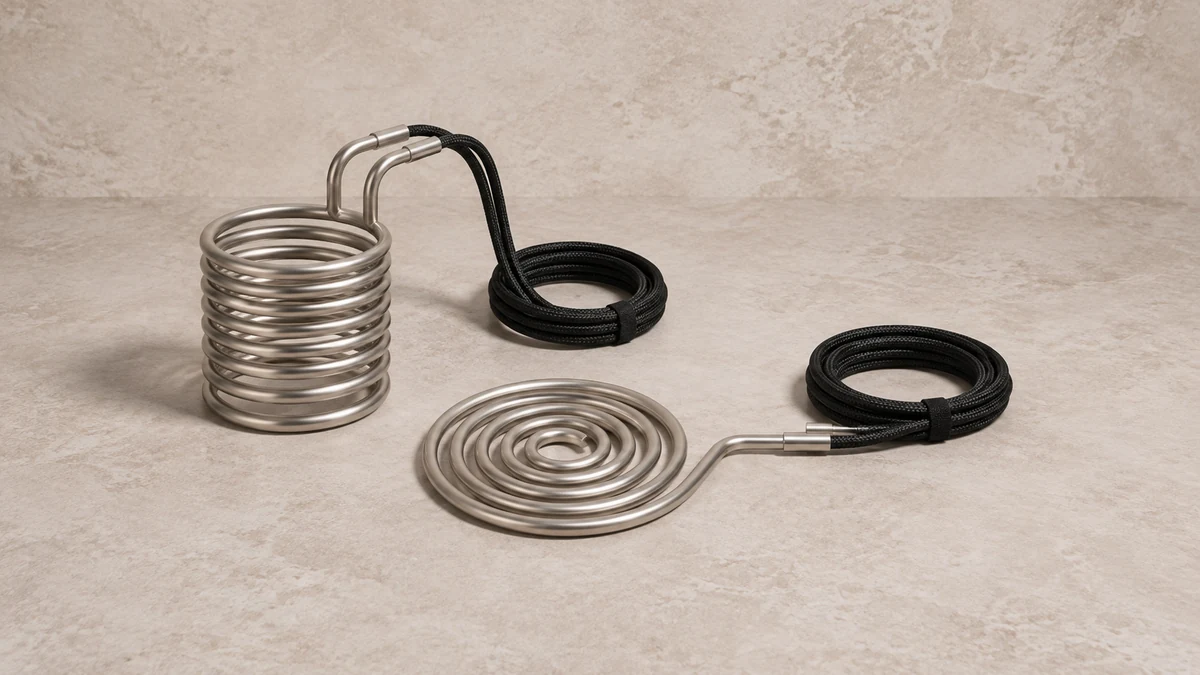
The next question is physical. A barrel-shaped winding surrounds the side of a matching component. A flat heater has a visibly different contact shape. An axial arrangement can extend beneath the supported component as well as around it. These names describe a layout, and the product drawing should show the surfaces the maker intended the heater to meet.
High Five’s 25mm Axial Coil page describes its intended nail families and includes a separate warning about compatibility with other controllers. The page is useful precisely because it presents physical pairing and electrical pairing as information that must both be checked. Its named combination does not establish a specification for another supplier’s similarly labeled heater.
📐 4.1 Ask Which Diameter a Listing Describes
Diameter can refer to a heater opening, the outside of a cup, or a nominal product family. Identify the object being measured before comparing two numbers. A photograph of a ruler against a glass bucket cannot establish the heater’s sensor arrangement, and a controller compatibility statement cannot establish the clearance around that bucket.
Keep the dimensional question separate in your message. Include the nail or banger model, the coil style and any drawing the maker supplied. If a listed dimension has no stated measurement location, ask for clarification. Enlarging or compressing the winding would change the part you are trying to identify and should not become a substitute for that answer.
↪️ 4.2 Include the Cable Exit in the Physical Comparison
Two coils can have similar openings while their stems point in different directions relative to the support. The cable then occupies a different part of the surrounding space. Photograph that relationship with the equipment cold and disconnected, rather than comparing only an overhead view of the circular winding.
Consider an assembly supported on a stand beside the glass. A replacement with a differently positioned stem may leave its cable crossing the stand or pressing against another component. The relevant drawing should establish the intended arrangement. Keep cable clearance in the physical-fit question even after the electrical pairing has been confirmed.
🧷 5. Find the Support That Keeps the Heater in Position
Look beyond the circular opening. Some assemblies include a lower support arm, a post or a retaining clip that belongs to the approved heater-and-nail combination. Those details can be small in a catalog photograph, but they explain how the heater stays in position without asking an unrelated glass joint to act as its holder.
Yo Dabba Dabba’s e-nail FAQ distinguishes its quartz components with side support arms from its clip-supported arrangements. That documentation provides an example of retention hardware supplied for particular assemblies. It should prompt a practical inventory question: does the replacement include the support pieces required by the specific nail it is meant to fit?
The broader guide to dab rig heater systems maps the controller, heater and glass. For a replacement, go one step further and identify which support belongs to which component. A loose clip from an old kit should stay unidentified until its intended location is confirmed.
🧰 6. Record a Fault Without Turning It Into a Wiring Diagnosis
An error message, damaged cable sheath and a loose connector are different observations. Write down what happened before the fault appeared, whether the original matched assembly was still installed, and what the display actually showed. Avoid translating every fault into “bad coil” before the manufacturer has enough information to distinguish the components.
🖥️ 6.1 Preserve the Display Message Exactly
Take a photograph if it is safe to do so with the equipment inactive. A shortened description such as “it flashes” can omit the part of the message the support team needs. Keep any interpretation separate from the observation. The owner can report an intermittent reading without claiming to have located a failed temperature sensor.
If the original assembly is damaged, leave it out of service while obtaining support. Connecting an unfamiliar spare simply to see whether the fault disappears adds another unknown to the situation. The useful next step is to establish the permitted replacement, then follow the maker’s instructions for that exact assembly.
The phrase coil can also describe an internal wax-pen heater module. The explanation of bare heaters and complete replacement assemblies helps distinguish those listings. A chamber module and a cable-ended external heater should not be compared as if the visible heating surface were their only difference.
🧵 6.2 Describe the Cable Separately From the Heater
A visible cut in an outer sheath, a damaged strain-relief boot and a problem at the winding occur in different places. Photograph the location that is affected and explain whether the observation is continuous or appeared after a particular event. The manufacturer can then assess the complete assembly with the correct context.
A braided outer sleeve also limits what an external inspection reveals. An apparently tidy sleeve cannot establish the condition of everything underneath it. Leave internal inspection and electrical testing to the qualified service process, and use the visible location to make the owner’s report more precise.
📦 7. Read Used and Mixed Kits Component by Component
A used bundle may contain a controller, a loose heater, a spare nail and an adapter that were never sold together. Lay out the cool, disconnected hardware and make a separate entry for each item. Mark an original matched pair only when the record establishes it. The seller’s description of the whole collection is a starting point, not a parts drawing.
Consider a hypothetical bundle with a recognizable controller and two coils. One coil has its original box and a model code. The other has the same diameter but no label. The first can be compared against the controller’s documentation. The second still needs identification. The presence of one documented assembly does not transfer its compatibility to every accessory in the box.
🗂️ 7.1 Keep Adapters in the Record
If an intervening cable or adapter was used, include it in the description and photograph both ends. An adapter is another specified component. Its presence can explain why an owner’s remembered setup differs from the connector shown on a current controller page. Leave its function unassigned until its maker and intended pairing are known.
Similar naming problems arise with coil-less 510 wax atomizers. A label describes a product category or a visible feature; the complete assembly determines what connects to what. Preserve that distinction when a listing uses the familiar word “coil” for substantially different hardware.
📎 7.2 Keep the Original Spare’s Identity With It
A genuinely unused spare can still become difficult to identify after several years in a drawer. Keep its package insert, part number and any confirmation of the intended controller with the assembly. Its clean appearance establishes little about which generation of equipment it was supplied for.
If a kit originally contained two coils, record each separately. A different size or support shape can be intentional within a documented kit. Preserving that original parts list lets the owner distinguish an approved alternative from a loose accessory that happened to be stored beside it.
✅ 8. Ask for Confirmation That Names Both Ends
A useful support request gives the controller model and revision, the coil model and power version, the connector photographs, and the nail or banger that will support the heater. Add the original fault message if this is a repair. This gives the recipient a specific combination to confirm rather than asking whether a broad style of plug is universal.
The reply should identify the exact replacement assembly or point to a document that does. If the answer confirms only the bucket diameter, the controller question remains open. If it confirms the electrical pairing, check that the necessary physical support is also specified. Save the final answer with the order details so the same uncertainty does not return at the next replacement.