🔎 1. Which Piece Has the Female Socket?
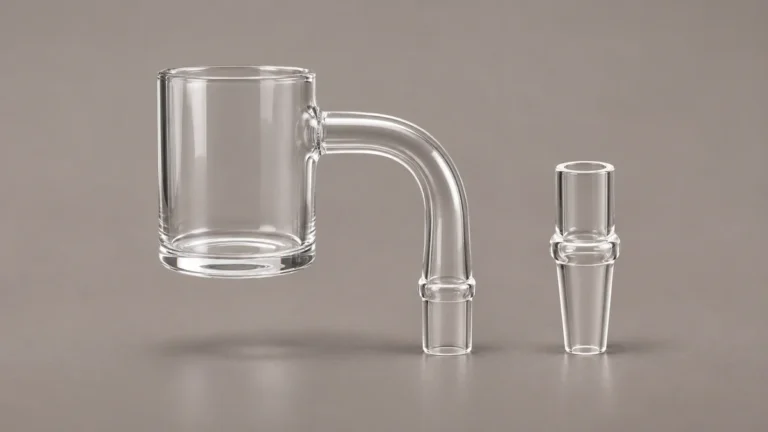
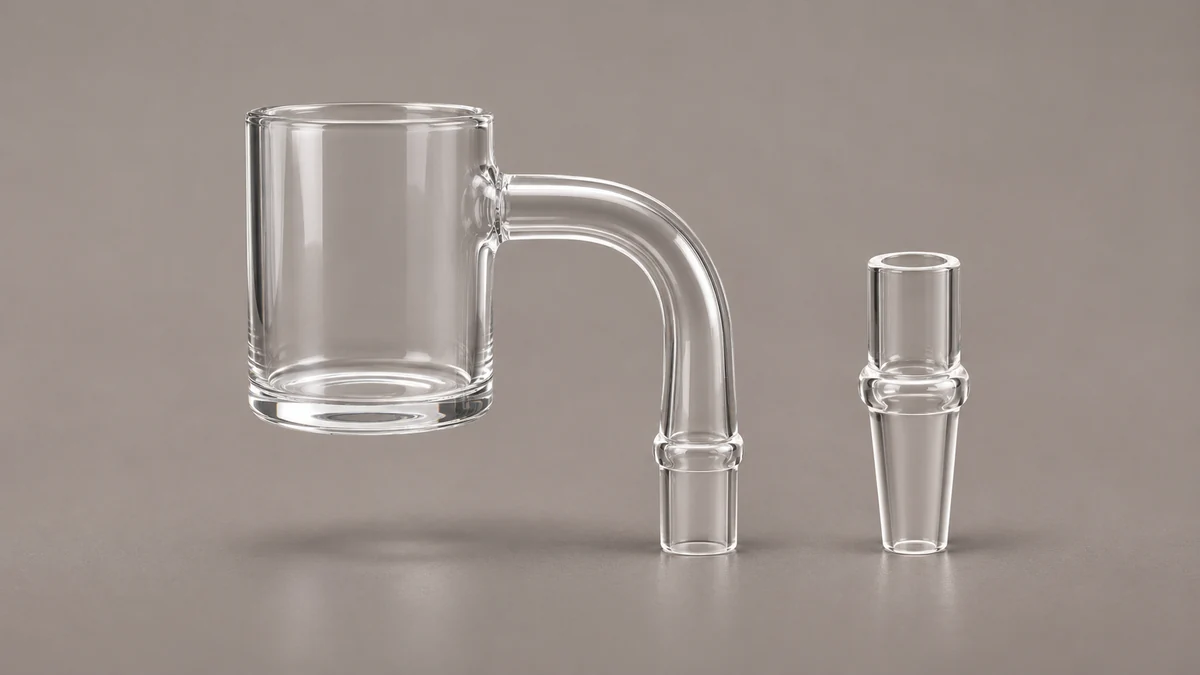
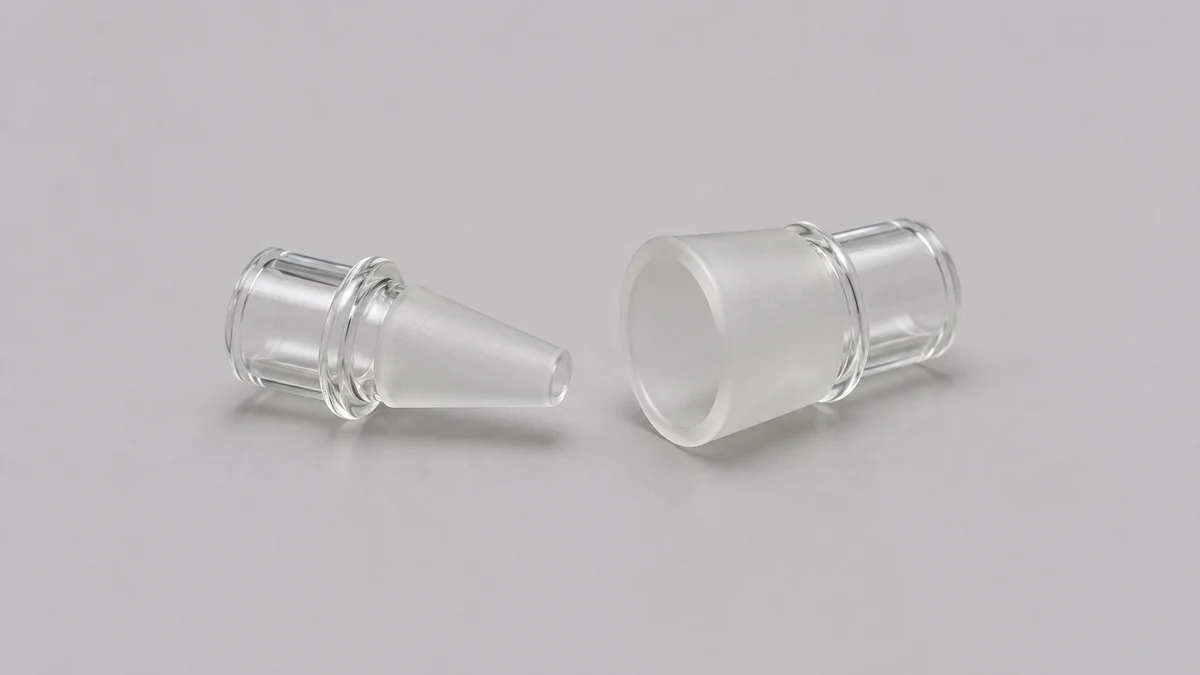
A 14mm female quartz banger has its receiving socket on the attachment. The matching part on the rig is an exposed male taper. In a side view, the socket wall goes around the outside of that taper. The number identifies the nominal size family. The word female identifies which part surrounds the other, and neither word tells you where the bucket will sit once the two pieces are together.
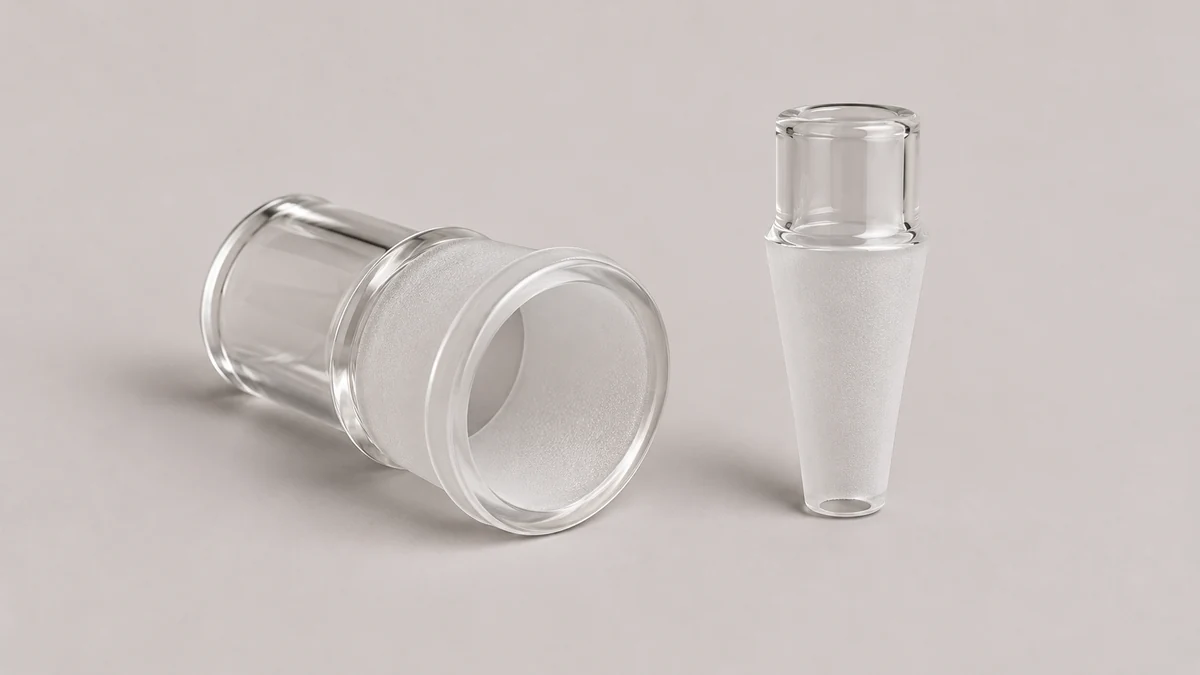
Start by looking at the rig’s bare connection and the banger’s bare connection separately while both are cool and empty. A fitted pair can hide most of the taper. A parts photo or diagram of each separated piece makes the orientation more obvious. AOVAPE’s 14mm male banger guide illustrates the other orientation, with the external taper on the attachment and the receiving socket on the rig.
🧩 2. Locating the Female Socket Before Any Comparison
Follow the bucket’s side arm to its end. On a female attachment, the opening leads into a receiving surface. The rig’s male side has a raised external taper with a passage through it. Both pieces are hollow, so the mere presence of a hole does not identify them. Look for the surface that surrounds the mating part. A view angled slightly into the opening makes that distinction easier to see than an overhead photo of the bucket alone.
In a January 2024 Reddit thread, a reader posted a photo of an unfamiliar banger and asked what replacement shape would fit. Replies described the rig and attachment from different sides of the pair. The useful question to take from that discussion is which part the writer is naming. A label that describes the rig’s male joint can be correct while the matching banger needs a female joint.
🪞 2.1 Look at the End of the Arm
A banger photographed against a light surface can lose the edge of the frosted joint in glare. A photograph from slightly below the arm can show the outline of the lower rim, and an angled view into the socket can show which side carries the receiving surface. Keep the whole attachment visible in one of the images. Otherwise a close-up of the socket can be mistaken for a separate adapter, particularly if several similar pieces are on the same bench.
📐 3. Reading the Taper Without Assuming a Fixed Length
The 14mm designation names the nominal interface. It does not describe the bucket opening, the length of the neck, or the distance to the nearest shoulder. A product drawing can identify where a dimension is taken. Measuring the glass across its widest visible outside edge can include the socket wall or a decorative shoulder. Compare the published designation and the actual profile before using an unlabeled measurement as a substitute.
📐 3.1 What the Nominal Size Leaves Open
Imagine two male joints that both carry the 14mm designation. The first has a broad glass shoulder immediately below the visible taper. The second has a narrow section extending below it. Those outside shapes can give an attachment’s lower rim different amounts of clearance. A listing for the banger may state the socket size while leaving the rim thickness unstated. A side photo of the pair gives you a starting point for locating the near surfaces, while the manufacturer can confirm the fit for the exact parts.
🔬 3.2 Ask What the Number Is Attached To
When a listing has both a joint size and a bucket diameter, keep each number beside the part it describes. The bucket number may describe the outer wall or the opening at the top. The joint number describes the connector size family. If the two dimensions appear in a single product title, a marked drawing can prevent a reader from assigning a number to the wrong opening. The measurement of a socket’s outside wall is yet another number because it includes the material surrounding the receiving surface.
A spare connector can also look shorter or longer in a perspective photograph than it is in a drawing. A photograph taken from above may shorten the part of the taper that extends toward the camera. The view from the side better shows the profile below the mating region. Keep that visual evidence separate from the nominal designation. A cropped picture alone gives no reliable scale when there is no dimensional reference in the same plane.
🪞 4. When an Adapter Enters the Stack
An adapter changes what the next piece sees. Thick Ass Glass describes a double-female adapter that presents a receiving socket at each end. On a rig with a male taper, one socket receives the rig’s joint. The free end then presents a female socket, so its matching counterpart is a male attachment. There is no hidden male end that mates two female sockets. The original female banger and a double-female adapter’s free end would both present receiving sockets.
🪞 4.1 Reading Each Side on Its Own Terms
Read the adapter’s two ends as separate specifications. For a hypothetical straight pass-through adapter between a male rig and a female banger, the end facing the rig would have a receiving socket and the end facing the banger would present an external taper. The nominal size may also differ from one end to the other, depending on the documented design. Draw a simple line from the rig to the attachment and label the joint at each side of each break in the line. That catches reversals that a shorthand description can hide.
🧷 4.2 Draw the Near End and Far End Separately
Consider an adapter photographed with the near end facing the camera. The far end is partly hidden behind its body. The visible socket tells you the geometry of one end, while the model’s drawing tells you the other. A note that reads “14mm on both ends” leaves orientation open. Add male or female to each end separately. With both parts represented in order, the note can explain where the adapter would change the interface instead of simply repeating the size printed on the listing.
👁️ 5. Look for Clearance at the Socket Lip
The socket lip is the edge at the open end of the receiving part. The shoulder is an adjacent change in profile below or beside the rig’s taper. The lip and shoulder may appear close together in a side view. Their distance can matter even when the nominal joint size appears to match, because the outer edges of the two components occupy space beyond the mating surface itself.
If the lip visibly touches the shoulder, photograph that contact point while the hardware is cool and empty. A seam can show where two exposed edges meet without revealing the extent of contact inside the socket. Keep the description to the feature you can see. A Clout Products listing states its female 14mm joint and 45-degree neck angle as separate attributes. That example shows why a joint designation and the way the neck is oriented belong in separate fields.
In another hypothetical example, a socket appears to sit low on a taper in one photo, but the rig’s shoulder is hidden behind the attachment. The lip may be close to a raised feature that cannot be seen from that angle. A second photograph turned toward the shoulder gives that outer clearance its own view. Record any contact that is already visible without trying to make the two pieces sit deeper. Hidden seating is a question for the part drawings.
⚖️ 6. Read the Bucket Angle Separately
A bucket can appear tilted relative to the upright body of a rig. The arm angle, how the rig sits on the surface, and camera perspective can all change how that view reads. Seating is a separate question about how the socket fits around the taper. An image of the cup can show its orientation. An image at the joint shows the lip and nearby clearance. The two views are easiest to compare when taken from the same side.
⚖️ 6.1 Use a Straight-On Reference View
Use the same level work surface and keep the camera straight for both reference photos. Photograph a questionable connection from the opposite side as well if the parts are already resting together. A one-sided shadow can look like a wider seam than the image from the other side shows. Record whether the lip seems to touch at one point or whether a space remains all the way around. If the joint cannot sit without force, keep the parts separate and ask the maker about the combination.
A December 2025 Reddit post described a female socket that already matched an older male rig joint. The reader’s next question was about a cap for an uneven bucket rim. AOVAPE’s carb cap geometry guide explains why the cap’s own seating area belongs in that question. It is possible to identify the right joint orientation and still need separate documentation for the rim.
🧵 7. Check What an Adapter Adds to the Profile
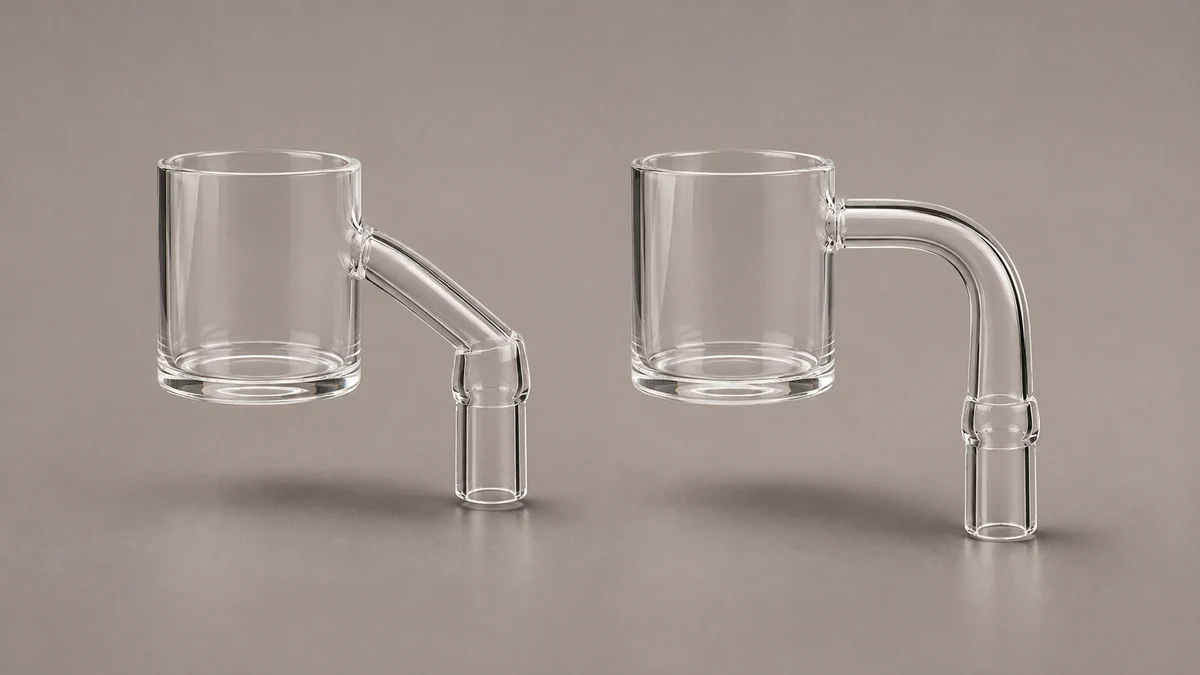
A single adapter adds a second junction and may move the bucket outward or upward relative to the rig. The resulting profile depends on the specific geometry. In a diagram, compare the height from the original joint to the start of the banger’s arm, and look at how the arm passes nearby glass. Checking the fit of the first pair of surfaces leaves the second pair and the overall clearance as separate observations.
🧵 7.1 The Bucket Rim Belongs to a Different Fit
The bucket opening and the joint opening may both be circular, but they belong to different interfaces. The guide to 90-degree banger geometry treats neck angle as its own question. For a bucket with a slanted rim, the shape and the area where a cap sits matter independently of whether the neck is straight or curved. Ask for the actual bucket profile if the listing only gives joint size and angle.
🖼️ 7.2 Photograph the Clearance Around the Arm
Consider a compact rig with a side joint close to the body. A bare banger can sit far enough away to leave an open space under its arm. With a second part between the two, the arm might end up beside a wider section of the body or nearer another piece of glass. The diagram and a straight side photo can help identify the two surfaces that come closest. Record their position rather than assuming an adapter always adds the same amount of room.
It is possible to ask about the space without assembling anything. Place the parts on the same level surface and show their lengths and orientation in the same image. Mark which end belongs nearest the rig. If the manufacturer has an assembled view, check whether it shows that same configuration. A photo of loose parts helps identify them, while the assembled drawing answers the clearance question more directly.
💬 8. Common Reversals in Replacement-Part Questions
A January 2023 Reddit discussion about moving from a 10mm to a 14mm joint quickly turned into a question about which end was male and which was female. The size change was only one part of the description. When you ask about a replacement, name both sides separately. Write “rig has an exposed male taper” and “attachment has a receiving socket,” then attach a photo that shows which statement belongs to which piece.
Some listings describe the joint from the part’s perspective, while a reader may be thinking about the opening they want to fit. Treat the wording as a claim to compare against the actual shape. If the edge already has a visible chip or the neck shows a crack, the guide to banger damage explains why that is a separate condition question. A photo can document damage without turning the pairing into a fit test.
In a note that includes several fittings, give each one a different label. Photograph the original attachment with the rig in one frame and the proposed replacement in another. If the same adapter is shown twice, make its orientation explicit. This prevents a reader from reading the far end as the rig end when comparing the two photographs.
🧭 9. Describe the Whole Connection in One Photo
Place the cool empty components next to one another in a photograph, with the two mating surfaces visible. If you have an adapter, label its rig-facing and attachment-facing ends. Add a separate side view that shows the arm and bucket in relation to the rim of the receiving socket. A reader can often identify the orientation from the first image, while the second image makes any question about the outer profile easier to answer.
If a support team needs to verify more than the nominal size, ask for the drawing or reference for that exact combination. A useful follow-up might be whether the socket has clearance past a broad shoulder on a particular rig. If the question is about the cap instead, show the bucket rim and include its own model reference. The better the image identifies the location, the less work the word fit has to do.