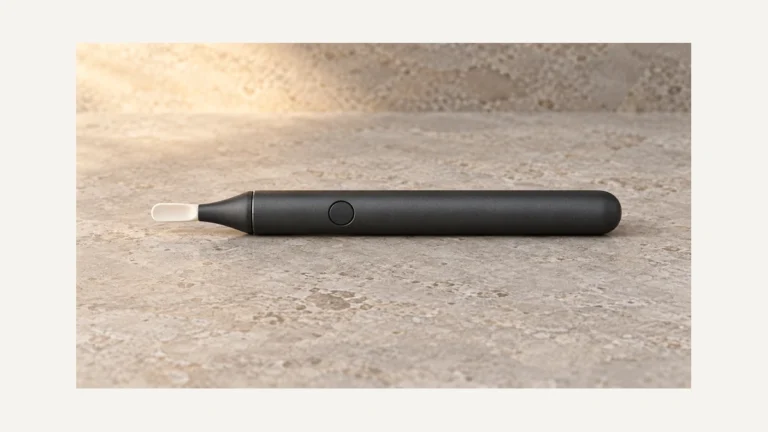
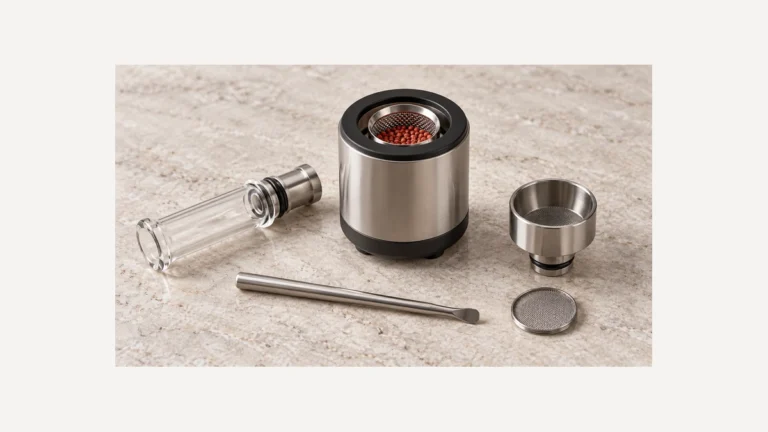
An electric nectar collector with a bubbler combines two upgrades that used to live on separate tools: a battery-powered heating tip in place of a torch, and a small water chamber in place of a dry mouthpiece. On concentrate forums, the two questions that come up most about this style are pretty consistent — what does swapping in an electronic tip actually change about how the device behaves, and how much does adding a bubbler affect portability and cleanup. Both questions come back to the same idea: the electric nectar collector separates the heater from the water path, and each side has its own parts, seals, and maintenance habits. Understanding where one system ends and the other begins makes it much easier to compare devices, troubleshoot airflow, and know what should — and shouldn’t — come apart for cleaning.
⚙️ 1. What the Electronic Tip Actually Changes
Swapping a torch for a battery moves heat control off the user’s timing and onto a small circuit board. That single change reshapes the whole front end of the device, since the battery, the button or activation switch, and the tip now form a self-contained heating system that has nothing to do with the water chamber downstream.
🧩 1.1 Battery and Control Board
The battery and control board sit inside the main housing, usually near the base, and handle everything related to heat: turning the tip on, holding a setting, and sometimes indicating charge level through a small light. A charging port is typically built into this same housing. None of this circuitry extends into the bubbler or the airflow channel — it stops at the connection point where the tip attaches, which is worth remembering when something feels off with heat output but the bubbler is working fine.
🧩 1.2 Replaceable Heater Tip
The tip itself is a separate, user-replaceable component that threads or seats onto the battery housing. It’s typically made from a conductive material chosen for how it heats and holds up over repeated use, and it’s the only part of the device that actually gets hot. Because it’s removable, a worn or damaged tip can be swapped without touching the battery, the control board, or anything on the water side of the device. Readers comparing electric formats in general, without the bubbler attachment, can find a broader rundown in the electric nectar collector guide.
💨 2. Vapor Path From Tip to Mouthpiece
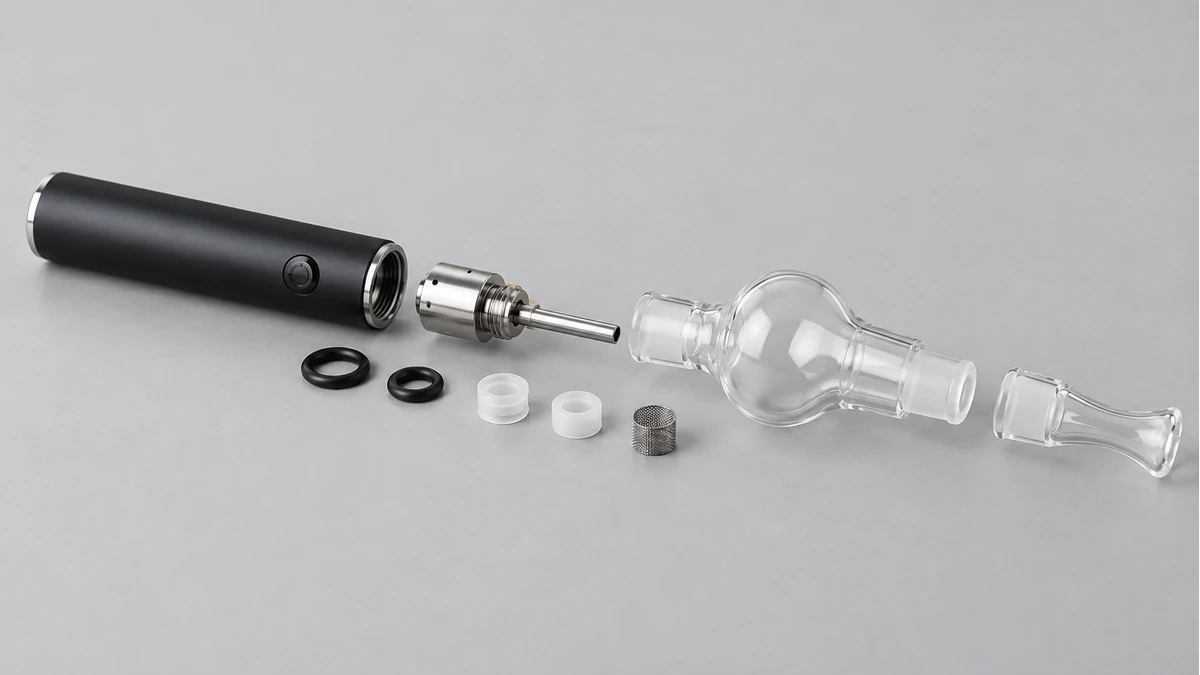
Once material vaporizes at the tip, it travels through a channel before ever reaching the bubbler or the mouthpiece. This middle section is easy to overlook, but it’s where flow, cooling, and buildup all start.
🧩 2.1 Airflow Channel and Material
Most vapor paths use glass or a heat-resistant material chosen to resist residue buildup and to be easy to see through, which matters for spotting when a cleaning is overdue. Any narrowing, cracking, or accumulation in this channel changes how the whole device pulls, independent of whether the tip or the bubbler is doing its job correctly. Keeping this section clear is really a separate task from either battery maintenance or water changes.
🧩 2.2 Why Path Length and Diameter Matter
A longer path gives vapor more distance to cool before it hits the water chamber, while a wider diameter generally makes for an easier draw at the cost of some concentration. Neither factor is about power or heat setting — they’re purely structural, tied to how the piece is built between the tip and the bubbler. When two devices use the same tip and battery but feel different to draw from, this middle section is usually why.
🫧 3. The Bubbler Chamber and Water Level
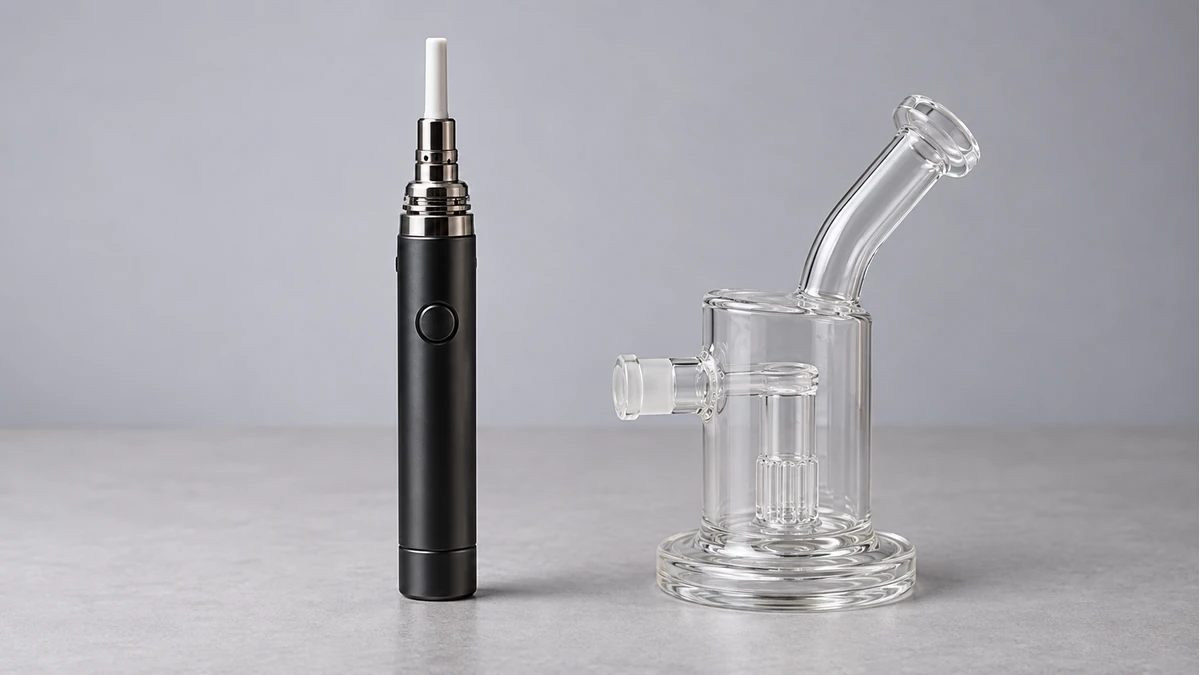
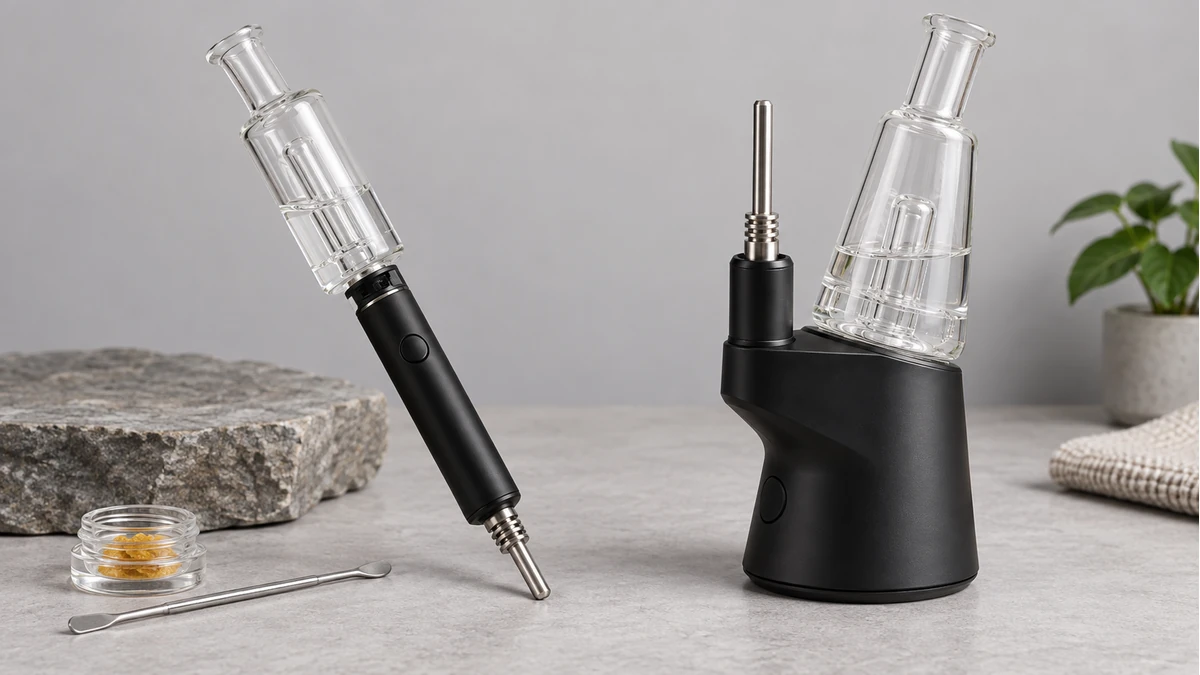
The bubbler chamber sits between the vapor path and the mouthpiece, adding a water-filtration step that happens entirely downstream of the heater. This is the clearest illustration of the device’s split design: everything upstream is about heat, everything from this point forward is about water.
🧩 3.1 How the Bubbler Attaches
Most bubbler attachments connect through a ground-glass or slip joint that’s held in place by friction or a small clip, rather than by any electrical or heat-related connection. Because the joint is purely mechanical, the bubbler can typically be removed, rinsed, or swapped without disturbing the battery or tip at all. Readers who want to compare this setup against a fully water-cooled design, where the entire body is built around the water chamber, can look at the water nectar collector guide for that side-by-side.
🧩 3.2 Getting Water Level Right
Water level is worth checking before each session rather than assumed. Too much water can splash back toward the mouthpiece when drawing, while too little reduces how much filtering actually happens. The right level usually sits just below any downstream airholes or percolator features, low enough that normal airflow doesn’t push water past that point. It’s easiest to check and adjust the level with the bubbler off the device, over a sink, rather than trying to eyeball it once everything is assembled.
🔧 4. Seals, Orientation, and Disassembly Boundaries
Every joint in an electric nectar collector with a bubbler relies on a seal, and those seals age differently depending on which side of the device they sit on.
🧩 4.1 O-Rings and Joints
Rubber or silicone O-rings seal the tip-to-body connection and the body-to-bubbler connection. The seal near the tip deals with repeated heat cycling and tends to harden or wear from that exposure, while the seal near the bubbler deals with moisture and periodic soaking. Since they wear for different reasons, they often need attention on different schedules. A closer look at seal types and replacement parts is covered in the nectar collector parts guide.
🧩 4.2 Orientation During Use
Keeping the bubbler upright matters more than it might seem, since tilting the device too far can let water reach the vapor path in a way the design doesn’t account for. The battery and control housing should stay away from water entirely — it’s built to be handled, not to get wet, and that’s a hard boundary rather than a suggestion.
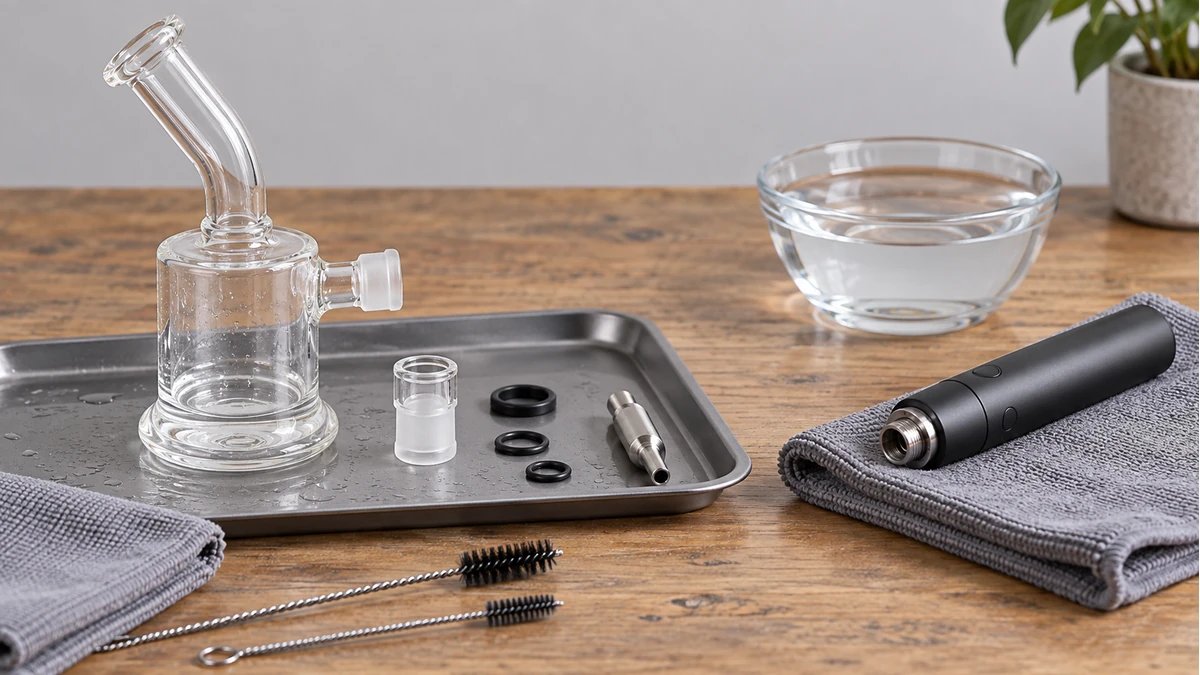
🧩 4.3 What to Take Apart for Cleaning — and What to Leave Alone
The bubbler chamber is the part meant to come apart most often. It can typically be removed, emptied, rinsed, and dried without any special handling. The heater tip can also be removed, mainly for inspection or replacement, but it isn’t meant to be soaked — its heating element and contact points aren’t built for submersion. The battery and control housing sits at the other extreme: it’s sealed, it should never be submerged, and cleaning it is limited to wiping the exterior. This three-way split — chamber for soaking, tip for dry wiping and swapping, housing for wiping only — is really the practical version of “separate the heater from the water path” that shows up in the device’s design.
🧭 5. Comparing Formats Without a Ranking
New concentrate users often ask how to compare devices when there are several formats that all sound similar on paper. Looking at where the heater ends and the water path begins is a more useful comparison point than any single feature.
🧩 5.1 Electric With Bubbler vs. Plain Electric Tip
A plain electric tip, without a bubbler, has fewer joints and fewer seals to maintain, and it’s generally more compact and easier to carry. Adding a bubbler introduces one more joint, a water-level habit, and a slightly larger footprint, in exchange for the added filtration step described above. Neither is better in the abstract — it depends on whether the added joint and water maintenance are worth the tradeoff for a given user.
🧩 5.2 Electric vs. Manual Water-Cooled Collector
A manual, torch-heated water nectar collector skips the battery and control board entirely, relying on a continuous flame at the tip instead. The electric version trades that flame for a charging habit and a heat button, while keeping largely the same water chamber mechanics on the other end. For someone deciding between the two, the real question isn’t which is “better” but which heating system — torch or battery — fits how they want to maintain the device, since the water side works about the same either way.
Framed this way, comparing electric nectar collectors with bubblers comes down to tracking two separate systems rather than judging one device as a whole. The battery, control board, and tip form the heating side; the vapor path, bubbler chamber, and water level form the cooling and filtration side; and the seals, orientation habits, and cleaning boundaries are what keep the two from interfering with each other.
🧭 9. Read the Device as Two Connected Systems
The powered section contains the battery, controls, contacts, heater mount, and replaceable or integrated tip. The wet section contains the glass chamber, water space, seals, mouthpiece, and drain path. The connection between them must hold the bubbler securely without letting water reach the electrical side.
This division also clarifies cleaning. A glass chamber may be removable while the heater base is not, and a removable tip does not make the battery housing washable. Product documentation should identify each boundary, the intended orientation, and the seals that can be inspected or replaced.
💧 9.1 Water Capacity Is a Geometry Question
A larger-looking bubbler is not automatically better. Internal tube height, inlet position, chamber shape, and tilt sensitivity determine whether water stays below the powered connection while still covering the intended diffusion path. Useful product images show the chamber upright and separated from the electronic base.
🧩 9.2 Seals Define the Service Boundary
Where glass meets the powered body, a gasket, collar, or shaped socket often carries several jobs at once: alignment, air sealing, vibration control, and removal. A replacement must match the original geometry rather than merely fitting over the same outside diameter. For related context, see AOVAPE’s electric nectar collector comparison.
Look for a parts diagram that names each seal and shows whether it is removable. An unnamed ring in a product photo is not enough evidence that a replacement will be available or that the user should remove it during routine cleaning. For related context, see AOVAPE’s water nectar collector guide.
📐 10. Compare Layouts With the Same Component Checklist
Place each candidate into the same columns: heater-tip attachment, air-inlet location, bubbler connection, water chamber, mouthpiece, electrical contacts, charging port, and removable seals. This exposes meaningful architectural differences that marketing names often hide. For related context, see AOVAPE’s nectar collector bubbler guide.
An upright all-in-one format may keep the bubbler aligned during storage but make the water section harder to isolate. A modular pen-and-bubbler format may simplify glass removal while adding another seal and connection. Neither arrangement is inherently superior; the useful question is which interfaces are visible, documented, and serviceable.
📦 10.1 Storage Starts With an Empty Water Path
The powered base and removable glass need separate support so the bubbler cannot load the heater connection in transit. A fitted case should restrain the heaviest component and protect the glass rim, not rely on the mouthpiece or tip as a locating pin.
For long-term ownership, list the bubbler, mouthpiece, seals, heater tip, and protective cap as separate service items. Confirm which pieces have model numbers and which are integrated into the body. A replaceable-looking part is not truly serviceable unless its interface and replacement path are documented.
The same checklist helps distinguish a water attachment from a purpose-built bubbler system. A glass piece can connect physically yet place its inlet, water line, or weight in the wrong relationship to the heater base. Fit must include orientation and support, not diameter alone. Photograph the separated parts from the front and side so the air inlet, seal seats, glass depth, and electrical boundary remain visible for later comparison.